If I were a space alien who knew nothing about human food, how would you describe bone broth to me? Be sure to read how Jamie’s children learned how to make bone broth in chapter 2 of The Modern Pioneer Cookbook Curriculum Experience series. (This lesson experience includes four activity downloads!)
Thanks for Your Support: This curriculum material is offered free for families, homeschoolers, co-ops, teachers, grandparents, and lifelong learners. If this resource helps your family and you would like to support the creation of future Mary’s Nest curriculum materials, consider becoming a Sweet Friend Supporter on Patreon.
Affiliates note: As an Amazon Associate I earn from qualifying purchases. My content may contain affiliate links to products and services. If you click through and make a purchase, I’ll receive a small commission. It does not affect the price you pay.
Table of Contents
About The Modern Pioneer Cookbook Curriculum Lesson Experience Series
Hi! My name is Jamie O’Hara, and I’m a homeschooling mom, curriculum writer, and former classroom teacher. I recently had the pleasure of helping Mary Bryant Shrader create The Modern Pioneer Cookbook Curriculum, which includes extensive lesson plans for grades K-12 to complement Mary’s bestselling book, The Modern Pioneer Cookbook.
- Get The Modern Pioneer Cookbook Curriculum (Free and over 250 pages!)
- Get The Modern Pioneer Cookbook
- Read The Modern Pioneer Cookbook Curriculum Lesson Experience Article Series
Now, I’m excited to embark on a journey of experiencing these lessons with my own children, ages 6 and 8 (and sometimes my 3-year-old, too). I’ll be facilitating a total of 14 lessons, one for each chapter in The Modern Pioneer Cookbook Curriculum. As we go through the curriculum, I’ll document our experience to share with all of you!
Getting Started with Bone Broth
Chapter 2 of The Modern Pioneer Cookbook is dedicated to bone broth.
Bone broth is “the backbone of the traditional foods kitchen because it allows the home cook to create a nutritious high-protein liquid, often from nothing more than kitchen scraps.”
Mary Bryant Shrader, The Modern Pioneer Cookbook
The three recipes included in Chapter 2 of The Modern Pioneer Cookbook are Roast Chicken Bone Broth, Rich and Flavorful Beef Bone Broth, and Beautiful Skin Bone Broth (made from ham hocks or pork bones). The table below summarizes the traditional foods kitchen principles and recipes that correspond to each grade band.
| Grade Band | Principle | Recipe |
| K-4 | 1. Homemade food 2. Low-waste kitchens | Roast Chicken Bone Broth |
| 5-8 | 3. Real, whole foods 4. Seasonal eating | Rich and Flavorful Beef Bone Broth |
| 9-12 | 5. Maximizing nutritional value 6. Preservation for self-sufficiency | Beautiful Skin Bone Broth |
As the table shows, the middle school lesson uses beef bones, and the high school lesson uses pork. However, if you’re a beginner and you don’t have those bones on hand, I recommend starting with the K-4 recipe, even with your older students. This is because, if you already completed the Chapter 1 lesson, you should have a roast chicken carcass and bones waiting in your freezer! Making the chicken bone broth first is a logical and seamless way to build on the first lesson of this curriculum.
If you choose to make the K-4 recipe with your 5-12 students, you should still follow the rest of the lesson plan (the vocabulary, discussion, and activity) for your older children’s grade level. Once you have the roast chicken bone broth recipe under your belt, you can move on to the beef and pork bone broth recipes. But remember, it’s up to you which recipe to prepare first!
Discussion: Introduction to Bone Broth
In this K-4 lesson, students learn some of the most basic information about bone broth: what it is, how it’s made, and how it benefits our health. Bone broth is already a staple in our home, so the first thing I did was ask my kids to define bone broth in their own words.
Defining Bone Broth
When asking young children to come up with their own definitions, I usually phrase the question like this: “If I never heard of bone broth before, how would you explain it to me?” (You can make this fun by saying, “If I were an alien who knew nothing about human food, how would you describe bone broth to me?” or, “How would you describe bone broth to someone younger than you?”) If your children are not familiar with bone broth, you can ask them to guess what it is.
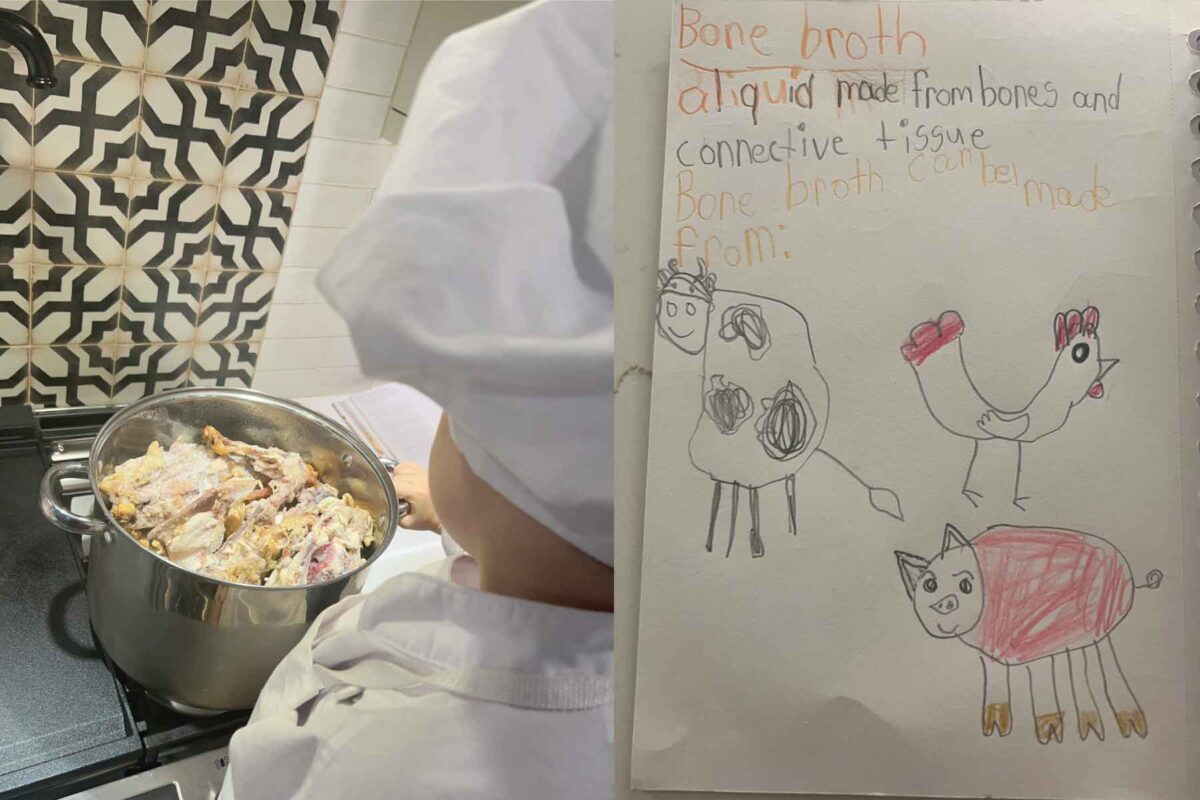
The first definition I got from my kids was “broth made from bones.” I had to prompt them to be more specific. “Broth? I’ve never heard of that,” I pretended. This got them thinking about what broth actually is. They switched to the word “liquid,” deciding that bone broth is liquid made from bones.
“Oh, so you put the bones in a juicer or a blender?” I asked them. This got them to add the word “boiling” to their definition. At this point, I wrote the definition of bone broth on the whiteboard and had them copy it into their kitchen journals. We took a minute to discuss connective tissue in a very general sense, without getting into details about collagen, tendons, and ligaments.
After writing down the definition of bone broth, I used the suggested questions in the lesson plan to guide our discussion. My children enjoyed brainstorming different ways our ancestors may have used bones. They mentioned bone broth, tools, weapons, and jewelry. They also brainstormed ways to use bone broth in cooking in place of water. They suggested cooking rice in bone broth and using bone broth to make sauces.
Connecting Making Bone Broth to Traditional Foods Principles
We wrapped up the discussion by connecting the practice of making bone broth to the two traditional foods principles that are highlighted in the K-4 lessons: homemade food and low-waste kitchens. My children enthusiastically explained that by reusing bones and scraps to make homemade broth, we are reducing the amount of waste in our kitchen.
They also pointed out that by reusing bones instead of discarding them, we can make a nutritious food “basically for free!” With a Kitchen Economy mindset, they compared “basically free” homemade broth with store-bought bone broth, which can be expensive. We even talked about the packaging that doesn’t end up in landfills if we make our broth at home instead of buying it in cartons, jars, or cans.
Activity: Bone Broth Basics
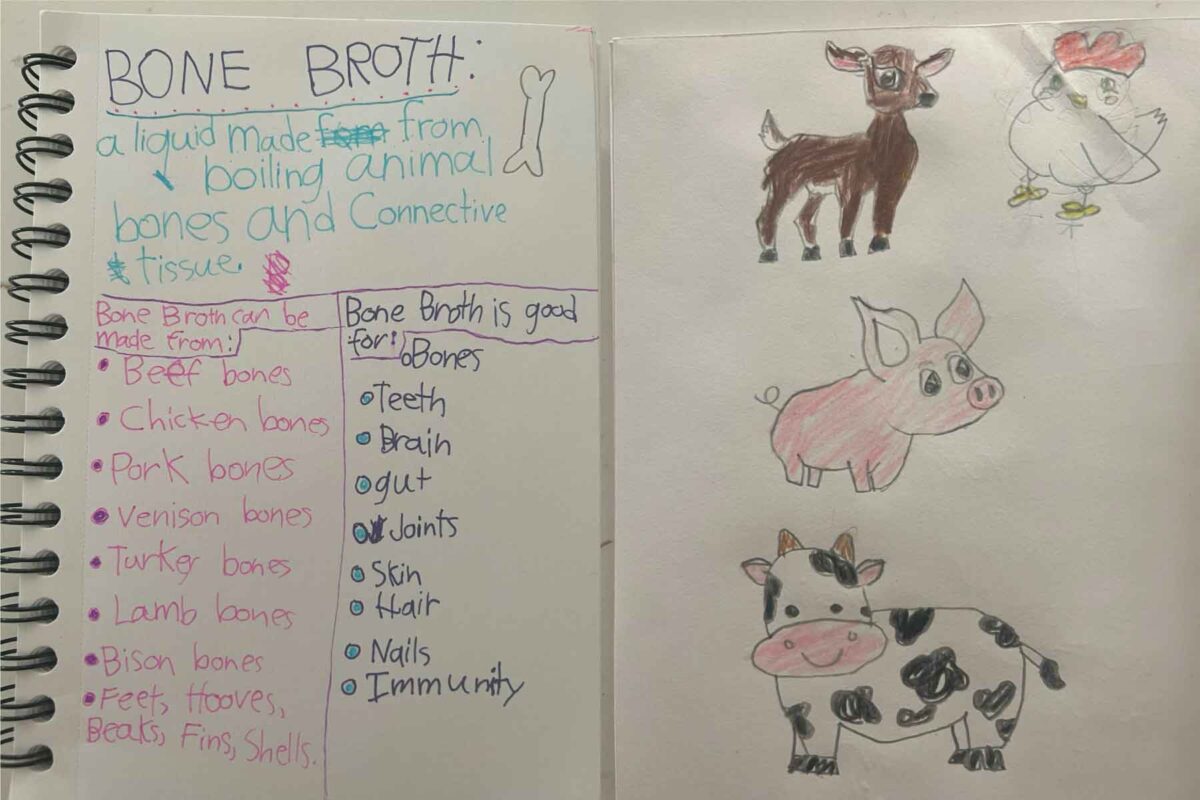
In this lesson, the discussion flows seamlessly into the activity, which begins with the question of what we can use to make bone broth. My children came up with different animal bones on their own, starting with the types of broth they’ve had before, and quickly realizing that they could identify any animal that people eat. My daughter wrote a list, and my son chose to draw pictures. (When my daughter saw my son’s drawings, she decided to draw a few animals, too!)
Both of my children were surprised to learn that bone broth could also be made from shells, fins, hooves, beaks, and feet. Talking about chicken feet reminded them of the picture book Tom by Tomie dePaola, about a boy whose butcher grandpa gives him a pair of chicken feet to take home. (Spoiler alert: mischief ensues!) We also talked about the classic book Stone Soup, which is a must-read for kids and adults alike.
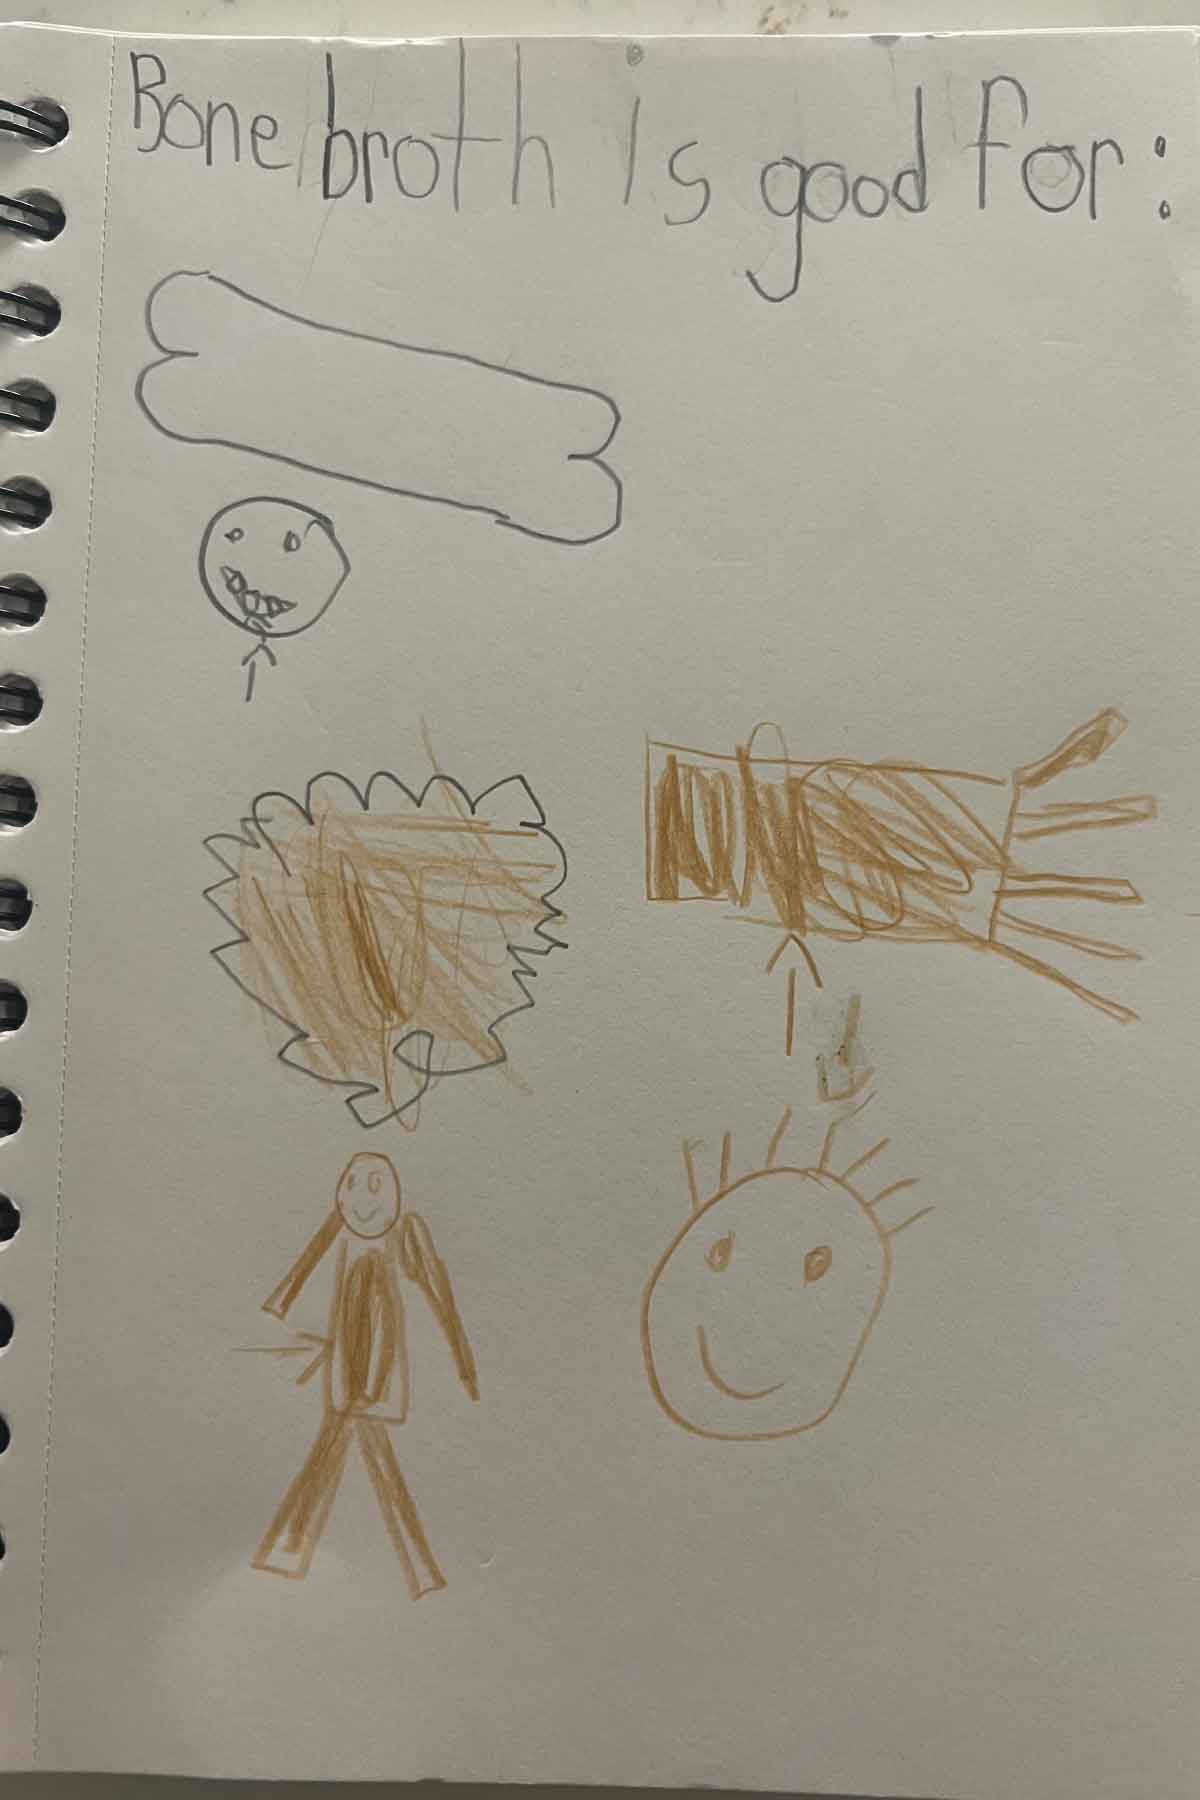
Our next step was to talk about the health benefits of bone broth. I challenged my kids to guess which parts of our bodies benefit from bone broth. Bone broth has so many health benefits, so I figured it wouldn’t take long for them to guess correctly, and I was right! My daughter made a list in her kitchen journal, and my son drew pictures of the body parts (if you’re wondering, the interesting shape in the middle of his page is a brain, and the hand is intended to show that bone broth is good for our skin).
Grades K-4 Activity Download
After watching my son work on his drawings, I had the idea to create a printable handout that might make it easier for young students to complete this part of the activity. You can download it here, or copy the template into your children’s kitchen journal by hand.
For children who don’t want to draw or use a visual aid, I also created a printable chart to be filled in, which you can download here.
Grades 5-8 Activity Download
The activities in the lessons for grades 5-8 and 9-12 are a bit more advanced. Middle schoolers outline the fundamental steps of making bone broth:
- Roast the bones
- Cover the bones in water
- Acidulate the water
- Simmer the bones
- Strain and store the bone broth
If you’d like a printable for your students to use, you can download one here. It can be a great reference chart to hang in the kitchen.
Grades 9-12 Activity Download
High schoolers learn these five steps as well, but they also learn to compare and contrast bone broth with simple broth and stock. These differences are summarized in the table below.
| Simple Broth | Bone Broth | Stock |
| • Made primarily from meat • Shorter simmer time • Least gelatinous (least amount of collagen) | • Made from roasted bones and some meat • Long simmer time • Very gelatinous (lots of collagen) | • Made primarily from bones with no meat • Shorter simmer time • Somewhat gelatinous (some collagen) |
A three-circle Venn diagram is an ideal way for high school students to represent the similarities and differences among these three types of broth. You can download a printable worksheet here.
In addition to the main lesson plans, this chapter of the curriculum has intriguing interdisciplinary extensions for the older grades, including an excerpt from Chaucer’s Canterbury Tales that mentions bone broth, and the mathematical formula for the culinary Butchers Yield Test.
Recipe: Bone Broth
Making bone broth isn’t complicated; it just takes a while, and most of that time entails waiting. When preparing bone broth with children, the most important consideration may be timing.
Before you start, check the recipe you’ll be following to see how long it will take, and plan appropriately so that your children will be available when the broth needs attending. For example, if you start the bone broth process in the afternoon, your children may be in bed by the time you need to strain it! Consider meal, sleep, and activity schedules when planning for this recipe.
First, I went over the Bone Broth Master Recipe with my children (page 44 of The Modern Pioneer Cookbook). They were most interested in the opportunity to strain the broth through the flour-sack towel (similar to my son’s interest in tying up the chicken legs in the Chapter 1 lesson). They were also surprised to learn how many hours the broth has to sit on the stove.
Part 1: Preparing the Ingredients
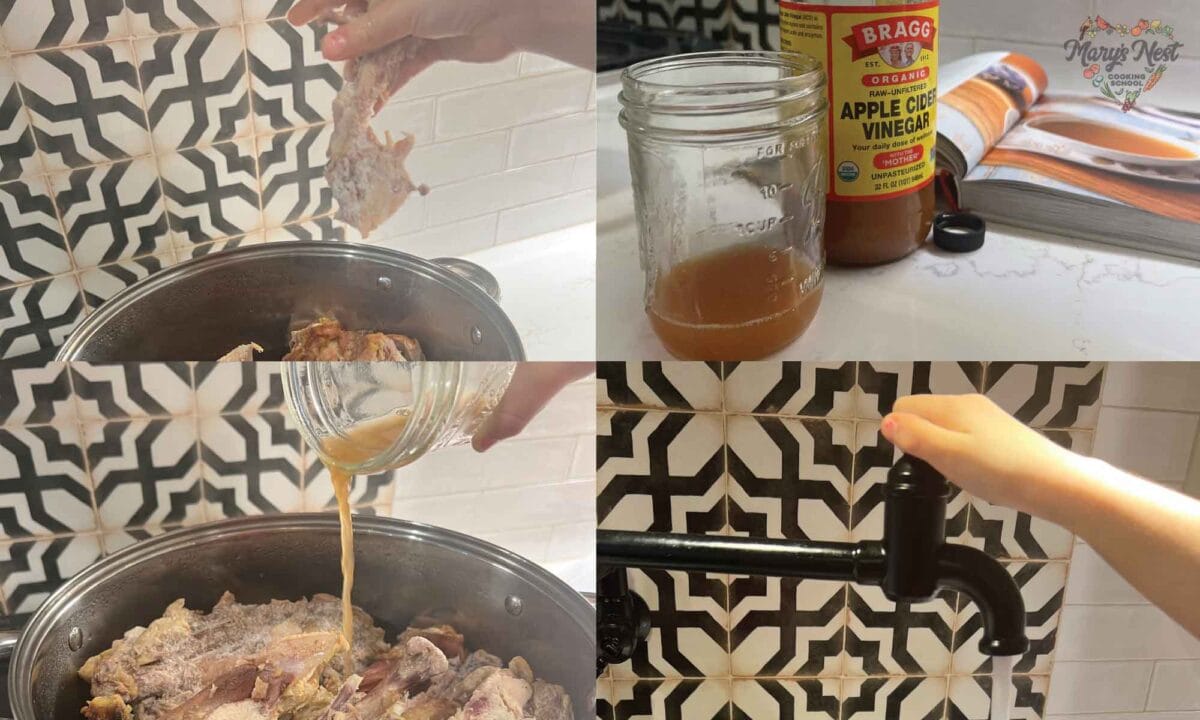
To get started, we took out our biggest stockpot and the frozen bones and carcasses we had in the freezer. We had a mix of chicken and turkey scraps, including pan drippings. We also took out the vegetable scraps we had in the freezer. My kids had fun dropping the bones into the pot without having to worry about being careful or precise.
Then, I had my children work together to measure the apple cider vinegar in a mason jar and pour it over the bones.
The next step was to fill the pot with water until the bones were covered. We’re fortunate to have a pot filler above our stove, and my kids love using it. But children can also help fill the pot in the sink, as long as they don’t try to carry it over to the stove on their own. Alternatively, you can leave the pot on the stove and have your students take turns filling it up with water from a pitcher or large measuring cup. Once the pot was full, my children set the timer for an hour-long soak.
Part 2: Simmering
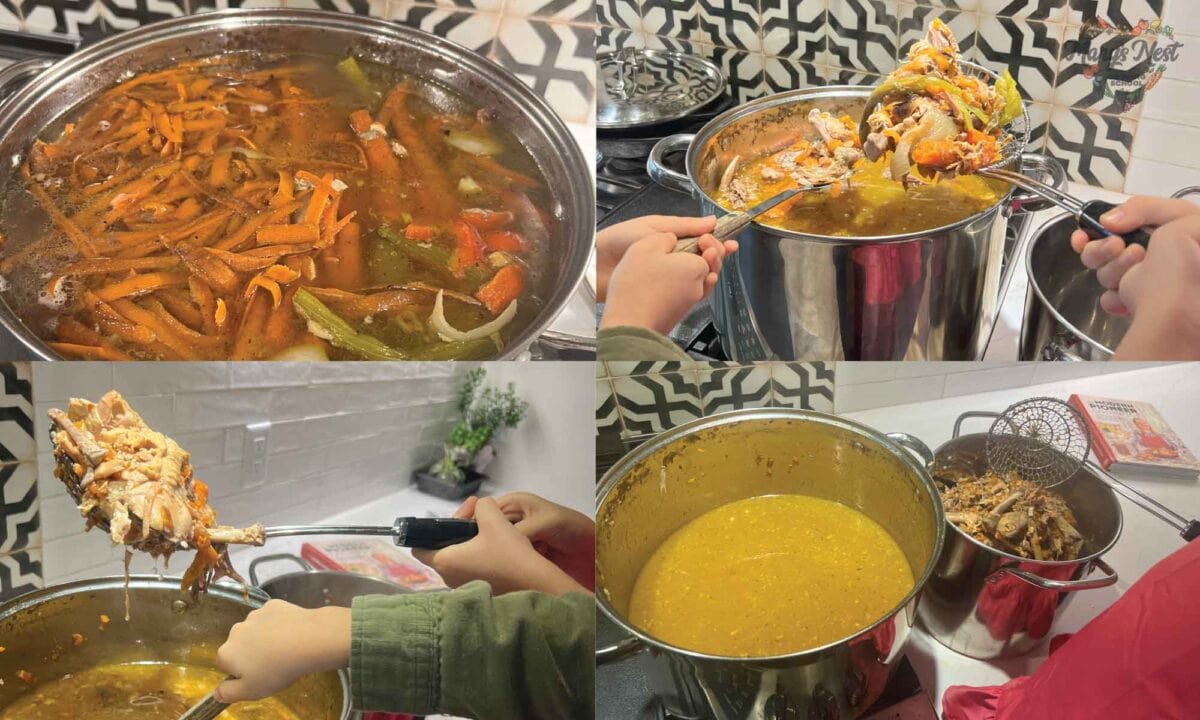
When the timer went off, we brought the pot to a boil and then turned the heat down to the lowest setting. My children added the vegetable scraps.
We set the timer for 6 hours, and when it went off, we let the broth cool a bit. Then, my kids removed the solids and dumped them into a separate pot. I gave my son a slotted spoon and my daughter a spider strainer, and they worked together.
Part 3: Straining and Decanting
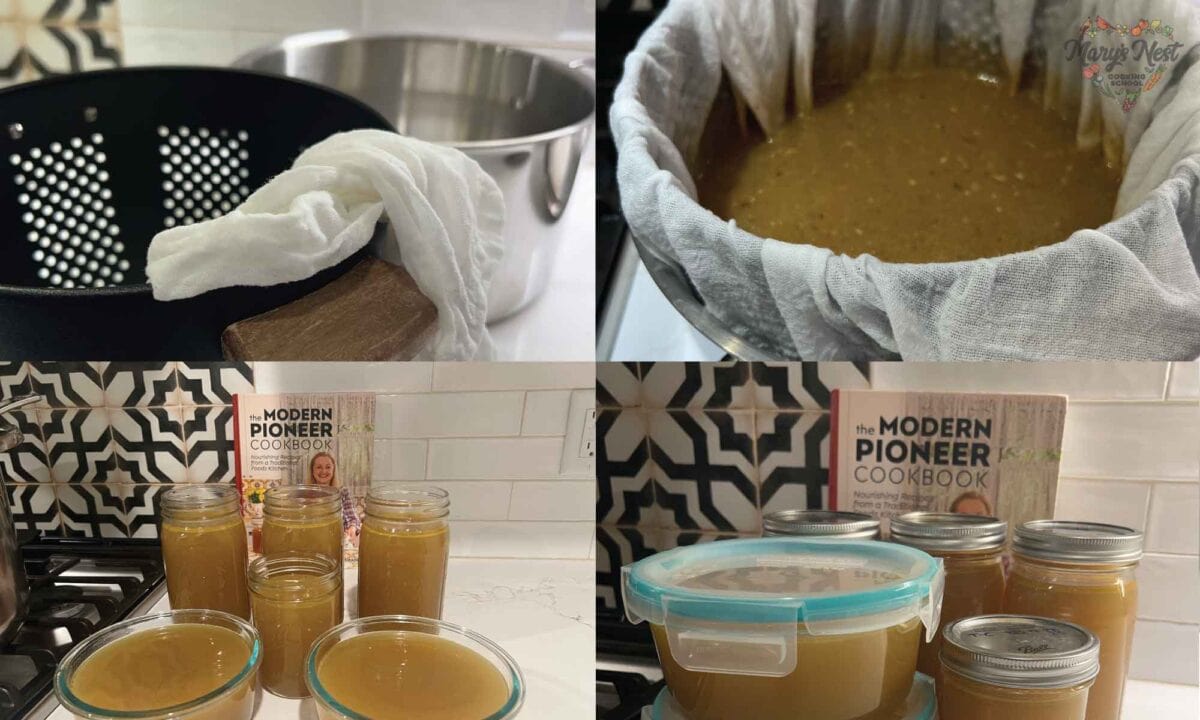
At this point, we got another large pot, a colander, and a flour-sack towel (moistened and wrung out).
We ladled the broth into the lined colander and strained it through.
I put the pot in the refrigerator, and we left it there overnight. The next day, we skimmed off the fat on top and transferred the broth into storage containers. If your students have never seen gelatinous broth, consider giving them a small scoop in a bowl and let them touch, taste, or jiggle and observe! When we were all done, we ended up with a total of 22 cups or 176 ounces of broth!
Interdisciplinary Extensions
While our broth was simmering, we took advantage of the downtime to look at the interdisciplinary extensions at the end of the lesson plan. We started with the Science prompt and discussed the three states of matter that could be observed throughout the process of making broth. We also used the History prompt and had a fun conversation imagining the very first people to discover that nutritious broth could be made from animal bones.
Final Thoughts
Using my experience facilitating this lesson, here are my ultimate takeaways for anyone getting ready for Chapter 2:
- If you already completed the Roast Chicken recipe in Chapter 1, consider starting with the Roast Chicken Bone Broth recipe for Chapter 2, regardless of your students’ grade level. After you use all the scraps in your freezer, you can purchase the beef or pork bones to make the other types of bone broth. (Note: You need three chicken carcasses to make a rich batch of bone broth, so plan to roast some additional chickens in advance!)
- Timing is important because bone broth simmers for so long. Plan carefully and figure out when you should start the recipe to ensure that your children will be available to help hours later. You may also decide to start soaking the bones first, and facilitate the discussion and activity while you wait.
- Make sure you have freezer-safe containers ready when you strain the bone broth. I realized that I only had three large jars that weren’t already in use, and I had to use two other containers and a smaller mason jar to store all of the broth.
- As I mentioned in the Chapter 1 post, don’t aim for perfection. Relax, knowing that it’s pretty hard to mess up the Bone Broth Master Recipe. Focus on process over product, prioritizing your learners’ experience over flawlessness. Most of all, have fun with it!