Chapter 11 of The Modern Pioneer Cookbook Curriculum invites students and families to step into the timeless tradition of home canning. Through hands-on activities and guided lessons, learners of all ages will discover how water bath canning transforms fresh, seasonal produce into shelf-stable foods that nourish the family year-round. Students can explore canning equipment, practice preservation techniques, and connect history, science, and kitchen skills in a meaningful way—bringing the pioneer spirit to life in today’s modern home. (This lesson experience includes five free activity downloads!)
Thanks for Your Support: This curriculum material is offered free for families, homeschoolers, co-ops, teachers, grandparents, and lifelong learners. If this resource helps your family and you would like to support the creation of future Mary’s Nest curriculum materials, consider becoming a Sweet Friend Supporter on Patreon.
Affiliates note: As an Amazon Associate I earn from qualifying purchases. My content may contain affiliate links to products and services. If you click through and make a purchase, I’ll receive a small commission. It does not affect the price you pay.
Table of Contents
- About The Modern Pioneer Cookbook Curriculum Lesson Experience Series
- Getting Started with Water Bath Canning
- K-4 Lesson: Canning
- K-4 Activity: Canning Supplies
- 5-8 Lesson: Exploring Canning Themes
- 9-12 Lesson: Diving Deeper Into Canning
- Recipe: Low-Sugar Jam
- Tasting the Recipe
- Final Thoughts
- The Modern Pioneer Pantry
About The Modern Pioneer Cookbook Curriculum Lesson Experience Series
Hi! My name is Jamie O’Hara, and I’m a homeschooling mom, curriculum writer, and former classroom teacher. I recently had the pleasure of helping Mary Bryant Shrader create The Modern Pioneer Cookbook Curriculum, which includes extensive lesson plans for grades K-12 to complement Mary’s bestselling book, The Modern Pioneer Cookbook.
- Get The Modern Pioneer Cookbook Curriculum (Free and over 250 pages!)
- Get The Modern Pioneer Cookbook
- Read The Modern Pioneer Cookbook Curriculum Lesson Experience Article Series
Now, I’m excited to embark on a journey of experiencing these lessons with my own children, ages 6 and 8 (and sometimes my 3-year-old, too). I’ll be facilitating a total of 14 lessons, one for each chapter in The Modern Pioneer Cookbook Curriculum. As we go through the curriculum, I’ll document our experience to share with all of you!
Getting Started with Water Bath Canning
Chapter 11 of The Modern Pioneer Cookbook is an introduction to home canning. The table below summarizes the recipes, principles, and learning objectives for each lesson.
| Grade Band | Recipe | Traditional Kitchen Principles | Learning Goals (Students will…) |
| K-4 | Low-Sugar Old-Fashioned Pioneer Berry Apple Jam | 1. Homemade food 2. Low-waste kitchens | ● Discuss the benefits of home canning in a homemade, low-waste kitchen ● Identify basic canning supplies ● Use the water bath canning method to preserve several jars of jam, following a recipe |
| 5-8 | How to Home Can Fresh Fruit (with No Sugar) | 3. Real, whole foods 4. Seasonal eating | ● Discuss the benefits of home canning in a real-foods, seasonal kitchen ● List the steps of water bath canning ● Use the water bath canning method to preserve pears, following a recipe |
| 9-12 | How to Home Can Tomatoes | 5. Maximizing nutritional value 6. Preservation for self-sufficiency | ● Discuss the benefits of home canning for self-sufficiency ● Describe the process of water bath canning in detail ● Use the water bath canning method to preserve tomatoes, following a recipe |
No matter which recipe you choose for this lesson, you’ll need water bath canning supplies, including:
- Stovetop canner or large stockpot (not a pressure canner)
- Rack
- Jars
- Lids
- A few other utensils

You can plan on the following approximate times for the recipe for each grade band.
- The K-4 recipe takes a total of about 45 minutes.
- The 5-8 recipe takes about an hour and 45 minutes.
- The 9-12 recipe takes about 2 hours.
Note that canning recipes call for large amounts of food:
- The K-4 lesson requires 5 cups of berries.
- The 5-8 lesson calls for 35 pears (17-18 pounds).
- The 9-12 lesson needs 85 tomatoes (about 21 pounds).
Planning for Students of Different Ages
Students of different ages can work together on any or all of the Chapter 11 recipes.
- The K-4 lesson activity provides an introduction to canning equipment and supplies.
- The 5-8 lesson is more about the steps of the canning process.
- The 9-12 lesson dives a little deeper into the topic of canning.
All three lesson activities require students to draw and/or write. The printable downloads can be used across grade levels, although the K-4 printable is much simpler than the 5-8 and 9-12 worksheets. The canning equipment reference sheet can also be used for all grade bands.
As always, it’s a great idea to preview each lesson beforehand to plan for each unique student.
K-4 Lesson: Canning
To get started with our Chapter 11 lesson, I asked my children to think about food that comes in jars or cans. We talked about the benefits of being able to store canned food without refrigeration. My children mentioned having a food supply for emergencies, as well as being able to donate cans of food to food pantries and food drives.
I explained to my kids that there are different ways to preserve food in cans and jars, and that we would be learning the simplest method, called water bath canning. Then, I shared with them the three main steps of water bath canning:
- Fill your jars with food and liquid (following a recipe).
- Close the jars and boil them in a large pot of water.
- Take the jars out and let them cool. As they cool, the lids will seal, making a fun “ping” sound.
At this point, we started connecting the topic of canning to the two themes of the K-4 lessons: homemade food and low waste. We talked about how a family farm might produce more fruits and vegetables than the family can eat before they begin to spoil, unless they practice preservation techniques, such as canning. This prevents waste and also gives the family a food supply for the colder months when nothing is growing.
To wrap up our discussion, I asked my children to imagine the large factories where food is canned on an industrial level. I invited them to draw a picture of the canning factory, so they could then compare it to our upcoming experience with home canning.

K-4 Activity: Canning Supplies
We transitioned to the canning activity by reflecting on some of the recipes from The Modern Pioneer Cookbook that we had prepared, which required special supplies or equipment. We mentioned kitchen twine, flour-sack towels, pH strips, and kraut pounders. I told my kids that they’d be learning about a new set of supplies specially made for water bath canning.
I laid out all the supplies we’d be using, and we reviewed each piece of equipment and its purpose. To make it easy, I created a printable reference sheet summarizing the purpose of the different canning supplies.
For K-4 students, I also created a booklet about canning equipment, explaining the purpose of each item and giving students the opportunity to illustrate each page.
Tip: When printing, select the “booklet” option on your print dialogue box to create a smaller foldable booklet rather than a full-size stack of pages that needs to be stapled.
Let your students draw each piece of equipment as you are discussing it, rather than discussing everything first and then having them illustrate page after page. Drawing as you go is a good way to break the activity up and prevent young students from tiring out from all the drawing. As you review the purpose of each canning item, make sure to have your students repeat the names of the supplies out loud.
After we discussed each piece of equipment and illustrated our booklet (I let my kids work together on the drawings), we had a more hands-on experience with the canning supplies. It’s a great idea to practice using some of the equipment in advance, without the giant pot of boiling water! This is true for children but also for adults who have never canned before.

Practicing the Canning Process
Following the lesson plan, I let my kids act out some of the steps of the canning process:
- Using the jar lifter to carefully lift a jar and place it down on the cushioned mat or towels.
- Using the magnetized lid lifter to place and remove lids from jars.
- Screwing rings onto jars “fingertip tight” (see page 224 of The Modern Pioneer Cookbook, “What Is Fingertip Tight?”).
- Using the funnel and ladle to fill a jar with water or even small toys.
- Using the debubbler to pop any bubbles (whether real or imaginary).
- Using the debubbler or food-safe ruler to measure the jar’s headspace.
- Using the thermometer to take the temperature of warm tap water.
Note: Be careful not to leave children unsupervised with glass jars, as they can easily break.
To wrap up the activity, I asked my kids which canning tool or task was the most fun. They both said they liked the magnetized lid lifter and the jar lifter. They also enjoyed using the candy thermometer, which provided an excellent opportunity to incorporate math and measurement skills.

5-8 Lesson: Exploring Canning Themes
Middle schoolers explore the topic of canning through the lens of the two 5-8 themes: real, whole foods and seasonal eating. I created a printable discussion guide for students to fill out during the lesson.
Like the elementary lesson, the middle school lesson also introduces students to the canning supplies they’ll be using. But the 5-8 lesson goes further and teaches about the steps of the canning process before asking students to create a canning page in their kitchen journals.
9-12 Lesson: Diving Deeper Into Canning
High school students go deeper into the practice of home canning, putting together the elements of the K-4 and 5-8 lessons into one whole.
First, they discuss canning within the context of the 9-12 themes of self-sufficiency and create a mind map about canning.
Then, high schoolers create a one-pager to summarize everything they learned. If you’re not familiar with a student one-pager, you can review some examples.
Students should be encouraged to use creativity when designing their one-pager layouts. However, I also made a printable template that students can use for this activity.
To create their one-pagers, students should have access to The Modern Pioneer Cookbook as well as the reference sheet on canning equipment (shared earlier). The 9-12 lesson plan in The Modern Pioneer Cookbook Curriculum outlines the criteria that each one-pager should include.

Recipe: Low-Sugar Jam
My children have been patiently waiting to make their own jam using the Low-Sugar Old-Fashioned Pioneer Berry Apple Jam Recipe from The Modern Pioneer Cookbook. We got started by reviewing the recipe in advance and gathering our supplies and ingredients.
In addition to the canning equipment, we also needed:
- Berries (We used a combination of strawberries, blackberries, and raspberries.)
- White cane sugar
- Granny Smith apple
- Bottled lemon juice
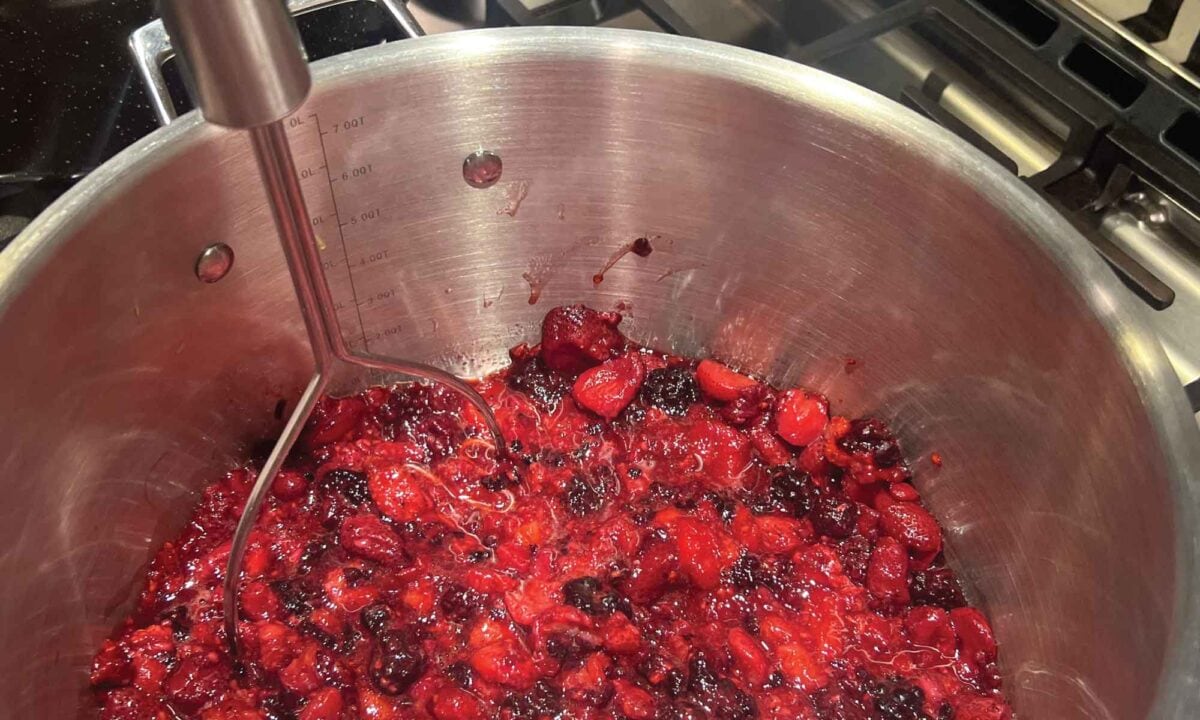
The jam recipe is ideal for younger students because they have a lot of fun crushing the berries! It’s good to get them involved in the crushing step because they may not be able to handle the stovetop steps.
I had my kids work on crushing the berries while I prepared the water bath canner and supplies. You’ll also want an adult to grate the apple to prevent kids from accidentally cutting their fingers.

Preparing the Jam Mixture
I took the lead in cooking up the mixture of crushed berries, grated apple, and lemon juice over high heat. My children stirred a few times, but the high heat made it difficult for them to stir continuously. I had my kids read the candy thermometer and spearhead the freezer test to see if the jam was the right consistency.

To conduct the freezer test, we put a small plate in the freezer in advance and took it out when we thought our jam was ready. We ladled a bit of jam onto the frozen plate and put it back in the freezer for a few minutes. When we took it back out, my kids ran their fingers through the glob of jam to separate it. When it didn’t seep back together, we knew the jam was done.
Canning the Jam Mixture
At this point, I removed the hot jars from the water bath canner and got my children to help me ladle the jam into the jars. Although not necessary, if you have a ladle with a pour spout, a canning funnel makes it much easier for kids to fill the jars and prevents unnecessary mess and waste.

My kids used the debubbler to remove any air bubbles and measure the headspace. I wiped down the jar rims with vinegar and had my children place the lids on with the magnetic lid lifter. Then, we screwed on the rings (not too tight!), placed the jars back in the canner, and processed them for ten minutes. We let the jars rest in the canner for five minutes before removing them and letting them cool. Twenty-four hours later, we removed the rings and put the jars in our pantry!
Tasting the Recipe
In many cases, you won’t have enough jam to fill your last jar, or you’ll have extra jam but not enough for an eighth jar. That’s welcome news because it means you’ll have some jam to eat and keep in your fridge right away!
The whole family was excited to taste the jam, and everyone loved it. First, we tried it on some sourdough toast, and the next morning, my kids added some to their oatmeal! It was rewarding to make something that everybody enjoyed, as well as to be able to fill the pantry with something we made from scratch.

Final Thoughts
Using my experience facilitating this lesson, here are my ultimate takeaways for anyone getting ready for Chapter 11:
- If you’ve never canned before, it can be intimidating, but it’s really all about having the right equipment. Take some time to familiarize yourself with the supplies and how they’re used. Even if your students are not in elementary school, consider incorporating the K-4 activity involving dry practice runs with the canning supplies.
- Before starting any of the Chapter 11 lessons, think about what kind of food you will be canning, and when those foods are harvested in your region. For example, if you are canning berries or tomatoes, it would be ideal to facilitate the lesson over the summer, when you can visit U-Pick farms and farmers’ markets for bulk purchases. Or, even better, you could grow your own berries or tomatoes! Plan to facilitate the lesson after a big garden harvest. On the other hand, if you are canning pears (for the 5-8 recipe), you may be able to purchase pears in bulk throughout autumn and into winter.
- Finally, I suggest watching Mary’s videos with your students before getting started!
Order YOUR COPY Now!
The Modern Pioneer Pantry
Simple ingredients, timeless techniques, and a well-stocked pantry. Discover over 100 nourishing recipes to preserve food and turn pantry staples into delicious, homemade meals. Build a wholesome, traditional pantry—just like a modern pioneer!