Sprout your own grains at home to make homemade sprouted flour. I’ll show you how to use the colander method to soak and sprout your wheat berries. Once your grains have sprouted and dried, you can grind them into a sprouted flour that’s ready to cook into a light and fluffy baked good.
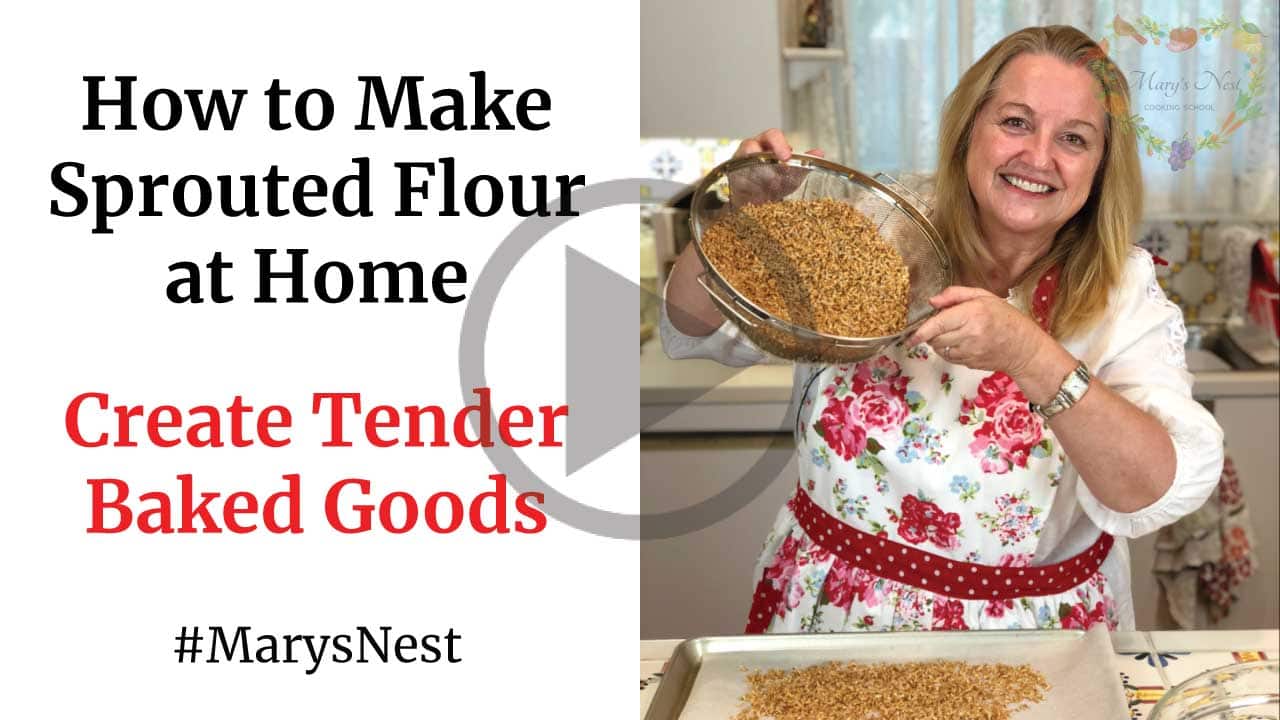
Watch the How to Make Sprouted Flour at Home video
Affiliates note: As an Amazon Associate I earn from qualifying purchases. My content may contain affiliate links to products and services. If you click through and make a purchase, I’ll receive a small commission. It does not affect the price you pay.
Table of Contents
- What is Sprouted Wheat Flour?
- Why Should I Make Sprouted Flour?
- Ingredients
- How to Sprout Wheat Berries
- How to Store Sprouted Flour
- Recipe Tips
- Grind Your Own Flour with the Mockmill
- Sprouting Grains for Flours FAQs
- Additional videos
- The Modern Pioneer Pantry
- Download Your Free 36-Page Pantry List
- Join the Traditional Foods Kitchen Academy
- More Kitchen Pioneer Videos
- How to Make Sprouted Flour at Home Recipe
- Shop for My Favorite Items
What is Sprouted Wheat Flour?
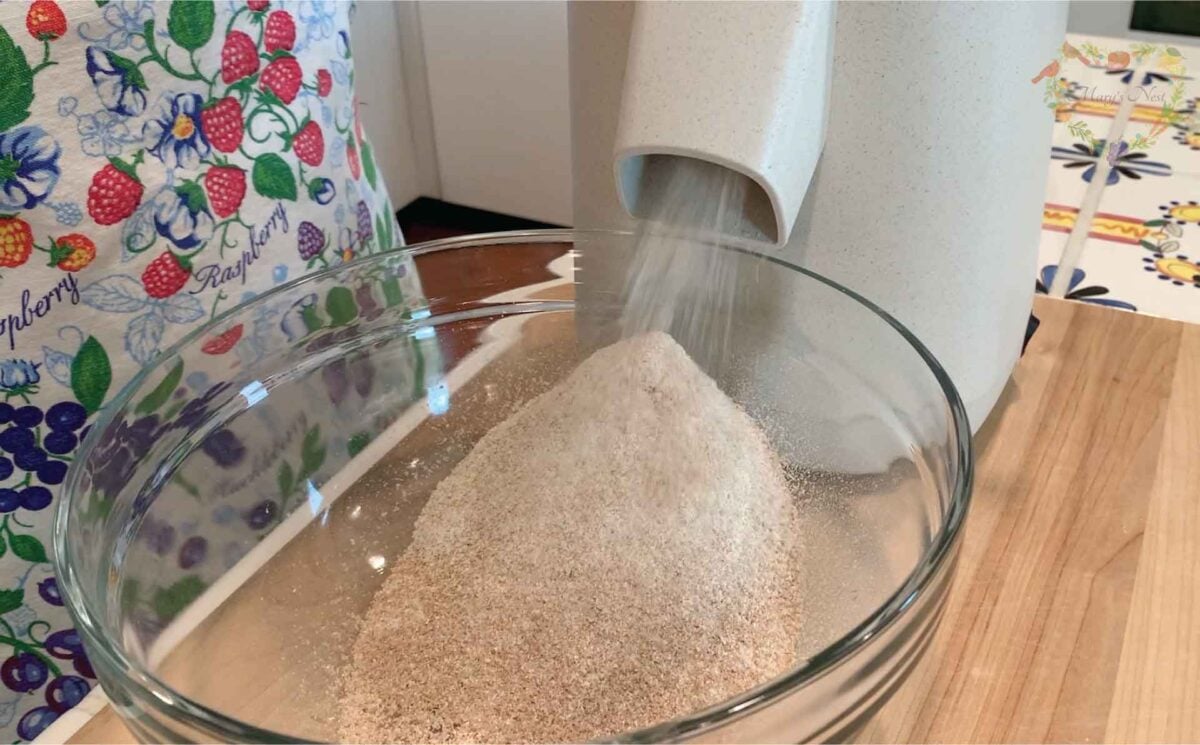
Sprouted wheat flour is freshly milled flour made from the sprouted grains of wheat berries. After sprouting, you’ll dry the sprouted grain and then mill them into flour. (I use my Mockmill 100 as an affordable and reliable electric grain mill for making fresh flour.)
Sprouting wheat berries and then turning them into sprouted flour helps to create more digestible baked goods and ones that are slightly lighter than if made with their unsprouted counterparts.
Why Should I Make Sprouted Flour?
I like to make sprouted flour at home because baking with it is so easy. Sprouting grains releases the nutrients and makes them more easily absorbable by our gut. Other methods also unlock nutrients, but they have a few downsides.
Alternative Technique: Sour the Flour
You can also sour the flour, such as in making sourdough bread which is an ideal option for chewy artisan style breads. However, this method takes longer because of the rise time and the sour taste may not be to everyone’s liking.
Alternative Technique: Soak the Flour
The other option is to soak our flour before baking with it, which is usually done for making quick breads and muffins. But is this really the best option? Personally, I’m not a fan of it.
The problem with soaking flour is that you can’t just wake up one morning and say, “I’m going to bake a cake.” You have to plan in advance and soak your flour for 8-12 hours at room temperature in an acidulated liquid.
Soaked flour—in my humble opinion—often creates an end product that is denser than I like. The reason is that you have to mix in the additional ingredients, such as eggs, after the flour has been soaking. All this additional stirring can make a quick bread or muffin dense.
Why Sprouting Grains for Flour is the Best Option
So if none of these alternative methods are suitable, what can a whole-grain home baker do? You can sprout grain at home and make your own sprouted flour. Learning how to make sprouted wheat flour is easier than you think. There is very little work involved on the part of the home baker.
Most of the process is passive time. Then once you have a nice bag of sprouted flour waiting for you in your kitchen, you can wake up any day and say, “I think I’ll bake some muffins.” And I assure you—they will be light and fluffy!
Ingredients
Find the full printable recipe with measurements below.
For this specific recipe, I recommend the following ingredients:
- Wheat berries: The most common modern-day wheat berries are hard red wheat, hard white wheat, and soft white wheat berries.
- Chlorine free water: Make sure you use chlorine free water for the best results!
What Wheat Berries Are Best for Sprouting?
When it comes to wheat berries, there are many varieties to choose from when making sprouted flour. You can learn more in my Wheat Berries FAQs – Frequently Asked Questions About Wheat Berries
What is considered “best” depends on you want to use the sprouted flour. Here are a few things to consider when choosing wheat berries for sprouted flour:
- Hard red wheat berries will create a darker baked good and one that lean towards denser consistency.
- Hard white wheat berries will make a baked good light in color and texture.
- Soft white wheat berries will make the lightest baked goods of all, and so it is perfect to use when making biscuits or pastries.
- Ancient wheat berries include einkorn, emmer, and spelt. All of these grains are generally lower in gluten than their modern-day counterparts. Once sprouted, these ancient grains can be used to bake any type of baked good.
PRO TIP: When using ancient grains, baking bread such as a yeasted bread with einkorn sprouted flour (the lowest in gluten of the ancient grains) takes some trial and error to shape it correctly and get it to rise fully. Spelt, on the other hand, is relatively easy to work with and can often create results similar as when baking with modern-day wheats.
Why Use Chlorine-Free Water for Sprouting?
Whenever you are doing anything in a traditional foods kitchen that involves culturing, fermenting, soaking, or sprouting, you want to make the environment as hospitable as possible so as to have success. Chlorine interferes with all these processes, so make sure you use chlorine-free water.
If your only option is chlorinated tap water, you can leave some water out on the counter top overnight, allowing some of the chlorine to dissipate. You can also boil the water to help allow some of the chlorine to dissipate. After you allow the boiled water to cool, you can use it in your recipes.
Keep in mind that when it comes to rinsing your sprouts, once they have started to sprout, it’s usually okay to give them a little rinse at the sink using tap water. Since they have already established themselves, a little minor rinse with chlorinated tap water shouldn’t hurt them.
How to Sprout Wheat Berries
Watch my How to Make Sprouted Flour at Home video as I walk you through the step-by-step process of making sprouted flour at home.
Step 1 – Place the wheat berries in a bowl and cover with filtered water. Let them soak for about 12 hours.

Step 2 – Drain the wheat berries and spread them out in a colander and place the colander over a bowl.
Step 3 – Cover the bowl loosely with a thin dish towel and place the bowl in an undisturbed warm place in your kitchen for approximately 12 hours.
PRO TIP: Store them somewhere out of the way such as on top of a refrigerator, in a pantry, or in a cabinet. In the warmer summer months, simply leaving the bowl on your countertop should be sufficient. You are looking for an average temperature of approximately 75°F (24°C).
Step 4 – Rinse the wheat berries in the colander with filtered water after 12 hours have passed.
Step 5 – Cover the bowl again and leave it undisturbed in a warm place for another 12 hours.
Step 6 – Check the wheat berries after they’ve sat for another 12 hours. At this point, they may have sprouted. If not, repeat the process of rinsing them and put them back in the covered bowl for another 12 hours.
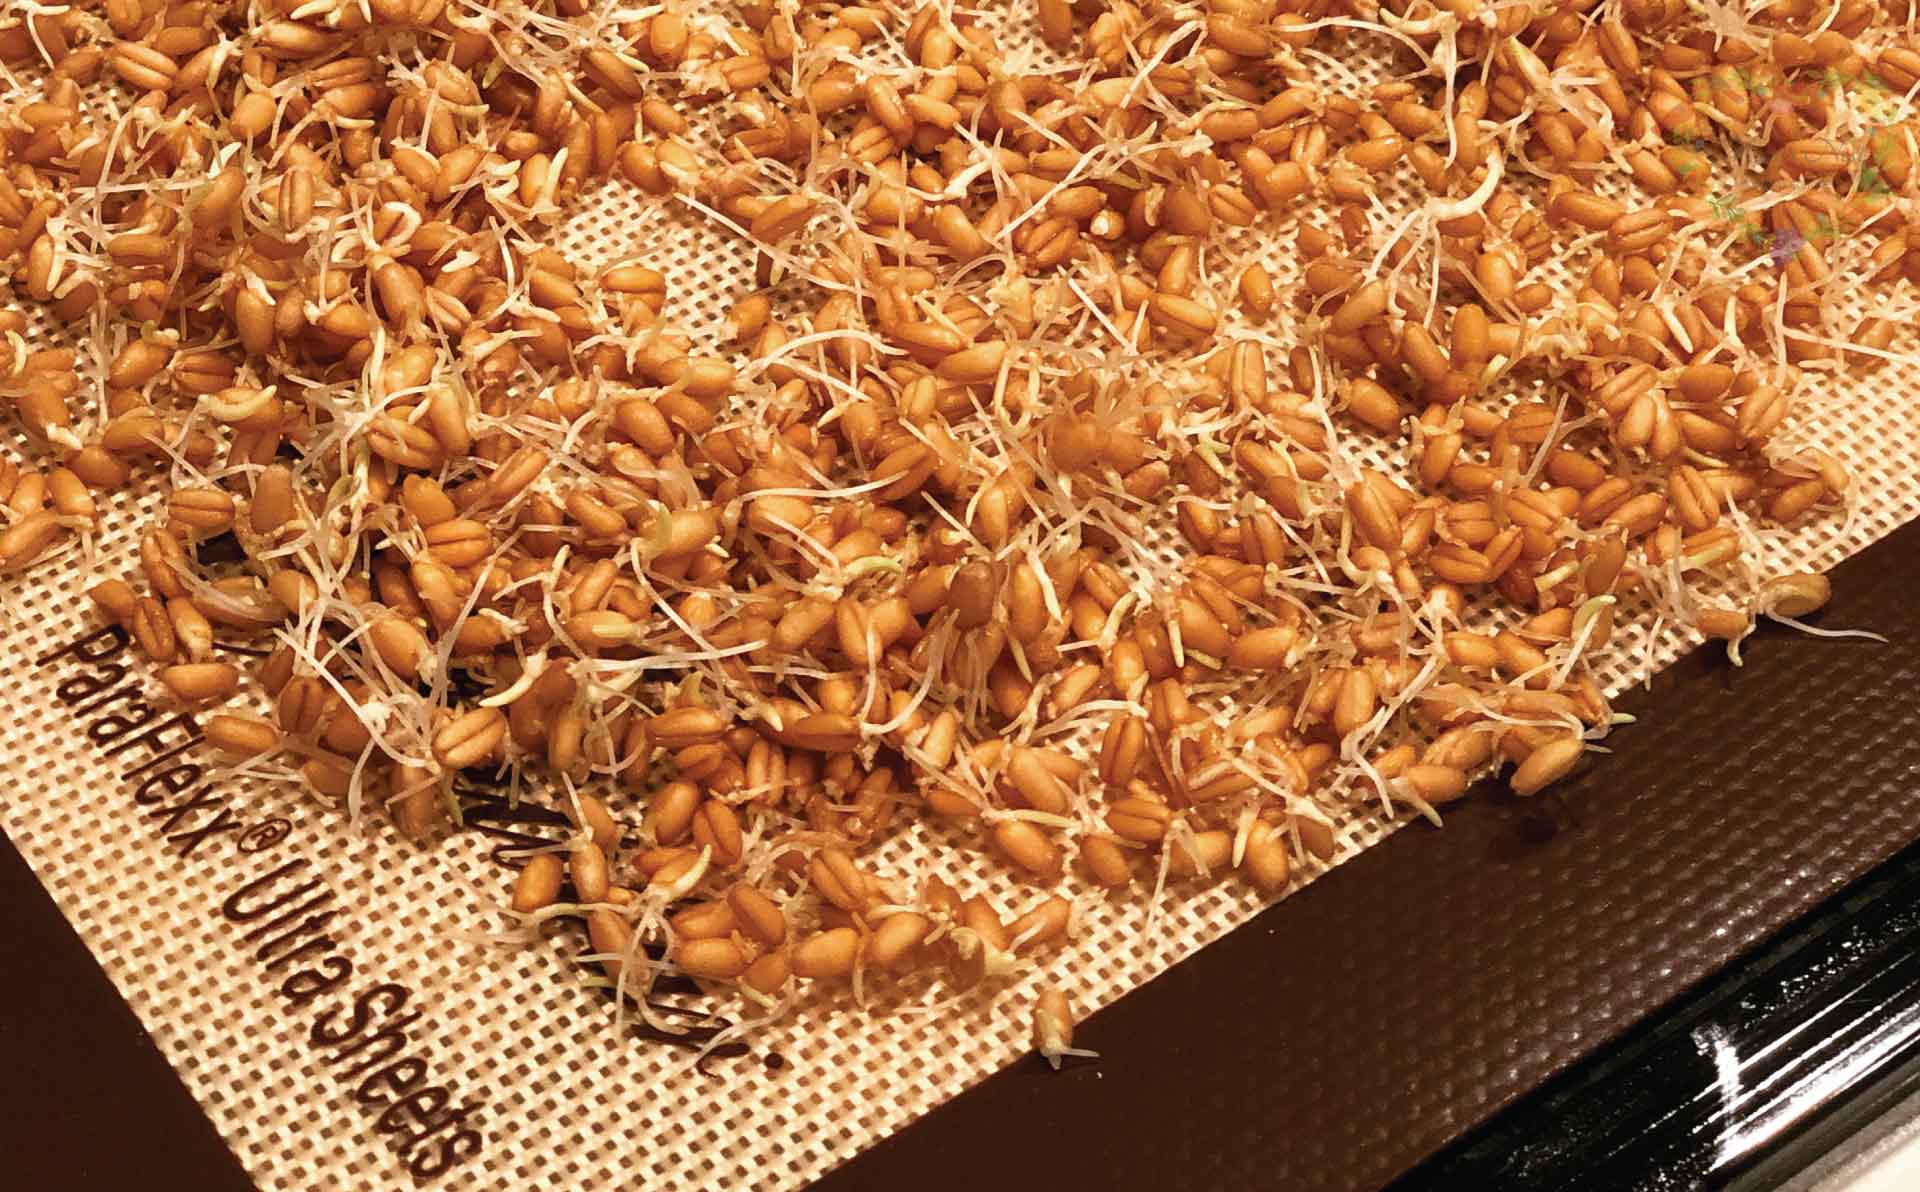
Step 7 – The wheat berries should have now sprouted after the next 12 hours passes. If not, you can rinse them again and continue the 12-hour cycle of rinsing and resting for up to 5 days.
PRO TIP: If the wheat berries do not sprout after 5 days, it is unlikely they will sprout. They are not fresh. You will need to discard them.
Step 8 – Dry your sprouted wheat berries in a dehydrator or in a cool oven at the lowest setting. In a dehydrator, the wheat berries will take from 12-24 hours to dry thoroughly. In a cool oven, the wheat berries will take 8-12 hours to dry thoroughly.
How to Store Sprouted Flour
Any flour, whether fresh-milled regular flour or fresh-milled sprouted flour, is best used immediately after grinding into flour. The reason is that these are whole-grain flours with all the bran and germ intact. The bran and germ contain oils that can go rancid quickly at room temperature.
There are varying opinions on how long fresh milled grains will stay fresh, but I would recommend storing them for no longer than one month in a cool dark area in an opaque, airtight container.
Fresh milled grains in an opaque, airtight container or an opaque, freezer-proof container can be refrigerated up to 3 months in the refrigerator or frozen up to 6 months.
However, keep in mind that whenever refrigeration is involved, it will change the moisture content of the flour and will require an adjustment to any liquid measurements in the recipe involving baked goods. To learn more about baking with freshly milled flour, check out my video on How to Bake with Fresh Milled Flour.
Recipe Tips
- One cup of sprouted grain, once milled, yields 1 1/2 cups of flour and you can easily adjust to make just the amount you need for a recipe.
- For best results use freshly milled sprouted flour immediately.
- Use fresh wheat berries. If they aren’t fresh they may not sprout properly or at all.
- Sprouts form best in a temperature around 75°F (24°C). So in colder months you may need to place them somewhere it’s a bit warmer such as on the fridge or in a cabinet.
- When your sprouted grain has dried, you grind it into fresh sprouted flour using a manual or electric grain mill. I use my electric Mockmill 100 to make fresh flour.
Grind Your Own Flour with the Mockmill
When it comes to electric grain mills, after I did A LOT of research, I decided to buy a Mockmill. And am I so happy I did! The Mockmill is a very affordable but beautifully crafted German-made mill that stone grinds grain with settings ranging from 1 to 10—fine to coarse ground grain.
Learn more about Mockmill electric grain mills for making fresh flour and their Flake Lover’s Flaker that flakes whole grain in minutes. (This is not a sponsored post, I bought the Mockmill products that I show you, and I’m a happy user of their devices in my kitchen.)
- Mockmill 100 Grain Mill unboxing
- Get the Mockmill 100 Stone Grain Mill (Same product I show you in my unboxing video.)
- Flake Lover’s Flaker from Mockmill in action (Using this device, you can flake whole grain in minutes.)
Sprouting Grains for Flours FAQs
You can tell your wheat berries are dry by feeling them. If they feel dry, they are done. If you are not sure, then continue to dry them for 1-2 hours longer. The more precise way to determine if your wheat berries are dry is to weigh them (using a food scale) before you soak and sprout them and then weigh them again when you think they are dry. They should weigh the same.
Once milled one cup of sprouted grains will be about 1 1/2 cups of flour.
Yes, you can! When it comes to sprouting grains, you can sprout pretty much any grain. The reason is that in nature, grains need to be able to sprout in order to proliferate and continue their species. So if you have a grain from nature, chances are you can sprout it in your kitchen.
What we think of as grains are technically called “cereal grains.” These are grains that come from the seeds of grasses. These include wheat of all varieties, rye, barley, oats, and more.
Not only can you sprout cereal grains, you can even sprout what are called pseudo-cereals. These are plants that also produce seeds but are not cereal grains from grasses. However, they can be sprouted similarly to cereal grains. Common pseudo-cereals include buckwheat and quinoa.
Always check your whole grain flour, whether sprouted or not, before baking with it. If it has any rancid odor reminiscent of turpentine or an odor that is simply putrid, it has clearly spoiled and should be discarded.
Additional videos
How to Make a Foolproof Sourdough Starter
Make a sourdough starter that will be successful every time.

How to Soak and Sprout Beans—Techniques for Seasonal Differences
Learn how seasonal differences affect the soaking and sprouting process for beans.

How to Make Soaked Oatmeal Using Oat Groats
Start with oat groats for healthy and nutritious soaked oatmeal that is delicious and budget-friendly.

Order YOUR COPY Now!
The Modern Pioneer Pantry
Simple ingredients, timeless techniques, and a well-stocked pantry. Discover over 100 nourishing recipes to preserve food and turn pantry staples into homemade meals. Build a wholesome, traditional pantry—just like a modern pioneer!
Download Your Free 36-Page Pantry List
For an extensive list of the traditional foods you can make and purchase to stock your pantry, be sure to download my free 36-page Traditional Foods Pantry List. This comprehensive eBook is full of links to recipe videos, helpful articles, and more!

And if you’re looking for a printed book full of my traditional foods recipes to show you how to create a traditional foods kitchen, be sure to order your copy of my bestselling book, The Modern Pioneer Cookbook.

Order YOUR COPY Now!
The Modern Pioneer Cookbook
Seasonal ingredients, traditional techniques, and nourishing recipes. Over 85 traditional, from-scratch recipes! Discover for yourself how you can use simple ingredients and traditional techniques to cook the modern pioneer way.
Join the Traditional Foods Kitchen Academy
Are you looking for more traditional foods videos? If so, I invite you to join the Traditional Foods Kitchen Academy. Members of this optional paid YouTube community get access to exclusive videos and other members-only perks. Plus, your YouTube comments include a special members-only badge.
More Kitchen Pioneer Videos

Baking with Whole Grains: The Maslin Method, Grain Mills, and America’s Bread Basket
Explore whole grain baking with The Maslin Method, fresh-milled flour, grain mills, heritage wheats, and more.

A Sweet Season of Celebration and New Beginnings with The Maslin Method Baking School Series
Celebrate the close of a heartfelt book tour and the exciting launch of The Maslin Method Baking School for traditional baking.

Why We Should Incorporate Mackerel Into Our Diet
Easy and nourishing ways to enjoy mackerel into your meals.
Stay in Touch with Mary’s Nest
- Subscribe to My YouTube Channel for Traditional Foods Videos (Free) - When you subscribe, be sure to click on the notification bell that will let you know each time I upload a new video.
- Subscribe to Mary’s Traditional Foods Newsletter (Free) - Get a free 36-page eBook for signing up: How to Stock Your Essential Traditional Foods Four-Corners Pantry.
- Join the Traditional Foods Kitchen Academy - For more detailed videos and exclusive members-only perks, join my YouTube membership community.
- Order The Modern Pioneer Cookbook - Get a hardcover book of Mary's nourishing recipes from a Traditional Foods Kitchen. This bestselling cookbook is published by Penguin Random House with their DK imprint.
- Order The Modern Pioneer Pantry - Get Mary's latest hardcover cookbook about preserving food and making delicious meals from your Four Corners Pantry. Mary's second cookbook is also published by Penguin Random House.
I look forward to having you join me in my Texas Hill Country Kitchen!
I’d like to receive more tips and recipes from Mary’s Nest.
How to Make Sprouted Flour at Home

Ingredients
- 2 cups Wheat Berries
- 1 Filtered water chlorine free
Instructions
- Place wheat berries in a bowl and cover with filtered water. Leave to soak for approximately 12 hours.
- Drain wheat berries and spread them out in a colander and place the colander over a bowl.
- Cover bowl loosely with a thin dish towel and place bowl in an undisturbed warm place in your kitchen for approximately 12 hours. On top of a refrigerator, in a pantry, or in a cabinet works well. In the warmer summer months, simply leaving the bowl on your countertop should be sufficient. You are looking for an average temperature of approximately 75 degrees Fahrenheit or 24 degrees Celsius.
- After 12 hours, rinse the wheat berries in the colander with filtered water. Re-cover bowl and leave in a warm place, undisturbed for another 12 hours.
- After 12 hours, check wheat berries. They may have sprouted. If not, rinse them again with filtered water, and place them back over the bowl. Re-cover the bowl and leave in a warm place undisturbed for another 12 hours.
- After 12 hours, the wheat berries should have now sprouted. If not, you can rinse them again and continue the 12-hour cycle of rinsing and resting for up to 5 days. If the wheat berries do not sprout after 5 days, it is unlikely they will sprout. They are not fresh. You will need to discard them.
- Once the wheat berries have sprouted, it is now time to dry them. You can dry them by spreading them on a non-stick sheet in a dehydrator set at 110 degrees Fahrenheit or 43 degrees Celsius. Or you can dry them on a parchment-lined baking sheet in a cool oven set at the lowest possible setting. This may be between 150 degrees Fahrenheit (65.5 degrees Celsius) and 200 degrees Fahrenheit (93 degrees Celsius) depending on your particular oven's settings.
- In a dehydrator, the wheat berries will take from 12-24 hours to dry thoroughly. In a cool oven, the wheat berries will take 8-12 hours to dry thoroughly. A simple test to tell is if the wheat berries are dry is to feel them. If they feel dry, they are done. If you are not sure, then continue to dry them for 1-2 hours longer. The more precise way to determine if your wheat berries are dry is to weigh them (using a food scale) before you soak and sprout them and then weigh them again when you think they are dry. They should weigh the same.
Notes
Nutrition
Shop for My Favorite Items
Favorite Sprouted Flour Supplies
- Pyrex Glass Mixing Bowl Set (3-Piece)
- 3 Piece Colander Set – Stainless Steel Mesh Strainer Net Baskets with Handles & Resting Base
- Nordic Ware Natural Aluminum Commercial Baker’s Half Sheet (2 Pack)
- Non-Stick Parchment Paper, 205 sqft
- Excalibur 9-Tray Electric Food Dehydrator with Clear Door for Viewing Progress, Adjustable Thermostat, 48-hour Timer, and Automatic Shut Off
- Excalibur ParaFlexx Ultra Silicone Re-usable Non-stick Dehydrator Sheets – Set of 3 – 14 x 14 Inches
Amazon Shop and Shopping Guide
- Visit Mary’s Nest Amazon Shop
- Get a 30-day Audible trial with a free audiobook
- Visit my Shopping Guide page
Get up to 15% off for stocking your Traditional Foods Pantry and equipping your Modern Pioneer Kitchen, including discounts from US Wellness Meats, Farmhouse Teas, Backwoods Home, Masontops, Cultures for Health, Survival Garden Seeds, Redmond Real Salt, and More!