If you’ve tried digestive bitters before and found the taste too strong or off-putting, you’re in for a treat with these strawberry digestive bitters! These mild and delicious bitters retain all the digestive benefits without the intense flavor, and they’re easy to make homemade. Watch the video tutorial below to learn how to make these bitters and enjoy their delightful taste and digestive support.
I love creating a variety of homemade digestive bitters, tonics, and elixirs, and I’m sure you will, too! Don’t miss out on learning how to make a legendary 16th-century elixir and the best turmeric tea to address a range of ailments—from digestive issues to aches and pains and more.
Affiliates note: As an Amazon Associate I earn from qualifying purchases. My content may contain affiliate links to products and services. If you click through and make a purchase, I’ll receive a small commission. It does not affect the price you pay.
Table of Contents
- What Are Digestive Bitters?
- Strawberry Digestive Bitters Video
- When Is The Best Time To Take Digestive Bitters?
- Disclaimer
- Ingredients For Making Digestive Bitters
- How to Make Digestive Bitters
- Variations For Making Digestive Bitters Without Alcohol
- Tips For Making Better Bitters
- How To Store Digestive Bitters
- How to Clean Dirty Flour Sack Towels
- Digestive Bitters 101 – The Ultimate Bitters Making Class
- An Excellent Book All About Bitters
- The Modern Pioneer Cookbook
- The Modern Pioneer Cookbook
- Download Your Free 36-Page Pantry List
- Join the Traditional Foods Kitchen Academy
- Kitchen Academy Videos
- Strawberry Digestive Bitters Recipe
- Shop for items used in this blog post or video
What Are Digestive Bitters?
Digestive bitters, crafted from blends of herbs with a storied history, offer a natural way to support our digestive system. These potent herbal formulas stimulate the production of essential digestive juices—stomach acid, bile, and enzymes—that are crucial for breaking down food and absorbing vital nutrients. Incorporating digestive bitters into your daily routine can help enhance your digestive health and overall well-being.
In the past, our ancestors enjoyed diets abundant in naturally bitter plants, reaping their numerous benefits. Unfortunately, modern diets often lack these beneficial ingredients. Reintroducing digestive bitters into your lifestyle is a delightful way to embrace the traditional wisdom of our forebears and restore these valuable health benefits.
Strawberry Digestive Bitters Video
When Is The Best Time To Take Digestive Bitters?
The beauty of bitters lies in their ability to promote healthy digestion from start to finish. Scientists tell us that healthy digestion can lead to overall better health. Taking bitters before a meal can enhance appetite, support liver function, and ease occasional bloating. When taken after a meal, bitters can help combat indigestion and improve overall digestive comfort.
Many bitters feature a variety of herbs, such as chamomile, cinnamon, cloves, dandelion root, fennel, gentian, and even black peppercorns, each bringing unique benefits. Whether you’re looking to embrace a more traditional approach to wellness or support your body’s natural digestive processes, adding bitters can be a flavorful and healthful choice.
Disclaimer
Digestive bitters are for adults only and should not be given to children or pregnant women. Before using bitters, be sure to check with your medical professional to determine if they are right for you.
Note: I am not a doctor or medical professional. This information is provided for informational purposes only and is not intended to treat or diagnose any type of illness. If you are not feeling well, please seek professional medical attention and medicine. And if you are thinking of supplementing your treatment with home remedies, be sure to talk to your medical professional about them. It’s important that you get the medicine and treatments you need to get back to good health.
Ingredients For Making Digestive Bitters
Find the full printable recipe with ingredients below.
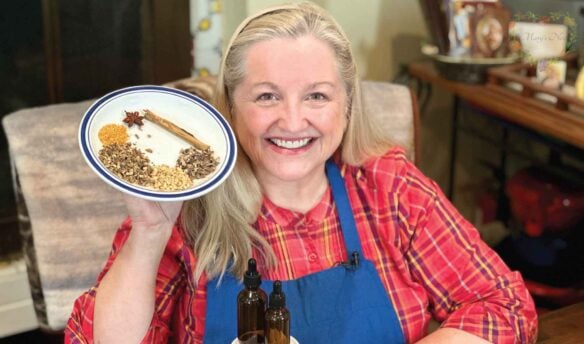
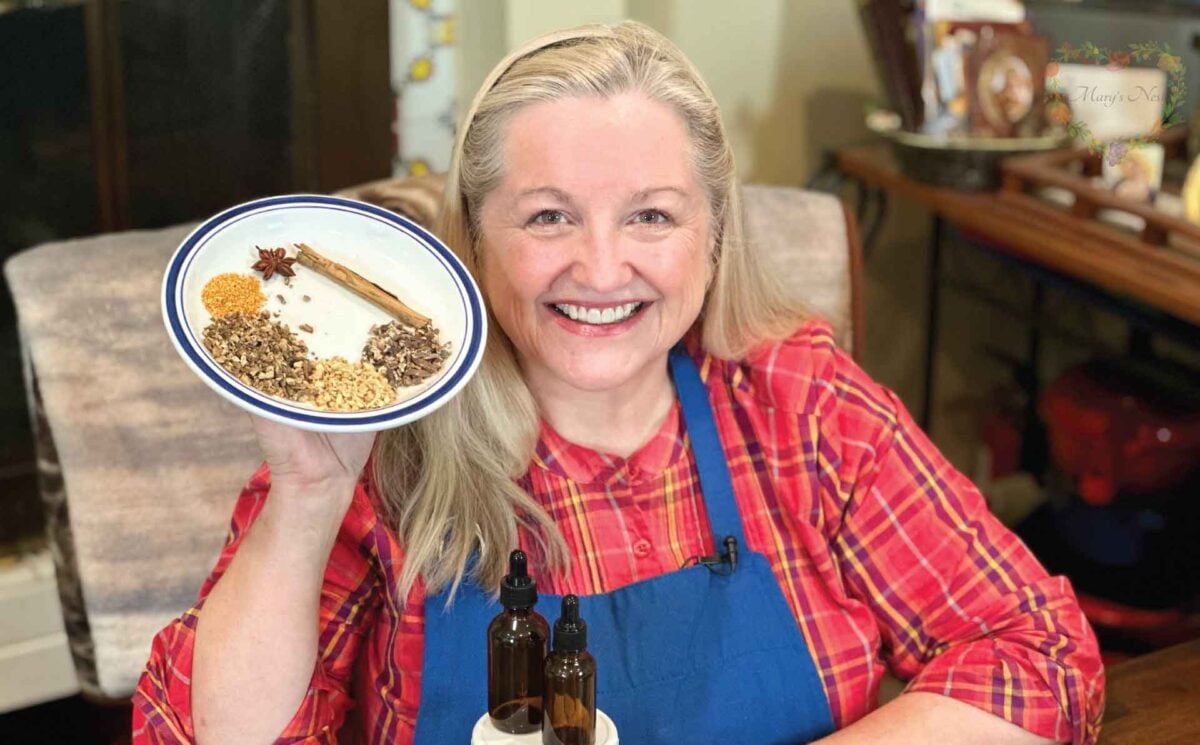
The key to making flavorful bitters is to start with a fruit base and then add a variety of herbs and spices. For this bitters blend we will be using:
- Fresh Strawberries
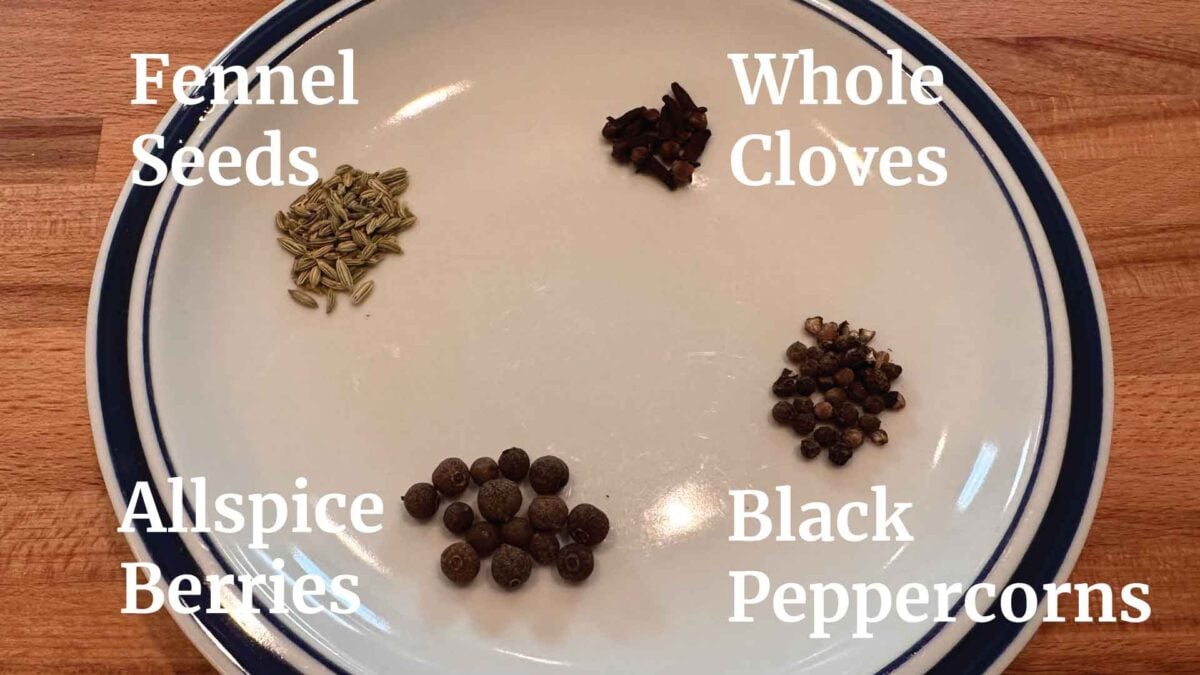
- Allspice Berries
- Black Peppercorns
- Cinnamon
- Fennel Seeds
- Whole Cloves
Additional ingredients include:
- Fresh Ginger
- Peel and Pith of 1 Large Lemon
- Vanilla Bean Pod
To this mix, we will add vodka as the liquid to extract the beneficial elements of the fruit and spices. However, you can also replace the alcohol with raw apple cider vinegar. Just keep in mind that bitters made with vinegar have a shorter shelf life.
Note that you can also use other berries in this recipe, such as blueberries, blackberries, or raspberries. You just need 2 cups of whatever berries you choose.
How to Make Digestive Bitters
Find the full printable recipe with measurements below.
Making bitters is one of the easiest things to do in a traditional foods kitchen because the vodka does the bulk of the work, stripping out the nutrients from the fruit and spices.
Here are the basic steps:
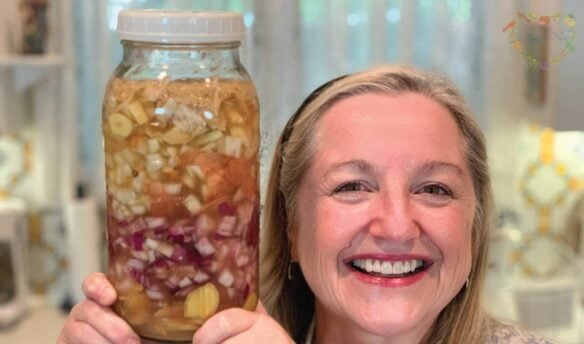
- Add all the ingredients into a quart jar, cover with vodka, and put a lid on the jar.
- Place the jar in an area out of direct sunlight for 2 weeks and shake the jar daily.
- After 2 weeks, strain the liquid from the jar. Set aside.
- Add the solids left behind to a saucepan and cover with water.
- Bring the mixture to a boil in the saucepan, then turn the heat down to low and simmer for 10 minutes.
- Allow the mixture to cool, and then strain out the liquid. Add the original batch of liquid to this second batch of liquid.
- Add 2 tablespoons of rich syrup to the liquid. (See the recipe details for how to make a rich syrup.)
- Stir everything well and then decant into a bottle with a tight-fitting cap.
- Store the bitters in a cool dark pantry.
Variations For Making Digestive Bitters Without Alcohol
If you prefer to make digestive bitters without alcohol, you can use raw apple cider vinegar instead of vodka. However, keep in mind that the shelf life will be much shorter.
And if you decide to use raw apple cider vinegar, be sure to store your bitters in the refrigerator to maintain their freshness and potency for approximately 1 year.
- Learn How to Make Homemade Apple Cider Vinegar with the Mother
- Visit the Rain Country Homestead YouTube channel to learn how to use glycerin instead of alcohol

Tips For Making Better Bitters
Want to ensure your homemade bitters turn out perfectly? Follow these essential tips:
- Keep Out of Direct Sunlight: Always store your bitters-in-the-making away from direct sunlight. This helps preserve the potency and flavor of the herbs.
- Shake Daily: Shake your bitters daily during the steeping process. This ensures the ingredients mix well and infuse properly, giving you the best possible flavor and effectiveness.
How To Store Digestive Bitters
One of the major advantages of bitters made with alcohol is their impressive shelf life. After preparing your bitters, decant them into a bottle with a tight-fitting cap and store them in a cool, dark pantry. With proper storage, your bitters can last for five years or even longer.
You can make your digestive bitters part of your Healing Pantry. For more information, learn How to Stock Your Healing Pantry and Create a Herbal Medicine Cabinet.
How to Clean Dirty Flour Sack Towels
Flour sack towels are incredibly useful for straining bitters and other food preparations, but keeping them clean can be a challenge.

Follow these simple steps to ensure your flour sack towels stay fresh and ready for your next project:
- Rinse Immediately: As soon as you finish straining, rinse the towel thoroughly to remove any remaining particles.
- Soak in Vinegar: Soak the towel in clean water with a splash of white vinegar for 12 hours. This helps break down any stubborn residues and keeps the towel fresh.
- Wash as Usual: After soaking, rinse the towel well and wash it with the rest of your kitchen dish towels.
By following these steps, you can keep your flour sack towels in top condition for all your culinary adventures.
Digestive Bitters 101 – The Ultimate Bitters Making Class
If you like the idea of making bitters, watch my How to Make Herbal Digestive Bitters recipe video. It’s a Bitters 101 full-length class!
And be sure check out my complete video playlist where I share a variety of master recipes for making herbal remedies, bitters, elixirs, tonics, and much more!
An Excellent Book All About Bitters
- If you enjoy making and using bitters, check out Bitters by Brad Thomas Parsons. This incredible resource covers everything you’ve ever wanted to know about bitters, including a plethora of recipes for creating a wide variety of bitters for every occasion. It’s a must-have for any bitters enthusiast!
The Modern Pioneer Cookbook
If you’re looking for a printed book filled with traditional foods recipes and guidance on creating a traditional foods kitchen, be sure to order your copy of my bestselling book, The Modern Pioneer Cookbook. In my book, I share my favorite bitters recipe along with a variety of recipes for what I like to call “supper foods.” It’s the perfect resource for anyone looking to embrace a traditional and wholesome approach to cooking.

Order YOUR COPY Now!
The Modern Pioneer Cookbook
Seasonal ingredients, traditional techniques, and nourishing recipes. Over 85 traditional, from-scratch recipes! Discover for yourself how you can use simple ingredients and traditional techniques to cook the modern pioneer way.
Download Your Free 36-Page Pantry List
For an extensive list of the traditional foods you can make and purchase to stock your pantry, be sure to download my free 36-page Traditional Foods Pantry List. This comprehensive eBook is full of links to recipe videos, helpful articles, and more!

Join the Traditional Foods Kitchen Academy
Are you looking for more traditional foods videos? If so, I invite you to join the Traditional Foods Kitchen Academy. Members of this optional paid YouTube community get access to exclusive videos and other members-only perks. Plus, your YouTube comments include a special members-only badge.
Kitchen Academy Videos

Are You Salt Sensitive or Salt Resistant? Get the Latest Salt Intake Research
Learn how your body may react to salt intake differently from others.

What Is the Best Time to Eat Dinner?
Find out if eating dinner early or late is best for you. You might be surprised!

Does Eating Food in a Specific Order Fight Disease?
Research suggests that the order in which we eat our food may significantly impact our health and ability to fight disease.
Stay in Touch with Mary’s Nest
- Subscribe to My YouTube Channel for Traditional Foods Videos (Free) - When you subscribe, be sure to click on the notification bell that will let you know each time I upload a new video.
- Subscribe to Mary’s Traditional Foods Newsletter (Free) - Get a free 36-page eBook for signing up: How to Stock Your Essential Traditional Foods Four-Corners Pantry.
- Join the Traditional Foods Kitchen Academy (Optional Paid) - For more detailed videos and exclusive members-only perks, join my YouTube membership community.
- Order The Modern Pioneer Cookbook (Optional Paid) - Get a printed book of Mary's nourishing recipes from a Traditional Foods Kitchen. This bestselling cookbook is published by Penguin Random House with their DK imprint.
I look forward to having you join me in my Texas Hill Country Kitchen!
Strawberry Digestive Bitters

Equipment
- 3 quart (32 oz) jars with tight fitting lids
- 1 large bowls
- 1 flour sack towel or cheecloth
- 1 Small saucepan
- 1 narrow-mouth funnel
- 1 or more Glass bottles with screw-on caps for decanting bitters
Ingredients
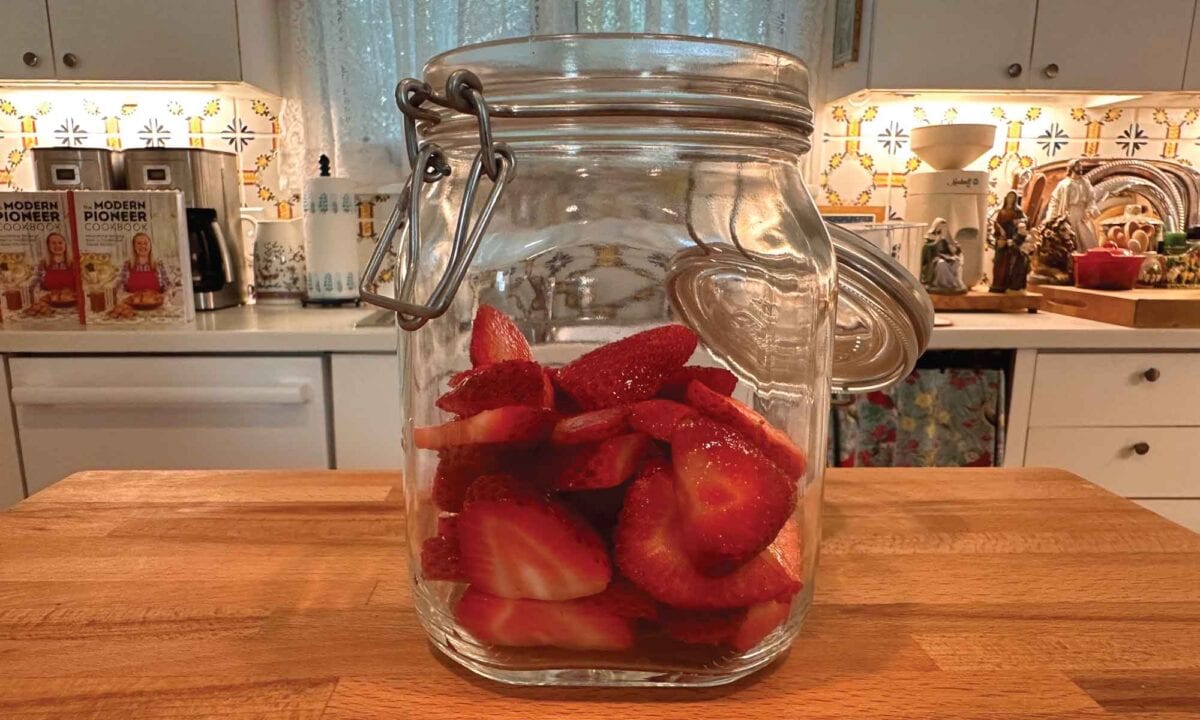
- 2 cups sliced strawberries
- 1 tbsp freshly grated ginger or 1 tsp powdered ginger
- 1 large lemon, peel only with the zest and pith save the fruit of the lemon for another recipe
- 1 4" Ceylon cinnamon stick, broken in half
- 1 vanilla bean pod, cut in half and split
- 1/2 tsp fennel seeds
- 1/2 tsp allspice berries
- 1/4 tsp black peppercorns
- 1/4 tsp whole cloves
- 2 or more cups vodka raw apple cider vinegar can be substituted
- 2 tbsps rich syrup a mixture of water and honey (See recipe instructions.)
Instructions
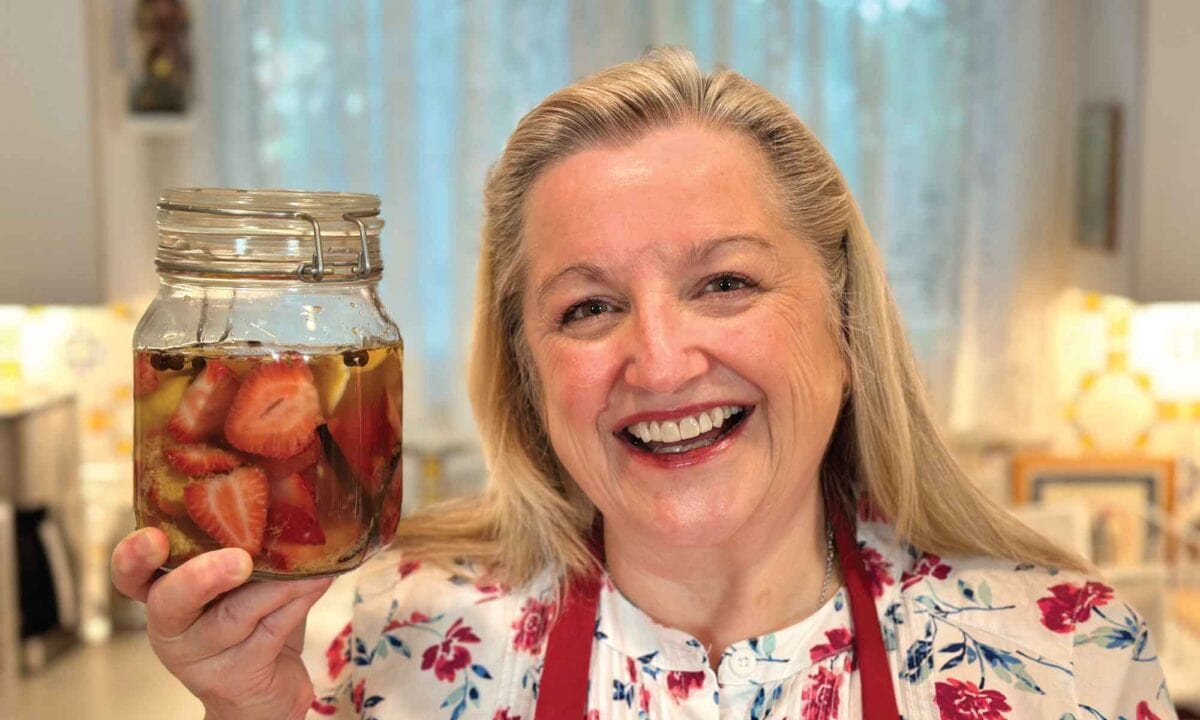
- Add strawberries to a quart jar.
- Add the cinnamon, vanilla, and all the spices to the jar.
- Add the vodka, making sure that the strawberries are completely covered. Do not worry if some of the spices float to the top.
- Put the lid on the jar and shake it. Then, allow it to steep for two weeks out of direct sunlight, shaking it daily.
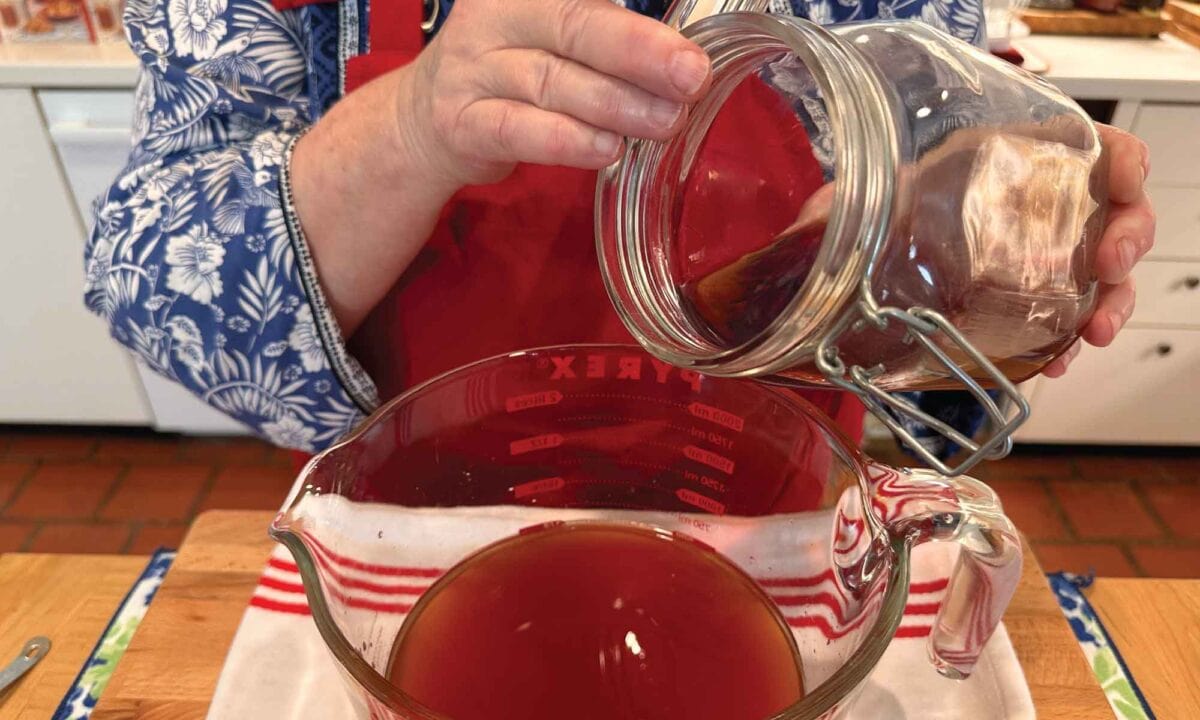
- After two weeks, rinse a flour sack towel or cheesecloth in cool water and ring it out. Lay it over a mesh strainer placed over a large bowl. Pour the strawberry mixture from the quart jar into the lined mesh strainer and allow the liquid to drain into the bowl. When it stops draining, pull the flour sack towel or cheesecloth together into a ball and squeeze out any remaining liquid.
- Take the strained liquid from the bowl and place it into a clean quart jar. Set aside.
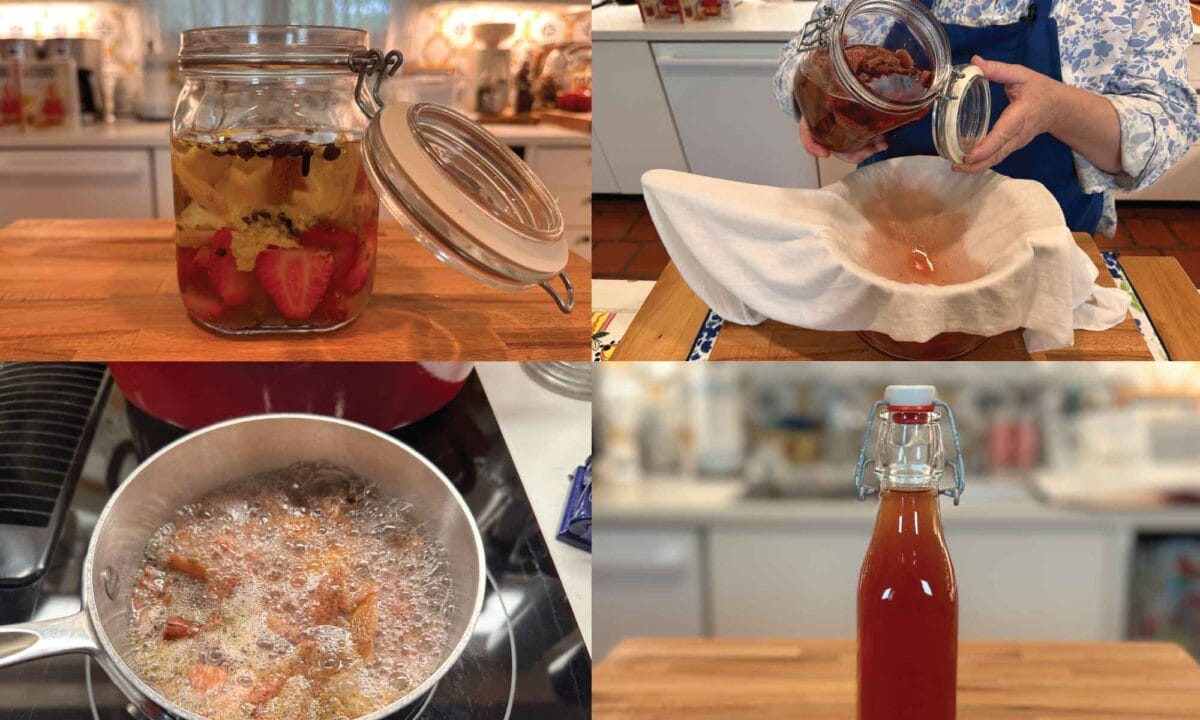
- Take the strawberry mixture from the flour sack towel and transfer it to a saucepan. Cover the contents of the saucepan with water. Bring the mixture up to a boil on high heat on the stovetop. When it comes to a boil, turn the heat down to low and cover the saucepan. Allow the mixture to simmer on low for 10 minutes.
- After 10 minutes, remove the saucepan from the stovetop and transfer it to a heatproof surface. Allow it to cool completely.
- Once the mixture has cooled completely, use a wide-mouth funnel and a ladle to transfer the strawberry mixture, including the water it was simmered in, from the saucepan to a clean quart jar.
- Set this jar aside for one week and allow it to steep, out of direct sunlight, shaking it daily.
- After one week, rinse a flour sack towel or cheesecloth in cool water and ring it out. Lay it over a mesh strainer placed over a large bowl. Pour the strawberry mixture from the quart jar into the lined mesh strainer and allow the liquid to drain into the bowl. When it stops draining, DO NOT squeeze the cloth.
- To the newly strained liquid, add the original strained liquid and stir well to incorporate. Set aside.
- Make the rich syrup: Mix 2 cups of honey with 1 cup of water. This mixture is your rich syrup, and you will need 2 tablespoons of this syrup for your bitters recipe. Refrigerate the remaining rich syrup to make other bitters or sweeten hot or cold beverages.
- Add 2 tablespoons of the rich syrup to the strained strawberry liquid. Mix well to fully incorporate the rich syrup. This liquid is your bitters.
- Use a funnel to decant the bitters into multiple small bottles or one large bottle.
- Bitters can be stored at room temperature in a cool, dark pantry or refrigerated. If alcohol has been used, the shelf life is at least 5 years. If apple cider vinegar has been used, the bitter must be refrigerated and will last approximately 1 year.
- To take the bitters, place 1/4 teaspoon under the tongue before a meal. You can use up to 1 teaspoon. Bitters can also be added to no more than 2 ounces of water and sipped before a meal. Bitters can also be taken after a meal to combat indigestion.
Video
Notes
Shop for items used in this blog post or video
Favorite Bitters Making Supplies
Favorite Kitchen Supplies
- Favorite Aprons
- Spice Grinder
- Countertop Burner (On my kitchen island in many recipe videos.)
- Handheld Vacuum Sealing System
- Vacuum Lids
- Whisk
- Silica Gel Packets (Helps keep moisture from building up in your mix)
- Cast Iron Dutch Oven
- 8-Quart Slow-Cooker
- Fat Separator (Clever kitchen device to help you decant bone broth)
- Flour Sack Towels
- pH Strips (Helps you check on the acidity of your vinegar)
Amazon Shop and Shopping Guide
- Visit Mary’s Nest Amazon Shop
- Visit my Shopping Guide page
Get up to 15% off for stocking your Traditional Foods Pantry and equipping your Modern Pioneer Kitchen, including discounts from US Wellness Meats, Farmhouse Teas, Lehman's, Masontops, Cultures for Health, Survival Garden Seeds, Redmond Real Salt, Plan to Eat, and More!
Recommended Reading
- The Modern Pioneer Cookbook
- Nourishing Traditions
- Bitters: A Spirited History of a Classic Cure-All, with Cocktails, Recipes, and Formulas
- Books written by or about Hildegard Von Bingen:
Disclaimer:I am not a medical doctor, a medical professional, a dietician, or a nutritionist. All content found on the MarysNest.com website, including text, images, videos, eBooks or eGuides, social media, or other formats, were created solely for informational purposes only. The content is not intended to be a substitute for professional medical advice, diagnosis, or treatment. Always seek the advice of your physician or other qualified healthcare provider with any questions you may have regarding a medical condition or proper nutritional advice. Never disregard professional medical advice or delay in seeking it because of something you have watched in a video or read on this website. Use caution when following the recipe in this video. The creator and publisher of this video and website will not be held responsible for any adverse effects that may arise from the use of this recipe and method or any other recipe and method on this website or corresponding video channel.