Affiliates note: As an Amazon Associate I earn from qualifying purchases. My content may contain affiliate links to products and services. If you click through and make a purchase, I'll receive a small commission. It does not affect the price you pay.
Salt Rising Bread Recipe – Step by Step Tutorial
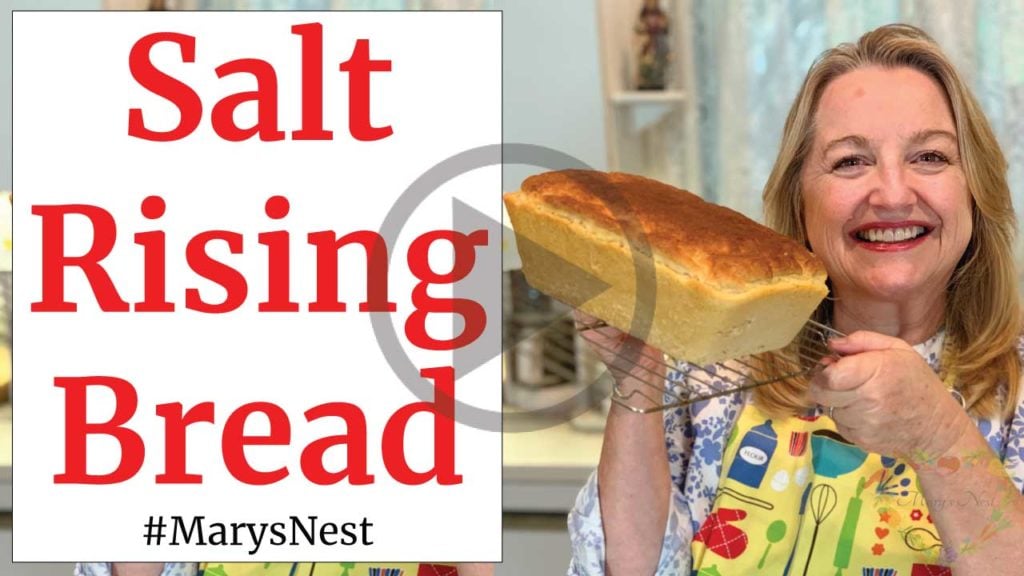
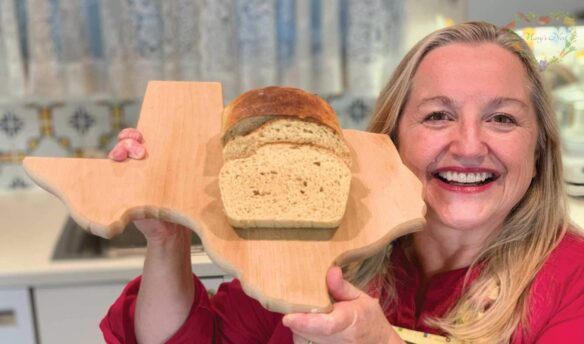
In this video, I show you How to Make Salt Rising Bread. It’s an easy Recipe and I walk you through the process with a Step by Step Tutorial. You’ll love this delicious and unique bread that is native to the Appalachian Mountains area and dates back to the mid to late 1700s.
A Surprise for Even the Experienced Baker
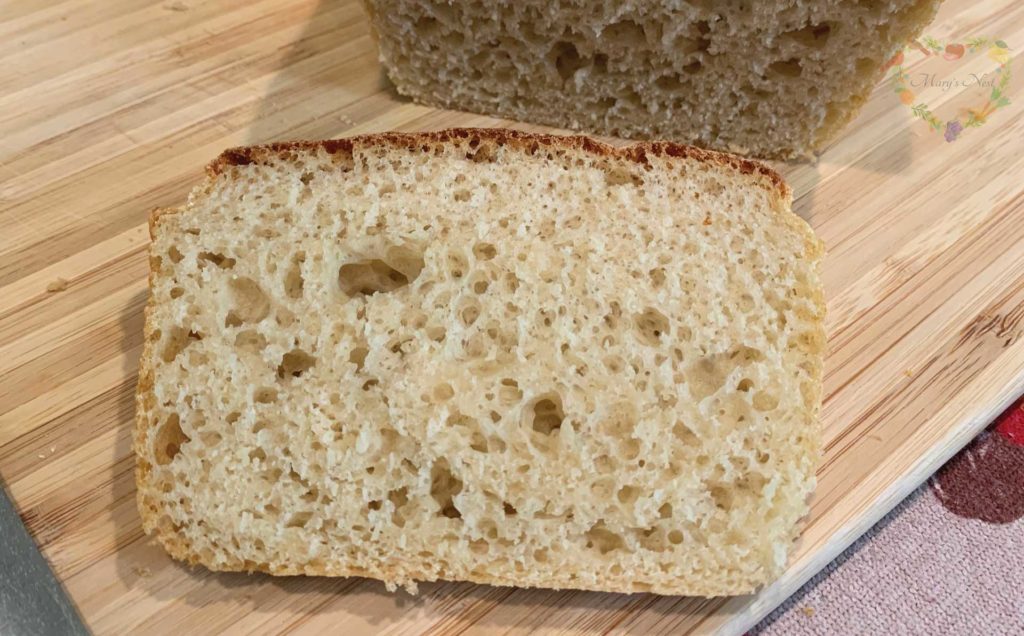
Even if you are an experienced bread baker, you might be surprised by this recipe. It uses neither commercial yeast nor sourdough starter. Yet the dough will rise beautifully thanks to a fermentation starter! And it will develop into a delightful country white bread with a wonderful crumb. Plus, this bread will have a cheesy taste and aroma. But there is no cheese in it! Toast and then spread with butter and homemade jam, and you will turn this bread into an irresistible snack. It also makes the best grilled cheese sandwiches!
A Treasured Family Recipe
Food historians theorize that Pioneer women living in the Appalachian Mountains developed Salt Rising Bread. And the earliest recipe dates back to the 1750s. As a matter of fact, my father-in-law’s family, native to the mountains of West Virginia, has been making this bread for centuries now!
Unfortunately, bakers don’t turn to this recipe as commonly as they once did. I don’t want this recipe lost to history. Instead, I want to share this recipe and keep it alive by teaching others how to make it. Most importantly, I want to honor my father-in-law’s memory by preserving this fascinating traditional food.
The Importance of Preserving Traditional Foods
It’s so important to preserve recipes such as Salt Rising Bread as well as other recipes for making traditional foods. They contain both historical and nutritional value! Above all, from these recipes, we learn about the wonderful ingenuity of pioneer woman.
For instance, they never wasted anything and made use of everything to create nourishing meals for their families. And often with very limited supplies! We can cherish their memory and hold them in our hearts with admiration by preserving the recipes they developed.
Let’s Get Baking
Salt Rising Bread starts by making a simple starter with the most basic of ingredients: Potatoes or cornmeal. If you decide to use cornmeal, you don’t need anything fancy. Plain old degerminated cornmeal from your local grocery store will work just fine. You may already have it in your pantry. If you don’t have cornmeal, just grab a potato.
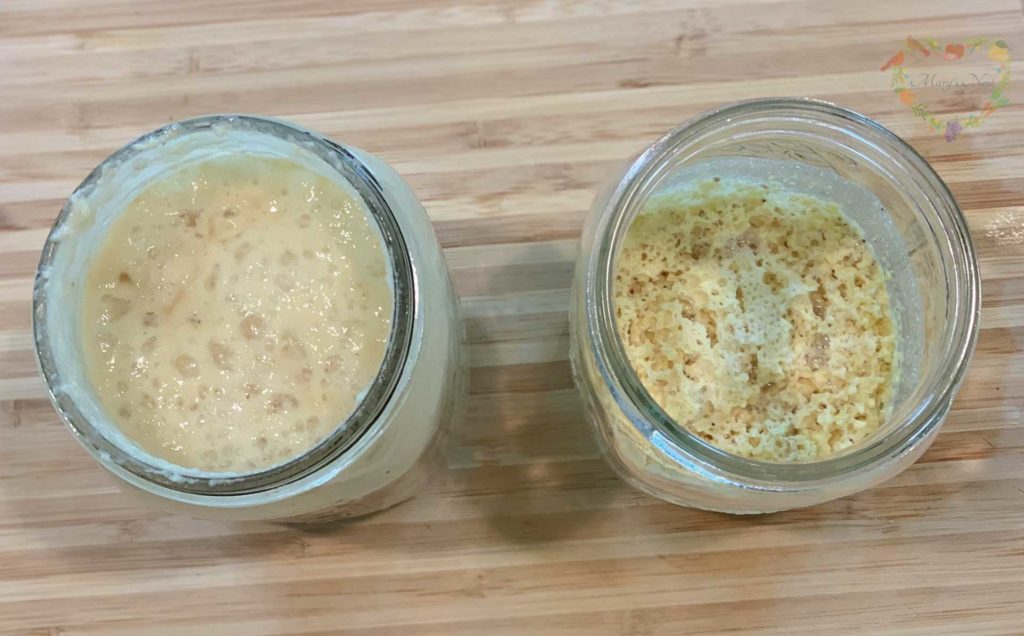
Next, find a quart-sized jar. Fill the jar with a bit of cornmeal or some sliced potato and few other ingredients and that’s it. Your starter will be bubbling before you know it! And you’ll know that you’ve been successful if, within a few hours, there is the makings of a strong aroma reminiscent of some rather “stinky” cheese! 😉
Learn the History Surrounding This Unique Bread
If you would like to learn more about this unusual bread and its history, check out Salt Rising Bread, the book that created renewed interest in this fascinating traditional food. The authors are Genevieve Bardwell and Susan Ray Brown, two women who are native to the Appalachian Mountains area.
These lovely ladies have dedicated their time and talent to studying this beloved bread that they grew up eating. And now, as adults, they have been baking this bread for years. They even opened a bakery, The Rising Creek Bakery, which not only sells the bread locally, but ships it all over the United States!
More Naturally Risen Breads
Once you’re ready to try your hand at other naturally risen breads, be sure to check out my video where I share How to Make a Foolproof Sourdough Starter. Then you can give your hand a try at making Traditional Sourdough.
If you’re in a hurry, I’ve got you covered. Give my Fast Sourdough a try when time is short. And when you’re ready to branch out into baking with whole grains, be sure to try my Spelt Sourdough. It’s easy to make and has a wonderfully rustic sweet flavor that only whole grains can provide.
Stay in Touch with Mary’s Nest
- Subscribe to My YouTube Channel for Traditional Foods Videos (Free) - When you subscribe, be sure to click on the notification bell that will let you know each time I upload a new video.
- Subscribe to Mary’s Traditional Foods Newsletter (Free) - Get a free 36-page eBook for signing up: How to Stock Your Essential Traditional Foods Four-Corners Pantry.
- Join the Traditional Foods Kitchen Academy - For more detailed videos and exclusive members-only perks, join my YouTube membership community.
- Order The Modern Pioneer Cookbook - Get a hardcover book of Mary's nourishing recipes from a Traditional Foods Kitchen. This bestselling cookbook is published by Penguin Random House with their DK imprint.
- Order The Modern Pioneer Pantry - Get Mary's latest hardcover cookbook about preserving food and making delicious meals from your Four Corners Pantry. Mary's second cookbook is also published by Penguin Random House.
I look forward to having you join me in my Texas Hill Country Kitchen!
I’d like to receive more tips and recipes from Mary’s Nest.
Salt Rising Bread
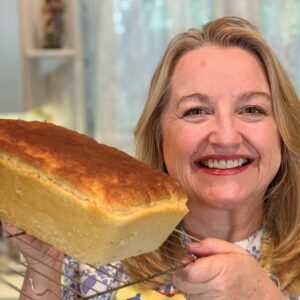
Ingredients
Potato Starter
- 1 Idaho potato, sliced
- 2 tablespoons White cane sugar
- 1 heaping teaspoon Baking soda
- 1/4 teaspoon Salt
- 3 tablespoons All-purpose flour
- Boiling water
Cornmeal Starter
- 2 tablespoons Cornmeal germinated or degerminated
- 1/4 teaspoon Baking soda
- 1/4 teaspoon Salt
- 1 tablespoon All-purpose flour
- 1 cup Scalded whole milk
Sponge
- Potato starter or cornmeal Starter
- Warm water
- All-purpose flour
Salt Rising Bread
- Sponge
- All-purpose flour
Instructions
Potato Starter
- Add enough sliced potato to a quart-sized jar to fill the jar halfway.
- To the jar, add the remaining potato starter ingredients and then pour the boiling water into the jar to fully cover the potatoes.
- Cover the jar with plastic wrap and put a slit in the plastic wrap at the top.
- Place the jar in a warm area that can maintain a temperature between 105-110 degrees Fahrenheit. An electric oven with the light on can work well.
- Allow the starter to ferment. This will take between 8-12 hours. It will become bubbly and foamy. (See recipe video.)
Cornmeal Starter
- Put all the dry cornmeal starter ingredients into a quart-sized jar and then pour in the scalded milk. Stir well.
- Cover the jar with plastic wrap and put a slit in the plastic wrap at the top.
- Place the jar in a warm area that can maintain a temperature between 105-110 degrees Fahrenheit. An electric oven with the light on can work well.
- Allow the starter to ferment. This will take between 8-12 hours. It will become bubbly and foamy. (See recipe video.)
Sponge
- To make the sponge, pour the starter of your choice into a large bowl and add 1 cup of water. Stir well.
- To this bowl, add enough all-purpose flour to make a loose batter that’s similar to a pancake batter.
- Cover the bowl with plastic wrap or a dish towel and return to a warm place between 105-110 degrees Fahrenheit.
- Allow the sponge to ferment for approximately 2-3 hours. It should be bubbly and foamy in appearance. Do not allow it to over ferment and go flat, losing the bubbly and foamy appearance.
Salt Rising Bread
- Grease two bread loaf pans with butter and set aside.
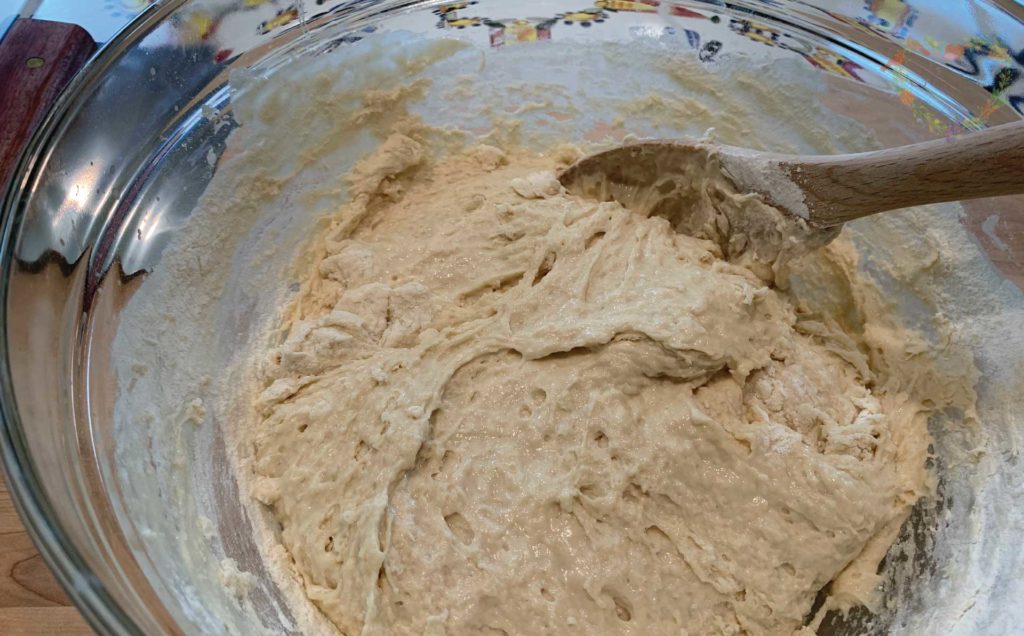
- To make the Salt Rising Bread, add enough all-purpose flour to the sponge to create a wet shaggy dough.
- Pour this dough out onto a well-floured board and begin to knead lightly, incorporating the flour until the dough is no longer sticky. This should take no more than a minute to do. Do not over knead the bread.
- Use a knife of bench scrape to cut the dough in half. Shape each half into an oblong loaf. One at a time, place one loaf into a prepared loaf pan.
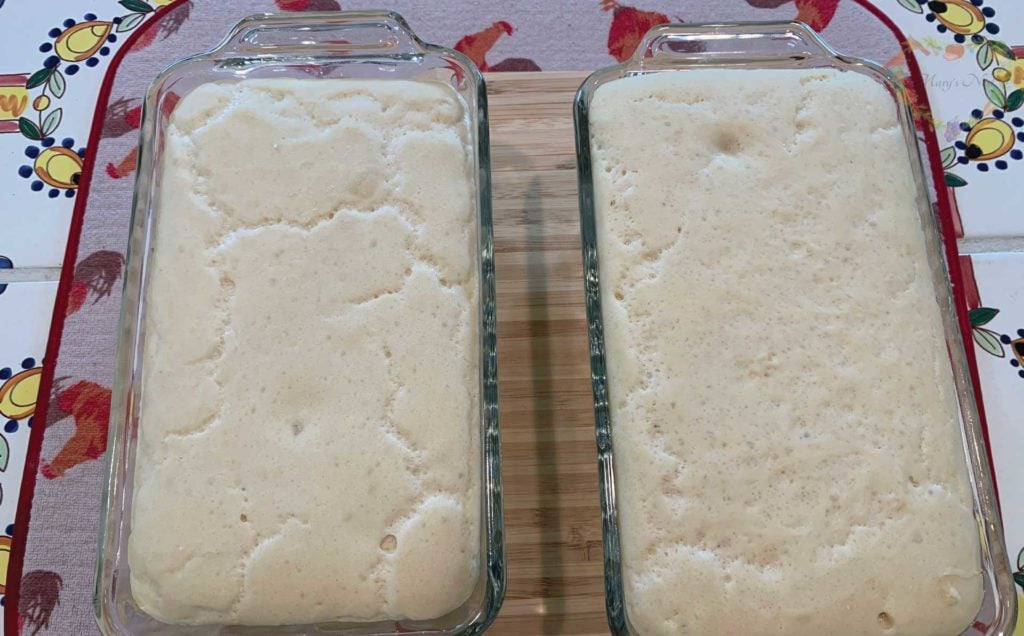
- Return the loaves to the warm place between 105-110 degrees Fahrenheit. Allow the loaves to rise in their loaf pans until they reach the rim of the loaf pan. This can take between 1-3 hours.
- Once risen, remove the loaves from the warm place (if they are in the electric oven) but keep the loaf pans warm by covering them with a dish towel.
- Preheat the oven to 400 degrees Fahrenheit. When the oven reaches the proper temperature, place the loaf pans on the middle rack of the oven.
- Bread should bake for approximately 30 minutes. Once the tops are golden brown, the bread is ready.
- Remove the loaf pans from the oven using oven mitts or pot holders and transfer to a cooling rack.
- Allow the loaf pans to cool enough so that they can be handled comfortably. Remove each loaf of Salt Rising Bread from their respective loaf pans and place the bread onto a cooling rack.
- Allow the bread to cool completely before slicing.
Video
Notes
Nutrition
Shop for items used in this blog post or video
- Visit Mary's Nest Amazon Shop
-
Visit my Shopping Guide page
Get up to 15% off for Stocking your Traditional Foods Pantry and Equipping your Modern Pioneer Kitchen, including discounts from US Wellness Meats, Mockmill Grain Mill, Masontops, Cultures for Health, Survival Garden Seeds, Redmond Real Salt, Plan to Eat, and more!
Items mentioned in this video:
Affiliates note: As an Amazon Associate I earn from qualifying purchases. My content may contain affiliate links to products and services. If you click through and make a purchase, I’ll receive a small commission. It does not affect the price you pay.
Disclaimer:I am not a medical doctor, a medical professional, a dietician, or a nutritionist. All content found on the MarysNest.com website, including text, images, videos, eBooks or eGuides, social media, or other formats, were created solely for informational purposes only. The content is not intended to be a substitute for professional medical advice, diagnosis, or treatment. Always seek the advice of your physician or other qualified healthcare provider with any questions you may have regarding a medical condition or proper nutritional advice. Never disregard professional medical advice or delay in seeking it because of something you have watched in a video or read on this website. Use caution when following the recipe in this video. The creator and publisher of this video and website will not be held responsible for any adverse effects that may arise from the use of this recipe and method or any other recipe and method on this website or corresponding video channel.
Hello Mary, I ate a lot of salt rising bread when I was growing up here in WV. I really like salt rising toast. There was a Wilson bakery in Clarksburg WV that made it, and it was on all the grocery shelves in the area. Loved it. They made all different breads too, white, pumpernickel, Hot dog and hamburger buns. It was a regular commercial bakery.The people that ran that bakery got old and it closed down. Their salt rising was just as consistent from loaf to loaf as the other varieties. I returned from the service and my grandmother could make good Salt rising also but after she passed it seemed to be a lost thing at our house. One day I decided to try to make it. Lots of failures until one day I bought a Sovs Vide immersion circulatory heater.. I decided to try your starter recipe so I used a 1/2 gal mason jar, doubled the recipe and put it in the kettle with the Sovs Vide heater in water and set it at 107 degrees. 12 hours later it was foaming out of the jar. I strained it through a cullender and made the sponge. added 4 cups of water and enough flower to make the sponge. put it in 3 -1/2 gal. jars and back into the 107 degree water in the Sovs Vide. 40 minuets later it was bubbling out of the jars. Mixed it with enough flower and followed your directions and ended up with 4 loaves of salt rising bread. That Sovs Vide cooker was the trick. I usually start the starter about 10 pm and before noon on the next day it is ready to make the sponge. The Sovs Vide is the real trick to keeping everything at the right temperature. I have been using your recipe for about 4 years. Brings back old memories and makes some new experiences for others. Thank You for helping me experience some of the good old days again.
Hi Alan,
Thanks so much for your detailed comment. I love hearing how you used the Sovs Vide, and I’m so happy that my recipe brought back good memories. I always think of my father-in-law and West Virginia when I think of salt rising bread.
Thank you again for sharing this with me and with all of our sweet friends!
Love and God bless,
Mary
Hi Mary.
Some years ago I tried to bake salt rising bread – total flop!! Never tried again. I have been baking bread – sourdough – for a while but salt rising was a challenge I wanted to complete. So I started surfing (Internet) and found you recipe and wonderful easy instruction.
The 1st two loafs turned our wonderful. Then I tried another batch and the dough is not rising. I have a bread proof feature on my gas oven and used that in the 1st batch and it worked fine.
So what am I doing wrong with the 2nd batch?
Your recipe is now on my computer for easy access because I fell in love with the taste.
Hi Barbara, So happy the first batch turned out great. I think the starter likes the temp of your gas oven bread proof setting. As to the second batch – it’s hard to say. Was the weather outside different? That can effect the rise some time. Salt Rising Bread can be so persnickety! Keep experimenting. Love, Mary
Hello! I have a question. Is there a risk of dangerous bacteria growth in the starter? My starter didn’t develop in the first twelve hours, but I decided to keep going. The light in my oven died so the started dropped to 64 degrees overnight! I warmed it this morning and it’s finally starting to develop the cheesy aroma and bubbles that I’ve seen before in a salt rising bread starter. My question is, is this starter dangerous to use if it’s been our WAY longer than the recipe states and has not kept a steady warm temperature? I’m excited to try this bread again but I’m nervous I’m going to make myself sick! Thank you.
hi Emma, Oh dear! I’m really not sure!! I wish I had a better answer. Love, Mary
Such a good video. I live in the UK and Salt Rising Bread is unheard of here. However i’m an avid sourdough baker so through my love of baking with wild yeast I got to hear of this unique and not very well known bread. I do have some questions though.
What is the purpose of the soda in the starter? Soda can be added as a leavener but since we want the leavening to come from the bacteria then why add the soda? And I’m sure bicarbonate of soda wasn’t available in the late 18th Century.
I would like to make a gluten free version if possible and use sorghum and/or rice flour for the starter as well as the final bread which will have some tapioca starch and psyllium husks. Do you think this is possible?
Hi Abe, Thank you for the kind words! All great questions! As to the soda – I’m not sure. I was just following recipes handed down to me by husband’s family. You could try leaving it out. As to the gluten free approach – it’s definitely worth experimenting with. Keep me posted. Love, Mary
First of all I LOVE your site! Your directions are so clear and the video was extremely helpful. I have fond childhood memories associated with Salt Risin’ Bread. Old King Cole Bakery was on Peachtree Street in Atlanta, GA and my Mom would occasionally pick up a loaf when she was making a trip to the wholesale floral supply houses in Atlanta. I have tried before to make the bread but never could get the starter to work. I recently had some success with a cornmeal starter but the texture was not what I remembered. Your method for the potato starter was a total success! I suspect that I never got it the right temperature before but you made it very clear how essential that is. I used an infrared thermometer gun to check it routinely to be sure it was staying consistent. I got my first two loaves of bread done… delicious…and then my curiosity got the best of me. (Good thing I’m not a cat…I’d be killed by now!) I wondered how it would work to use the potatoes again… what’s to lose but a few cents worth of ingredients, right? So I put the starter ingredients in the jar with the same potatoes and put it back in the warm place. Within an hour and a half, the starter was bubbling over out of the jar so I mixed the sponge. It was foamy in just over an hour so I made another two loaves. Well…you guessed it…tried it a third time and it wasn’t quite as fast as the second time but my warm spot was occupied by the two loaves of bread that were rising. With the third batch, I made one regular loaf, added handfuls of shredded sharp cheese to another, and made a pan of rolls that came out kind of flat and a little crispy on the edges. They were delicious! My husband ate almost the whole pan. I quit after the third batch…didn’t know what to do with any more bread!
Thanks for the inspiration and the wonderful tutorial.
Carolyn
Hi Carolyn, Thank you so much for sharing all of this!! Are you in our FB group – Mary’s Nest Modern Pioneers: https://www.facebook.com/groups/171869080205145/?source_id=210509998974645 Come join us. Love, Mary
Hi Mary
My sister is coming for a visit and this will be one of the things we plan to do while she is here. We grew up eating this bread and loved it so much. Our grandmother lived next door and made this all the time and taught our mother how to make it. We lived in North Carolina and now live in Virginia. Their recipe uses both the potatoes and cornmeal and we were wondering if the cornmeal had to be plain or could we use self rising cornmeal? We definitely remember the smell and mama always said, ” the worse it stinks the better the bread.” Thank you for your time.
Janet
Hi Janet, I think any cornmeal will work. Keep me posted. Are you in our FB group – Mary’s Nest Modern Pioneers: https://www.facebook.com/groups/171869080205145/?source_id=210509998974645 Come join us. Love, Mary
Dear Mary,
Thank you so very much for your written recipe and video tutorial! I live in Indiana and had salt rising bread as a child, but we purchased it from the local bakery. So, so good! Well, as in many parts of the country, local bakeries have become a thing if the past with only the large chains having their own bakeries, which do not measure up.
I’m looking forward to digging in to this recipe! Again, thank you so very much for the recipe and tutorial.
Sincerely,
I took the time this weekend to try your salt-rising bread recipe and I’m in love. My husbands family is from central NY state and they have been eating this for generations but over time the convenience of buying it at the local store meant that the recipe and techniques were lost. For years I’ve been meaning to try it, but have heard that it can be a bit temperamental and the time commitment, though easy, had to be just right. Well this is certainly a labor of love and I must admit it took some trial and error after my first starter failed, but I quickly learned that my oven light isn’t warm enough but the warmer zone on my stovetop can get the perfect temperature right below medium. The house is full of that “stinky cheese” smell but I couldn’t be more proud that our late 1800s farmhouse is perhaps smelling how it once did many many years ago. Thank you for this recipe and thank you more for the video which I watched no less than a dozen times in the process. We’ll be putting this recipe in safe keeping for years to come. Delicious.
Oh Kristine!! I was so happy to read your comment!! And glad to hear that you embraced the “aroma” and didn’t find to off-putting! Yes, like the 1800s indeed!! Love, Mary
Hi Mary, I have tied five times to make your Salt Rising Bread and it fails every time… What am I doing wrong??
Hi Barbara, you are not doing anything wrong. Salt rising bread is very very very persnickety! Even many of my father-in-law‘s relatives have given up trying to make it. Being able to keep it at a certain warm temperature is very important. Variables in the temperature can affect the starter. I am so sorry you are struggling with it. You may want to give it one more try and then maybe try some of my other breads instead. Love, Mary❤️🤗❤️
I have so many questions to ask you, hope you don’t mind. I live in the most beautiful state –WEST VIRGINIA!!!! I lived in Florida for 5 years and couldn’t wait to get back to my beloved WV. I am 83 and love salt risin bread, however my mother never had to make it at we could buy it in local stores here in Bluefield. I have tried to make this bread so many times and have had very little success. I found a lady in Lewisburg, WV and ordered several loaves from her, it was good but did not have that strong
foul smell to taste to it. Just how can I make the smell very strong smelling. I don’t mind the smell because I know that I will end up with that delicious bread. I feel that the stronger the foul smell the better the bread taste. I love to make what my mother called “wet toast” which was made by putting a good spread of butter on the bread before toasting. Oh, my there is no better bread than that.
I watched a video on youtube some years ago and it was showing an elderly gentleman making salt risin bread step by step. I loved the video and searched for it when I found your site. The video was made by his daughter. That dough was like puddy in his hands! Could that have been your father-in-law? Since you live in Texas which is quite a distance from WV, are you able to sell your bread and mail it such a distance? If you do, please send me the information on how to order it. Thank you so much for your video and for sharing your recipe – the one I had was a little bit different but just the soda. Looking forward to hearing from you.
Hi Patricia, Thank you so much for your lovely comment! I don’t sell my bread but I am flattered that you asked!! As to that video with the older man – no that was’t my FIL. He loved the bread but left it to us ladies to bake it!! LOL!! My starter was VERY stinky!! So if you follow what I did, you may be able to re-create the bread you love and remembered. Thank you so much for sharing your memories. I love reading comments like this!!
Do you enjoy making other traditional foods? If so, I have a playlist of some of my videos titled “Mastering the Basics of Traditional Nutrient Dense Foods Cooking”. It’s a series of 15 detailed videos that covers How to Make Bone Broth, Cultured Dairy, Ferments, Sourdough Starter (my foolproof stater), Sourdough Bread, Soaked and Sprouted Nuts and Beans, and How to Soak and Sprout Grains to Make your own Sprouted Flour at Home. You can watch it here: https://www.youtube.com/playlist?list=PLkRuW3pBo2U3b4eu0QraZReKlGzA11h3y And please share the playlist with any other folks you think might be interested in learning about these types of things. I’m passionate about the book Nourishing Traditions by Sally Fallon (of the Weston A Price Foundation) and want to help as many people as I can learn how to make Traditional “Nutrient Dense” Foods.
Please let me know if you have any questions. I’m so happy to help! And I’m SO glad you’re here!! Love and God Bless, Mary❤️😘❤️
PS – Do you know about our FB group? It’s called Mary’s Nest Modern Pioneers. Come join us! We have a lot of fun chatting about Traditional Foods: https://www.facebook.com/groups/171869080205145/?source_id=210509998974645
Hi! I made your salt-rising bread (potato starter version) today, and I must say it is wonderful! Thank you! I’d made salt-rising bread many years ago, using a different recipe, with mixed results. This batch of bread was quite mild in flavor, only a hint of cheese taste, which was surprising but nevertheless very nice, tasty, bread. Interestingly, the final rise, in this case, was considerably more than I expected. The breads nearly overflowed the pans — when I checked after an hour + 45 minutes, I had to swiftly deflate the tops and heap the dough back up into the pans 😉 Nevertheless, the breads came out fine. Next time I will use larger pans! I’m going to try the corn meal version next week and see if that is more pungent 😉
Warm Regards,
JcP
Hi Michele!! Oh my goodness!! I just saw this comment!! Wow – thanks for sharing that story – that is really something!! Love, Mary
Thanks for the detailed tutorial. I am writing a story set in historical Appalachia, so I wanted to know how to make this bread. I tried twice with another recipe, and the starter wouldn’t take off (still smelled only of cornmeal and milk after 12 hours). I used your cornmeal starter, and it was ready in about 12 hours. I set my bowl on a heating pad on medium, and the temp was at 104 when I checked. The smell is very unpleasant to me, more Petri dish than socks. I had to open some windows and turn on the exhaust fan for the baking. The recipe performed exactly as you showed, and the bread turned out great. The cheesy aroma has taken over now. I didn’t eat this bread as a child, so no memories to compare. I think your technique is a winner.
Hi Alice, Thank you so much for this wonderful comment. I am so happy that it all turned out OK. Yes – the smell is something isn’t it! LOL!! I am so impressed to hear about this book you are writing. Please let me know when it will be published as I would love to buy a copy. As I mentioned in the video, my Father in Law grew up in the Appalachia Mountains so that part of the country – and books about it – hold a special place in my my and my husband’s heart! BTW – have you read Wish You Well by David Baldacci? It’s a wonderful family oriented story about that part of the country.
BTW – Do you enjoy making other traditional foods? I have a playlist of my videos titled “Mastering the Basics of Traditional Nutrient Dense Foods Cooking”. It’s a series of 15 detailed videos that covers How to Make Bone Broth, Cultured Dairy, Ferments, Sourdough Starter (my foolproof stater), Sourdough Bread, and How to Soak and Sprout Grains to Make your own Sprouted Flour at Home. You can watch the VIDEOS here:
https://www.youtube.com/watch?v=qCWcFsG-Np0&list=PLkRuW3pBo2U3b4eu0QraZReKlGzA11h3y
Also, I wanted to let you know that if you are also interested in making bone broth, I buy my bones from US Wellness Meats. Be sure to go to the “shopping guide” on my webpage where I have a special link and 15% off discount code for US Wellness Meats: https://marysnest.com/shopping-guide/
Oh…one more thing…Do you know about our FB group? It’s called Mary’s Nest Modern Pioneers. Come join us! We have a lot of fun chatting about Traditional Foods:
https://www.facebook.com/groups/171869080205145/?source_id=210509998974645
Please let me know if you have any questions. I’m so happy to help! And I’m so glad we’re on this Traditional Foods Journey together!!
Thank you again for writing to me!
Love, Mary
Thanks you for your video and recipe. We grew up in Western NY State and have enjoyed salt rising bread as children but can’t get it anymore. The salt rising bread available is made with yeast and it doesn’t taste the same. I’m going to try your recipe!
Hi Randy,
Thanks so much for commenting! Glad to hear that you are familiar with Salt Rising Bread. Hope this recipe works out for you. Keep me posted!
BTW – Do you enjoy making other traditional foods? I have a playlist of my videos titled “Mastering the Basics of Traditional Nutrient Dense Foods Cooking”. It’s a series of 15 detailed videos that covers How to Make Bone Broth, Cultured Dairy, Ferments, Sourdough Starter (my foolproof stater), Sourdough Bread, and How to Soak and Sprout Grains to Make your own Sprouted Flour at Home. You can watch the VIDEOS here:
https://www.youtube.com/watch?v=qCWcFsG-Np0&list=PLkRuW3pBo2U3b4eu0QraZReKlGzA11h3y
Also, Do you know about our FB group? It’s called Mary’s Nest Modern Pioneers. Come join us! We have a lot of fun chatting about Traditional Foods:
https://www.facebook.com/groups/171869080205145/?source_id=210509998974645
Please let me know if you have any questions. I’m so happy to help! And I’m so glad you’re here!!
Thank you again for commenting!
Love, Mary
I made your salt rising bread today. It tastes amazing. I have tried it before but never had the starter turn out. After a major boo boo ( I skipped the turn the sponge into dough step. ooooops) by pouring the sponge onto the bread board. What a mess. I managed to scrape enough back into bowl to make enough dough for 1 loaf and after a major clean up kneaded the dough and let it rise as per the recipe Hubby liked it after it was baked but thought it smelled awful before that. Funny thing is that he is a born and bred West Virginian and never eaten it where as I am a Michigander and remember eating it as a child. Thank you for your recipe it brings back wonderful memories
Hi Tammy,
Thank you so much for sharing your Salt Rising story with me. I am so happy that it turned out great! Yes, it has quite the odor before baking it!! LOL!! But what a great taste afterwards! Glad your hubby liked it!!
BTW – Do you enjoy making other traditional foods? I have a playlist of my videos titled “Mastering the Basics of Traditional Nutrient Dense Foods Cooking”. It’s a series of 15 detailed videos that covers How to Make Bone Broth, Cultured Dairy, Ferments, Sourdough Starter (my foolproof stater), Sourdough Bread, and How to Soak and Sprout Grains to Make your own Sprouted Flour at Home. You can watch the VIDEOS here:
https://www.youtube.com/watch?v=qCWcFsG-Np0&list=PLkRuW3pBo2U3b4eu0QraZReKlGzA11h3y
Also, Do you know about our FB group? It’s called Mary’s Nest Modern Pioneers. Come join us! We have a lot of fun chatting about Traditional Foods:
https://www.facebook.com/groups/171869080205145/?source_id=210509998974645
Please let me know if you have any questions. I’m so happy to help! And I’m so glad you’re here!!
Thank you again for commenting!
Love, Mary
Hi Mary, I made your salt rising bread recipe and it’s delicious! I’m just wondering if the potato starter can ferment longer than 12 hours?
Hi Stella, Thanks so much for your comment. Glad to hear that you made Salt Rising Bread. As to your question – I’m not sure. I have never let it go more than 12 hours. I’m not sure if would rise – and then fall – not unlike a sourdough starter. You might need to experiment. I will too. Keep me posted.
Do you enjoy making other traditional foods? If so, I have a playlist of some of my videos titled “Mastering the Basics of Traditional Nutrient Dense Foods Cooking”. It’s a series of 15 detailed videos that covers How to Make Bone Broth, Cultured Dairy, Ferments, Sourdough Starter (my foolproof stater), Sourdough Bread, Soaked and Sprouted Nuts and Beans, and How to Soak and Sprout Grains to Make your own Sprouted Flour at Home. You can watch it here: https://www.youtube.com/playlist?list=PLkRuW3pBo2U3b4eu0QraZReKlGzA11h3y And please share the playlist with any other folks you think might be interested in learning about these types of things. I’m passionate about the book Nourishing Traditions by Sally Fallon (of the Weston A Price Foundation) and want to help as many people as I can learn how to make Traditional “Nutrient Dense” Foods.
Please let me know if you have any questions. I’m so happy to help! And I’m SO glad you’re here!! Love and God Bless, Mary❤️😘❤️
PS – Do you know about our FB group? It’s called Mary’s Nest Modern Pioneers. Come join us! We have a lot of fun chatting about Traditional Foods: https://www.facebook.com/groups/171869080205145/?source_id=210509998974645