Here is an easy recipe for how to make a no knead sourdough Rye Bread. The sourdough starter and an overnight rise do all the work!

Affiliates note: As an Amazon Associate I earn from qualifying purchases. My content may contain affiliate links to products and services. If you click through and make a purchase, I’ll receive a small commission. It does not affect the price you pay.
Table of Contents
- Sourdough Rye Bread’s Amazing Flavor
- An Overnight Rise Does All the Work
- Learn More About Rye and Wheat Berries
- Grind Your Own Flour with the Mockmill
- Sourdough Starter Recipes
- What to Do with Discarded Sourdough Starter
- More Sourdough Bread Recipes
- Join the Traditional Foods Kitchen Academy
- Sourdough Rye Bread Recipe
- Shop for items used in this blog post or video
Sourdough Rye Bread’s Amazing Flavor
If you like sourdough—and you like rye—this bread will become your new favorite. The flavor of the rye shines through, but the sourdough adds a bit of tang that those of us who love sourdough can’t get enough of!
An Overnight Rise Does All the Work
The best thing about making traditional sourdough breads is that the overnight rise lends an amazing flavor to the bread. But by making this a no knead bread, we streamline the process by letting the “kneading” take place overnight while the flavor is developing.
How is this achieved? All it takes is making a very loose and sticky batter. The extra liquid makes all the difference, and it starts by activating the gluten. Gluten is a wheat protein—actually two proteins, glutenin and gliadin—that combine and form what we call gluten.
But in order to be activated, gluten needs to be wet. Withholding water from dough deters gluten’s development. To really maximize gluten’s development, you want to add enough water to create a wet sticky dough.
Reasons to Encourage Gluten Development
We want to encourage this development of gluten because the more we develop the gluten, the better the rise of the bread and the lighter the consistency of the crumb. You can cause gluten to develop by kneading the dough for 10 minutes or more, but the easier way is to simply add a bit more water than a normal bread dough batter would call for and then let the dough rest at room temperature for anywhere from 12-18 hours. Voila! You’ve created perfectly developed gluten and no knead to…knead!
If you want to slow things down even further, you can refrigerate your dough and let it rise in the refrigerator for anywhere from 24-36 hours. This delay allows you to bake the bread on your schedule. No knead breads offer a great deal of flexibility!
Learn More About Rye and Wheat Berries
Have you ever wondered what the difference is between ancient grains (such as Einkorn, Spelt, and Kamut) and modern-day wheat? And how about Rye? If so, be sure to check out the following videos where I talk about the history of these grains and how they are best used for baking. I’ll also show you how to make traditional Rye Bread Kvass.


Grind Your Own Flour with the Mockmill
To make my Sourdough Rye recipe, you can use rye flour, but if you feel adventurous and enjoy the aroma of freshly ground flour, I show you how to grind your own Rye flour from Rye berries in my Sourdough Rye recipe video.
When it comes to electric grain mills, after I did A LOT of research, I decided to buy a Mockmill. And am I so happy I did! The Mockmill is a very affordable but beautifully crafted German-made mill that stone grinds grain with settings ranging from 1 to 10—fine to coarse ground grain.
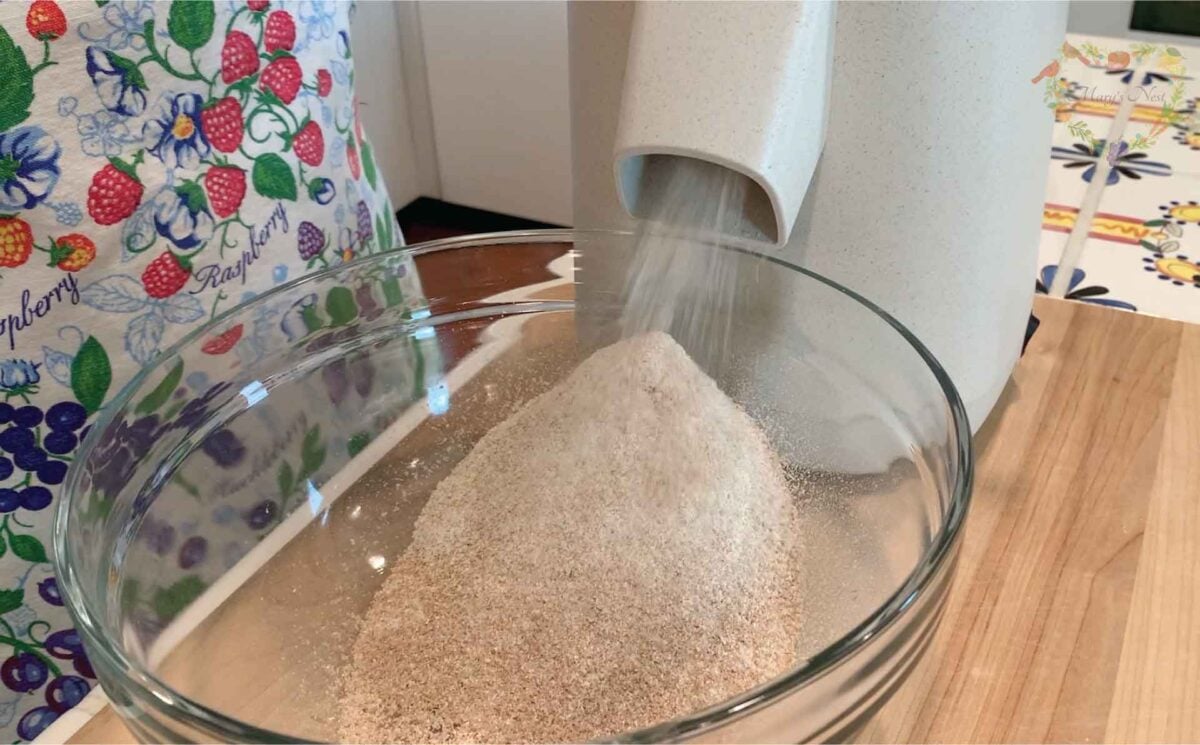
Learn more about Mockmill electric grain mills for making fresh flour and their Flake Lover’s Flaker that flakes whole grain in minutes. (This is not a sponsored post, I bought the Mockmill products that I show you, and I’m a happy user of their devices in my kitchen.)
- Get the Mockmill 100 Stone Grain Mill (Same product I show you in my unboxing video.)
- Mockmill 100 Grain Mill unboxing
- Flake Lover’s Flaker from Mockmill in action (Using this device, you can flake whole grain in minutes.)
Sourdough Starter Recipes
If you’re new to sourdough baking and need to learn how to make a sourdough starter to make your Sourdough Rye Bread (or another type of Sourdough Bread), I show you a few different ways to do this. My first starter video on how to make a Foolproof Sourdough Starter is the easiest. You’ll make this sourdough starter with rye flour, and you’ll have your starter bubbling and ready in about four days or so. Rye contains a starch that yeast loves, so it’s great for using to make a sourdough starter!

Can’t find rye flour? No problem. I show you how to make a sourdough starter using all-purpose flour in my Complete Sourdough Starter Guide. Plus, I also review all the problems you may encounter when making a starter and how to correct them. This is the perfect video for beginners to start with!

And in my next sourdough starter video, I show you a shortcut to making a sourdough starter that becomes a true sourdough starter. It’s the Busy Mother’s Sourdough Secret, and I’m happy to share it with you!

What to Do with Discarded Sourdough Starter
When you make a traditional sourdough starter, you’ll have to “feed” your starter and remove part of the starter, which is what we call the “discard.” For ideas for what to do with your sourdough discard, check out the following recipe videos. You’ll never have to throw out your discard again!


More Sourdough Bread Recipes
New to sourdough baking? If so, my Fast No Knead Sourdough is for you. It has a short two-hour rise with a mild flavor even children love.

When you’re ready to make a traditional sourdough bread with a long rise and tangy flavor, I show you how in my how to make Sourdough Bread using a Foolproof Starter. Yum!

Join the Traditional Foods Kitchen Academy
Are you looking for more traditional foods videos? I invite you to join the Traditional Foods Kitchen Academy. Members of this optional paid YouTube community get access to exclusive videos and other members-only perks.
In the following members-only video, I talk about How to Make Any Baking Recipe a Sourdough Recipe.

Stay in Touch with Mary’s Nest
- Subscribe to My YouTube Channel for Traditional Foods Videos (Free) - When you subscribe, be sure to click on the notification bell that will let you know each time I upload a new video.
- Subscribe to Mary’s Traditional Foods Newsletter (Free) - Get a free 36-page eBook for signing up: How to Stock Your Essential Traditional Foods Four-Corners Pantry.
- Join the Traditional Foods Kitchen Academy - For more detailed videos and exclusive members-only perks, join my YouTube membership community.
- Order The Modern Pioneer Cookbook - Get a hardcover book of Mary's nourishing recipes from a Traditional Foods Kitchen. This bestselling cookbook is published by Penguin Random House with their DK imprint.
- Order The Modern Pioneer Pantry - Get Mary's latest hardcover cookbook about preserving food and making delicious meals from your Four Corners Pantry. Mary's second cookbook is also published by Penguin Random House.
I look forward to having you join me in my Texas Hill Country Kitchen!
I’d like to receive more tips and recipes from Mary’s Nest.
Sourdough Rye Bread

Equipment
- Large Dutch Oven, Baking Sheet, or Cast Iron Frying Pan
Ingredients
- 2 cups Whole grain rye flour
- 1 cup All purpose or bread flour Sifted rye flour may be substituted. (See video.)
- 1 tsp Salt
- 1 cup Sourdough starter Approximately 100% saturation. (See video.)
- 1 1/3 – 1 1/2 cups Water
Instructions
- In a medium bowl, mix flours and salt together. Whisk to incorporate and set aside.
- In a large bowl, add starter and water and mix well until the starter is completely incorporated with water.
- NOTE: You can start adding 1 1/3 cups of water to the sourdough starter, but once you add the liquid to the flour, if the batter seems overly dry, add additional water, 1 tablespoon at a time until you achieve a wet sticky batter. (See video.)
- Add flour and salt mixture to the sourdough starter and water mixture. Mix well until all the flour mixture is completely saturated, and you have achieved a wet sticky batter. Add more water as described above if needed.
- Cover bowl loosely and allow the dough to rest at room temperature for 12-18 hours. The longer resting time will allow for a stronger sourdough flavor.
- After the 12-18 hour period, generously dust a flat surface with flour and transfer the dough to the flat surface. The dough will be very loose and sticky.
- Work flour from the flat surface into the dough as you begin to shape dough into a round. A plastic bench scrape can be very helpful for this purpose. (See video.) Add more flour as needed if the dough is sticking to the flat surface. Keep your hands and the surface well-floured as you work with the dough.
- Set the dough aside and clean your flat work surface. Place a lint-free cloth on the flat surface and dust the cloth very generously with flour. Place the round of dough onto the center of the cloth and cover loosely.
- Allow dough to rise for 1-2 hours. Generally, a 2 hour rise will create the best results.
- As the dough is rising, 30 minutes before the end of the 2 hour rise time, place the oven rack on its lowest rung. Place a covered Dutch oven on the rack. Close the oven door and preheat the oven to 475°F.
- After the dough has risen for two hours, using pot holders remove the Dutch oven to a heatproof surface and close the oven door. BE CAREFUL! The Dutch oven will be very hot! Carefully remove the lid, facing it away from you, so as to avoid the release of steam. Set the lid on a heatproof surface.
- Open the cloth that is covering the dough and sprinkle the top of the dough with flour. Using the cloth, carefully lift the dough up and flip it over into the Dutch oven so that the bottom of the dough is now the top. Pull out the cloth and set it aside.
- Replace the lid onto the top of the Dutch oven, and place the Dutch oven back into the preheated oven. Close the oven door and bake the dough for 35 minutes.
- After 35 minutes, open the oven, and using pot holders, carefully remove the lid of the Dutch oven and set it aside onto a heatproof surface. Close the oven door and allow the bread to bake for an additional 5-15 minutes until it is golden brown on top.
- Using pot holders, remove the Dutch oven from the oven and place it on a heatproof surface. Carefully remove the bread from the Dutch oven using a heatproof spatula.
- Tap the bread on the bottom to make sure that it sounds hollow. If so, it is fully baked. If not, return to the oven for an additional 5 minutes of baking. To prevent over browning of the crust, you can tent your bread with foil when it is in the oven.
- Place the fully baked bread onto a cooling rack and allow to cool for 1 hour before slicing.
- Well wrapped and refrigerated, your bread will stay fresh for 3-4 days or up to 3 months in the freezer.
Video
Notes
Nutrition
Shop for items used in this blog post or video
Favorite Baking Supplies
- Favorite Aprons
- 10-Piece Glass Bowl Set
- Stainless Steel Measuring Cups and Spoons
- Mesh Strainers
- Baker’s 40 Mesh Strainer
- Baker’s 60 Mesh Strainer
- Large Measuring Cup
- Danish Dough Whisk
- Plastic Bench Scrape
- Flour Sack Towels
- Cast-Iron Dutch Oven
- Baking Sheet
- Parchment Paper
Amazon Shop and Shopping Guide
- Visit Mary’s Nest Amazon Shop
- Get a 30-day Audible trial with a free audiobook
- Visit my Shopping Guide page
Get up to 15% off for stocking your Traditional Foods Pantry and equipping your Modern Pioneer Kitchen, including discounts from US Wellness Meats, Farmhouse Teas, Backwoods Home, Masontops, Cultures for Health, Survival Garden Seeds, Redmond Real Salt, and More!
Recommended Reading
- The Modern Pioneer Cookbook
- The Modern Pioneer Pantry
- Nourishing Traditions
- My Bread: The Revolutionary No-Work, No-Knead Method
- Sourdough: Recipes for Rustic Fermented Breads, Sweets, Savories, and More
- Eat Wheat: A Scientific and Clinically-Proven Approach to Safely Bringing Wheat and Dairy Back Into Your Diet