Affiliates note: As an Amazon Associate I earn from qualifying purchases. My content may contain affiliate links to products and services. If you click through and make a purchase, I'll receive a small commission. It does not affect the price you pay.
How to Make Sourdough Bread Using a Foolproof Starter
Now that you’ve made your Sourdough Starter, you’re ready to make sourdough bread!
First, you’re going to make a “sponge” using your sourdough starter, which I explain in detail in this video. If you need a refresher on making your sourdough starter, be sure to watch my How to Make a Foolproof Sourdough Starter video.
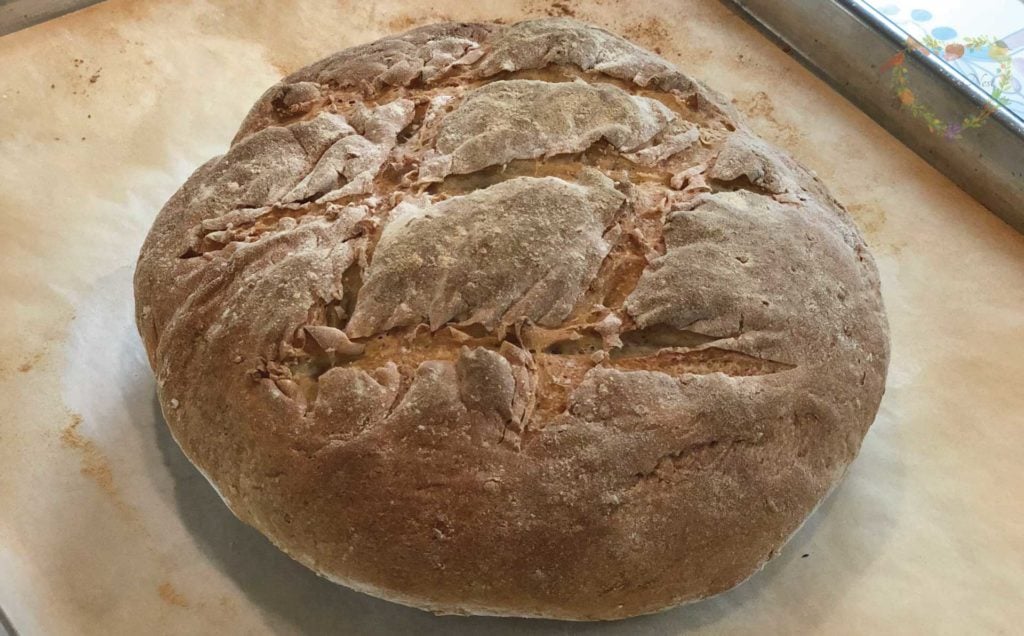
Once you make your sponge, you’ll be ready to make your sourdough bread. It’s a no-knead bread, so it will come together quickly and be ready to bake in no time at all. And best of all, it will have a nice crisp crust, a soft tender crumb, and be enjoyed by all!
Related Videos
- How to Make a Foolproof Sourdough Starter
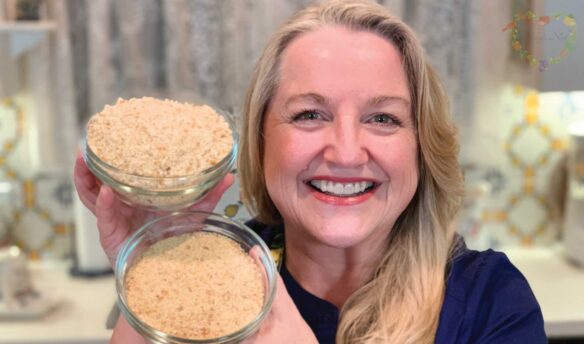
- How to Make Sprouted Flour at Home
- Mockmill 100 Grain Mill Unboxing and Review
Stay in Touch with Mary’s Nest
- Subscribe to My YouTube Channel for Traditional Foods Videos (Free) - When you subscribe, be sure to click on the notification bell that will let you know each time I upload a new video.
- Subscribe to Mary’s Traditional Foods Newsletter (Free) - Get a free 36-page eBook for signing up: How to Stock Your Essential Traditional Foods Four-Corners Pantry.
- Join the Traditional Foods Kitchen Academy - For more detailed videos and exclusive members-only perks, join my YouTube membership community.
- Order The Modern Pioneer Cookbook - Get a hardcover book of Mary's nourishing recipes from a Traditional Foods Kitchen. This bestselling cookbook is published by Penguin Random House with their DK imprint.
- Order The Modern Pioneer Pantry - Get Mary's latest hardcover cookbook about preserving food and making delicious meals from your Four Corners Pantry. Mary's second cookbook is also published by Penguin Random House.
I look forward to having you join me in my Texas Hill Country Kitchen!
I’d like to receive more tips and recipes from Mary’s Nest.
How to Make a Sourdough Bread Using a Foolproof Starter
Ingredients
- 2 tbsp Rye sourdough starter
- 1/3 cup Rye flour
- 2 1/3 cups Filtered water lukewarm, divided
- 4 1/2 cups Bread flour
- 1 tbsp Fine ground sea salt
- Additional bread flour for dusting
Instructions
- Make the “Sponge”. Add the starter to the rye flour and 1/3 cup of the water. Mix well and allow to rest for 6-10 hours. It should become bubbly and foamy.
- Add the bread flour to a clean bowl and add the salt. Mix well. Make a well in the center of the bread flour and pour in the remaining 2 cups of water and the sponge. Mix well using a wooden spoon or spatula. You can also use your well-floured hand. The dough will be sticky. (You can use an electric mixer to do this, but it really isn’t necessary.) All the flour should be moistened and pull away from the bowl, leaving the bowl with a clean appearance. This takes approximately one minute to do.
- Cover the bowl tightly with plastic wrap. Place the bowl in a warm (approximately 75 degrees Fahrenheit), undisturbed place for approximately 6-8 hours.
- At six hours check the dough to see if it has doubled in size. If so, it is time to check the dough to see if it has risen sufficiently. The easiest way to do this is with the “Finger Test”. (See the recipe notes.)
- Once the dough passes the finger test, you are ready to transfer it from the bowl to a well-floured board. Divide the dough into two portions and shape each portion into a round “boule” loaf. Watch the video for a detailed demonstration on how to do this.
- Place a dish towel on a wooden cutting board and flour the dish towel. Flour the top of each round loaf and cover with a second dish towel. Allow each round loaf to double in size. This will take approximately 1-2 hours depending on the temperature in your kitchen.
- While you are waiting for the round loaves to rise, preheat the oven to 475°F (246°C) for at least 30 minutes before baking the round loaves.
- Once the round loaves have doubled in size, transfer each one to its own parchment-lined and floured baking sheet. (You can also transfer them to a baking stone that has been sprinkled with cornmeal or wheat bran to prevent sticking.)
- Once you place the round loaves in the oven to bake, immediately turn the heat down to 450°F (232°C).
- Use a lame to make some cuts on the top of each round loaf to allow for proper baking. If you do not have a lame, use a sharp knife. If you would prefer to skip this step, invert your loaf and place it on the parchment-lined and floured baking sheet with the seam side facing up.
- Bake the bread for approximately 30 minutes. You can tell that it is done when it is nicely browned on top and when it has a hollow sound when you tap on the bottom of the round loaf. Transfer to a wire rack to cool for at least one hour.
- After one hour, you can slice and enjoy the bread. It will stay relatively fresh on the counter for a few days (if it’s not all eaten by then!!) or you can transfer it to a plastic bag and refrigerate it. It will stay fresh for about one week. You can also wrap the bread well in plastic wrap.
Video
Notes
Shop for items used in this blog post or video
- Visit Mary's Nest Amazon Shop
-
Visit my Shopping Guide page
Get up to 15% off for Stocking your Traditional Foods Pantry and Equipping your Modern Pioneer Kitchen, including discounts from US Wellness Meats, Mockmill Grain Mill, Masontops, Cultures for Health, Survival Garden Seeds, Redmond Real Salt, Plan to Eat, and more!
Favorite bread making supplies:
- Pyrex Glass Mixing Bowl Set (3-Piece)
- Hodgson Mill Organic Rye Flour, 30-Ounce (Pack of 6)
- King Arthur Organic Bread Flour, 5 pound bag (Pack of 6)
- Celtic Sea Salt Fine Ground, (One-16 Ounce Resealable Bag)
- Pyrex Prepware 2-Cup Glass Measuring Cup
- Le Creuset Silicone Large Spatula Spoon
- Nordic Ware Natural Aluminum Commercial Baker’s Half Sheet (2 Pack)
- Non Stick Parchment Paper, 205 sqft
- Large Canadian Maple Cutting Board (18x24x3/4)
- Large Soft and Absorbent Cotton Kitchen Dish Towels – Set of 12
- Breadtopia Bread Lame (Dough Scoring Tool)
- Breadsmart bread baking kit
Use promo code MARYSNST for a one-time 15% off Masontops and Breadsmart products on Amazon.com.
Affiliates note: As an Amazon Associate I earn from qualifying purchases. My content may contain affiliate links to products and services. If you click through and make a purchase, I’ll receive a small commission. It does not affect the price you pay.
Disclaimer:I am not a medical doctor, a medical professional, a dietician, or a nutritionist. All content found on the MarysNest.com website, including text, images, videos, eBooks or eGuides, social media, or other formats, were created solely for informational purposes only. The content is not intended to be a substitute for professional medical advice, diagnosis, or treatment. Always seek the advice of your physician or other qualified healthcare provider with any questions you may have regarding a medical condition or proper nutritional advice. Never disregard professional medical advice or delay in seeking it because of something you have watched in a video or read on this website. Use caution when following the recipe in this video. The creator and publisher of this video and website will not be held responsible for any adverse effects that may arise from the use of this recipe and method or any other recipe and method on this website or corresponding video channel.

Do you think your no knead sourdough recipe for beginners would turn out if I used white whole wheat instead of all purpose flour? Thanks
Can I put this in two traditional loaf pans instead two of free form loaves?
Hi Cindy, I haven’t tried that but I think it will work. Love, Mary
Mary, in your video you mentioned adding Malt to increase your rise with sourdough. How much do you add for a dough this size, and can you also add apple cider vinegar and malt in the same dough?
Hi Joe, Great question! If you add malt, start slowly. I would use only a teaspoon in this recipe. And I would go slow about the vinegar too – just start with a teaspoon. As to using both, I would first try one or the other and see if you like the rise and the texture. Using both or using too much of either can create a sort of wet, gummy, interior. Keep me posted on how it all turns out. Love, Mary
Hi Sweet Mary! I just made this sourdough bread recipe using your sourdough starter. Oh my goodness! It was amazing! I made it exactly as the recipe stated. Is there any reason after shaping my loaves that I cannot place them on a floured parchment lined baking sheet covered with a tea towel to rise? I had a difficult time removing them from from the tea towel to place on the parchment. I’m learning so many new things even though I considered myself a somewhat traditional cook. Thank you so much for sharing with all of us! Love, Lori
Hi Lori, I understand completely. Yes, you can place them on a flour lined parchment. So happy they turned out great for you!! Love, Mary
Hi Mary! Do you make a sponge with a non sourdough starter as well? I start with wheat flour and feed with AP, discarding half each time. Do I take some of this and make a sponge before making the bread? Another recipe I follow doesn’t have the sponge process. Thanks for your help!
Hi Kathleen, Thanks so much for your comment. As to a sponge, yes, sometimes I do make a sponge without a sourdough starter. I think it really helps with both the rise and the final flavor of the bread. But you do not need to make a sponge if you do not want to. There are all sort of recipes and variations out there and all can work. But if you do decided to make a sponge, yes, you would take some of your wheat flour and AP flour and use that to make your sponge. Hope this helps.
Have you seen my “Complete Guide to Sourdough”: https://www.youtube.com/playlist?list=PLkRuW3pBo2U3NKN0GHvGCpiWNxcTefLof I think you will enjoy some of the videos in this playlist.
Do you enjoy making other traditional foods? If so, I have a playlist of some of my videos titled “Mastering the Basics of Traditional Nutrient Dense Foods Cooking”. It’s a series of 15 detailed videos that covers How to Make Bone Broth, Cultured Dairy, Ferments, Sourdough Starter (my foolproof stater), Sourdough Bread, Soaked and Sprouted Nuts and Beans, and How to Soak and Sprout Grains to Make your own Sprouted Flour at Home. You can watch it here: https://www.youtube.com/playlist?list=PLkRuW3pBo2U3b4eu0QraZReKlGzA11h3y And please share the playlist with any other folks you think might be interested in learning about these types of things. I’m passionate about the book Nourishing Traditions by Sally Fallon (of the Weston A Price Foundation) and want to help as many people as I can learn how to make Traditional “Nutrient Dense” Foods.
Please let me know if you have any questions. I’m so happy to help! And I’m SO glad you’re here!! Love and God Bless, Mary❤️😘❤️
PS – Do you know about our FB group? It’s called Mary’s Nest Modern Pioneers. Come join us! We have a lot of fun chatting about Traditional Foods: https://www.facebook.com/groups/171869080205145/?source_id=210509998974645
I found your videos and I love them. I am trying sourdough bread for the first time. My starter is not a rye starter does that matter for this recipe. Also do you have any tips for first time bread makers. Thanks
Hi Chalene, Thanks so much for commenting and for the kind words! No, you do not need to use rye starter. Your starter will work great! If you would also like some ideas for how to use your starter to make No-Knead sourdough breads, I have a short playlist here: https://www.youtube.com/playlist?list=PLkRuW3pBo2U1febAOyheqmpJMQX9_s_ji&disable_polymer=true Please let me know if you have any questions. So glad you’re here! Love, Mary