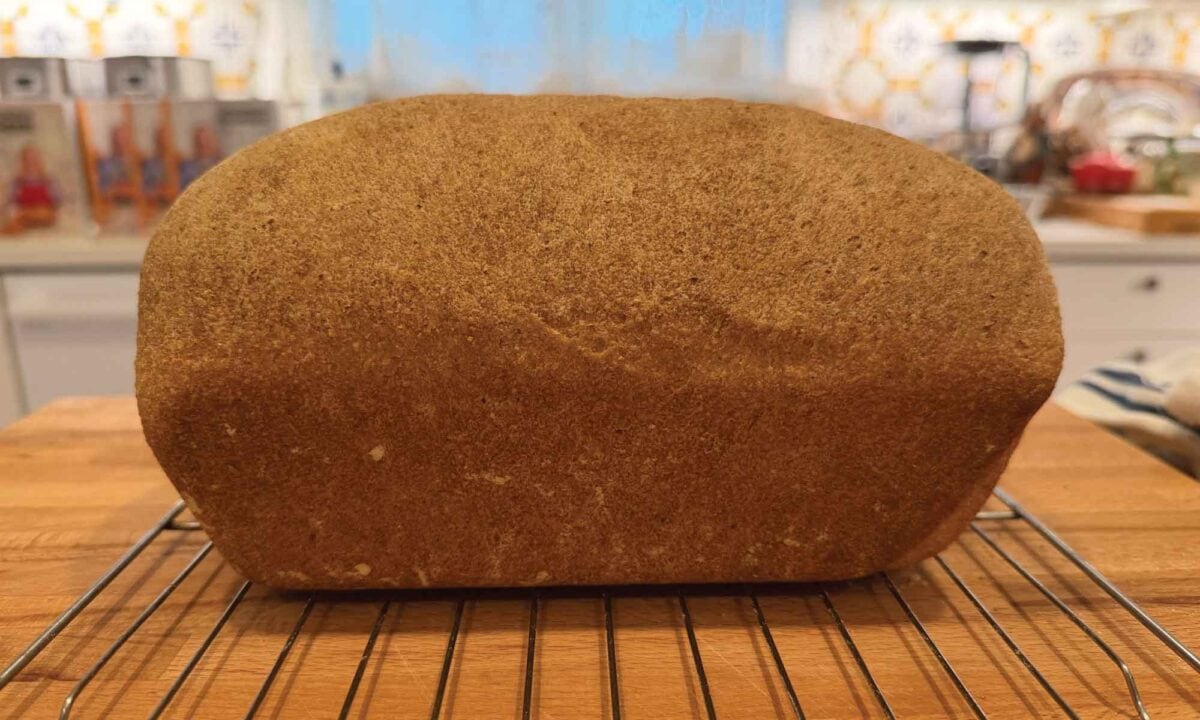
There is something so comforting about a simple loaf of bread baked in a pan—the kind that slices beautifully, toasts perfectly, and becomes part of everyday meals. This is the type of bread my mother made on a weekly basis using whatever whole grain flours she had on hand. Although she wasn’t familiar with the concept of maslin, she was instinctively creating her own Maslin Flour Blends based on what she stocked in her kitchen pantry—not unlike what our ancestors did—and now we’ll do the same thing!
We’re continuing with our Maslin Method Baking School series, and today I’m so happy to share a very special loaf with you—one that truly captures the heart of The Maslin Method and Maslin Flour Blends.
Be sure to watch the video below where I walk you through each step, and then keep reading for all the details to help you master this loaf in your own kitchen.
The Maslin Method™, Maslin Flour Blends™, and The Maslin Method Baking School™ are original terms created by Mary Bryant Shrader to represent a traditionally-inspired approach to baking with a blend of whole grains to create nourishing baked goods where different grains are intentionally combined, each bringing its own unique nutrition, flavor, and character to the finished bake.
Affiliates note: As an Amazon Associate I earn from qualifying purchases. My content may contain affiliate links to products and services. If you click through and make a purchase, I’ll receive a small commission. It does not affect the price you pay.
Table of Contents
- A Quick Glance
- The Maslin Method Baking School Series
- What Is The Maslin Method?
- Before You Begin Baking The Maslin Hearth Loaf
- The Maslin Flour Blend For This Recipe
- Maslin Hearth Loaf Ingredients
- How to Make the Maslin Hearth Loaf
- Recipe Tips
- Storing
- After You Bake
- Grand Teton Ancient Grains
- Grind Your Own Flour with the Mockmill
- The Modern Pioneer Cookbook
- The Modern Pioneer Pantry
- Start Your Traditional Foods Journey
- Download Your Free 36-Page Pantry List
- Join the Traditional Foods Kitchen Academy
- Kitchen Academy Videos
- The Modern Pioneer Flagship Maslin Hearth Loaf Recipe
- Shop for My Favorite Items
A Quick Glance
- A wholesome, everyday sandwich loaf made using The Maslin Method
- Made with a Maslin Flour Blend of whole grains
- Flexible and forgiving dough for both new and experienced bakers
- Works beautifully with freshly milled or store-bought flour
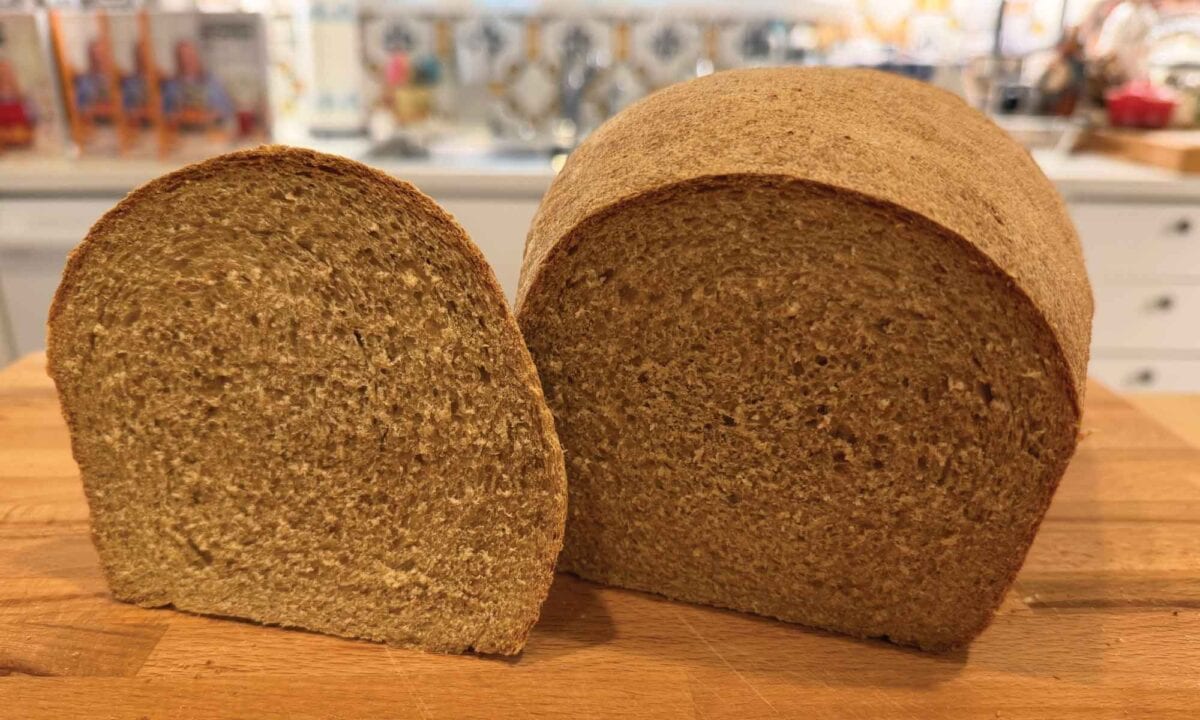
- Soft, sliceable crumb with a hearty yet tender texture
The Maslin Method Baking School Series
This recipe is part of our Maslin Method Baking School series, where we return to the traditional practice of blending grains, but in the modern Maslin Method way, to create nourishing, balanced breads.
If you’re just joining us, be sure to visit Lesson No. 1, What Is The Maslin Method?, in this series, where we explore:
- What is maslin?
- What is The Maslin Method?
- What are Maslin Flour Blends?
- How to create your own Maslin Flour Blends.
- How to work with modern whole grains and ancient grains.
Each recipe in this series will build gently on the last, helping you grow more confident and intuitive in your baking.
What Is The Maslin Method?
The Maslin Method is inspired by the practical wisdom of traditional home bakers, who blended grains based on what they had on hand.
Instead of relying on a single flour, The Maslin Method baking uses a thoughtful combination of grains to create:
- Balanced flavor
- Strong yet tender structure
- A more nourishing loaf
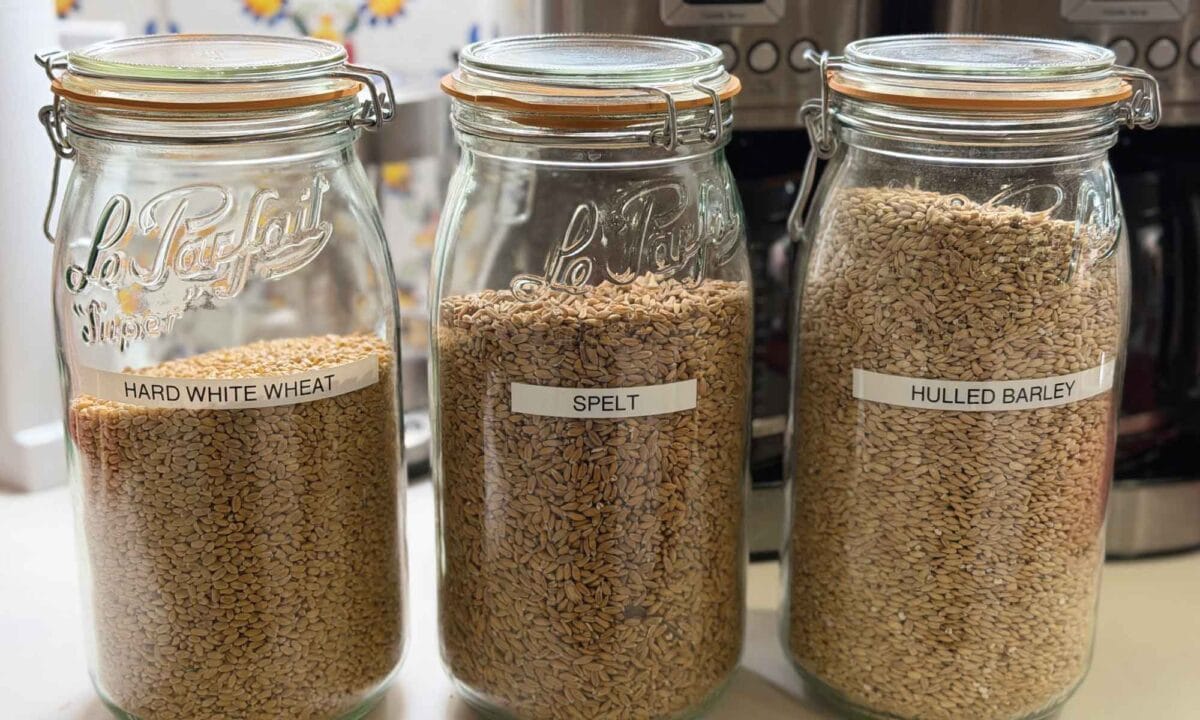
In this Maslin Hearth Loaf recipe, our maslin blend consists of:
- Whole wheat, providing structure
- Spelt, creating a soft, workable dough
- Barley or oat flour, adding tenderness and a delicate crumb
Together, they create a loaf that is hearty yet light—perfect for everyday use. And perhaps most importantly, this method teaches you to trust your hands and your instincts to learn how to bake by look and feel.
Before You Begin Baking The Maslin Hearth Loaf
Before you begin, take a moment to gather your ingredients and read through the recipe so you have a sense of the flow. This will help you feel relaxed and confident as you work.
Fresh-Milled or Store-Bought Flour
This recipe works beautifully with both freshly milled flour and high-quality store-bought flour. Fresh-milled flour brings a wonderful depth of flavor and nourishment, while store-bought flour offers convenience and consistency.

Whichever you choose, this method will guide you in learning how the dough should look and feel, so you can achieve excellent results every time.
Hand Kneading or Stand Mixer
Although this recipe includes instructions for hand kneading, you can certainly use a stand mixer if you prefer. The kneading time will be slightly reduced, and you can use either a traditional dough hook or a roller-and-scraper style mixer.
While both work well, mixers with a roller and scraper are especially well-suited for ancient grain doughs, as they mimic the gentle action of hand kneading (and help prevent overworking the flour), resulting in a tender, well-structured loaf.
Allow the Dough to Guide You
Each recipe I share here in The Maslin Method Baking School series uses a carefully chosen Maslin Flour Blend—a specific combination of grains that work together to create balance in flavor, structure, and texture. Over time, you’ll become comfortable adjusting these blends to suit your preferences and what you have on hand.
Remember that baking—especially with whole grains, including ancient grains—is not about perfection, but about learning to recognize the look and feel of the dough. Use the measurements as a guide, but trust your hands as you go.
Rise times and baking times can vary greatly depending on your kitchen environment, so allow the dough to guide you rather than the clock.
And most importantly, enjoy the process. Baking in this traditional way is meant to be simple, nourishing, and part of the gentle rhythm of everyday Modern Pioneer kitchen life.
The Maslin Flour Blend For This Recipe
This Maslin Flour Blend reflects the practical wisdom of traditional home bakers—combining grains not only for flavor, but for balance and function. The whole wheat provides structure, the spelt creates a soft, workable dough, and the barley or oat flour adds a subtle tenderness, each in its own way.
Barley flour softens the crumb and gives the bread a more delicate interior texture (the crumb). It helps take the edge off the sturdiness (some might say density) of whole wheat. Oat flour is especially known for creating a soft, tender, almost velvety crumb, thanks to its natural fats and lack of gluten.
All of the flours blended together create a loaf of whole grain bread that is hearty, yet tender and light.
Maslin Hearth Loaf Ingredients
Find the full printable recipe with ingredients below.
The Maslin Flour Blend:
- 3½ – 4 cups whole wheat flour
- ¾ cup whole spelt flour
- ¼ cup hulled barley flour or oat flour
For the Dough:
- Maslin Flour Blend, divided
- 1–2 tbsp sunflower lecithin (optional)
- 1–2 tbsp vital wheat gluten (optional)
- 1¼ – 1½ cups warm water
- ¼ cup orange juice
- 1 large egg
- 1–2 egg yolks
- ¼ cup olive oil
- ¼ cup honey, maple syrup, or molasses
- 2¼ tsp instant yeast
- 2 tsp fine sea salt
- 6 ice cubes
For Kneading & Pan:
- Finely milled semolina
- Olive oil or butter
How to Make the Maslin Hearth Loaf
Find the full printable recipe with measurements below.
This wholesome Maslin Method loaf is inspired by traditional home baking—simple, nourishing, and deeply comforting. It’s designed to be flexible and forgiving, helping you learn to recognize the look and feel of a well-made dough.
- Combine the Dry Ingredients. In a large bowl, whisk together 3½ cups whole wheat flour and optional lecithin or gluten.
- Add the Water. Mix water and orange juice into the flour until it resembles a soft cookie dough, adjusting as needed.
- Rest Time (Autolyse). Cover and rest 30 minutes to 1 hour.
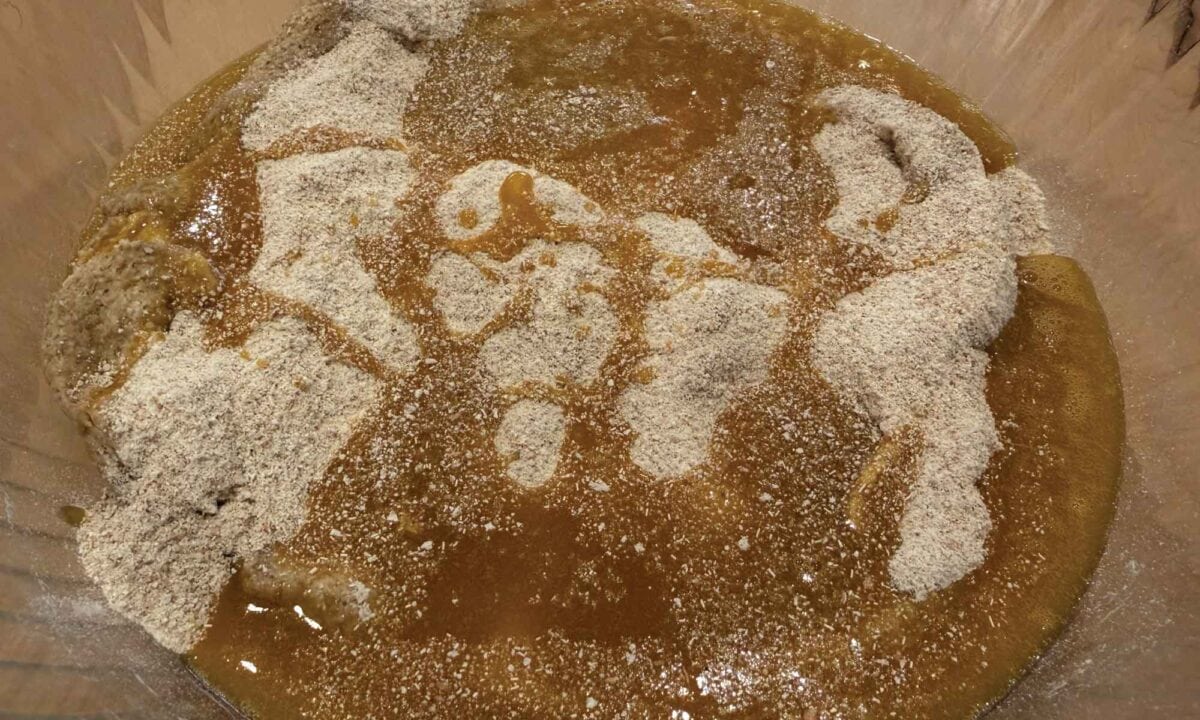
- Mix Remaining Ingredients. Combine remaining flours, yeast, and salt. In a separate bowl, whisk egg, yolks, oil, and sweetener. Add everything to the soaked whole wheat flour.
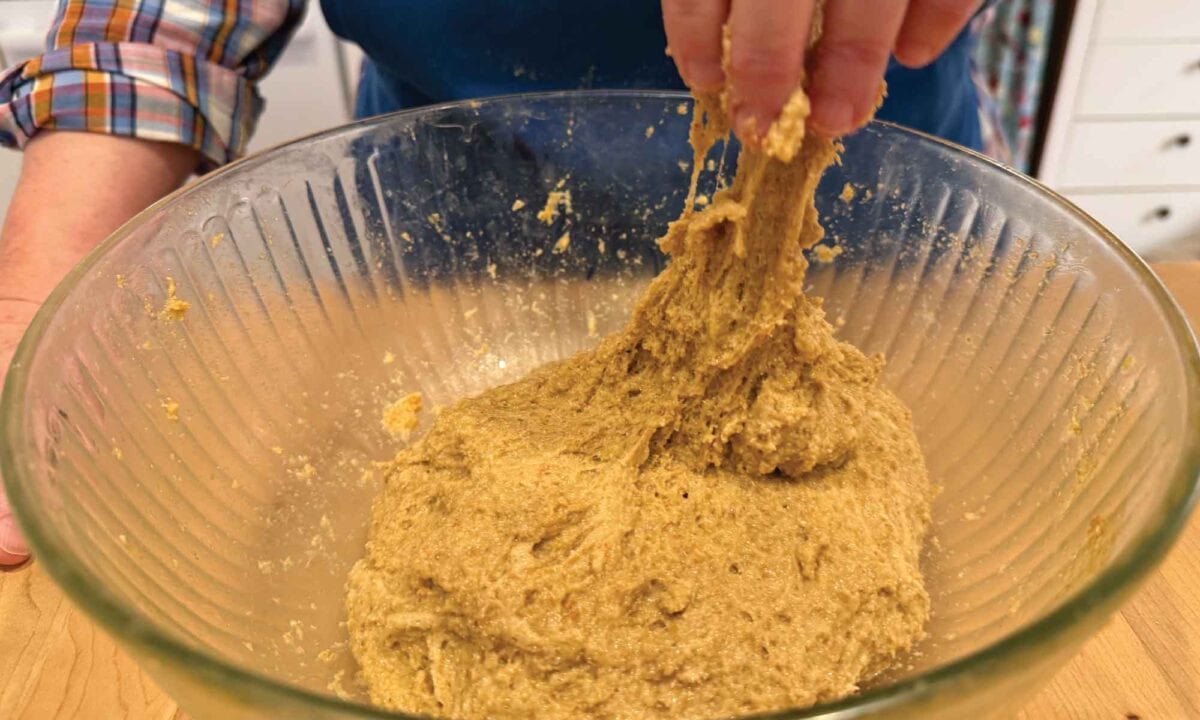
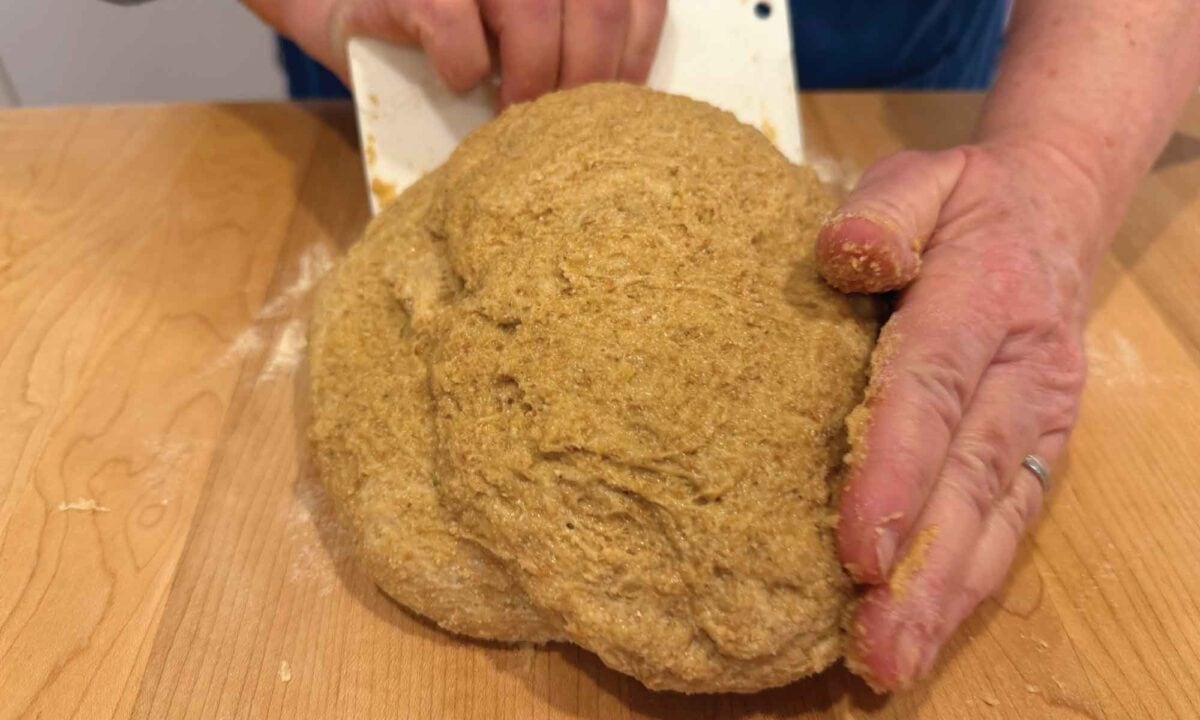
- Form the Dough. Mix until a soft, slightly tacky dough forms.
- Knead Until Smooth. Knead 8–10 minutes until smooth and elastic. Perform the windowpane test.
- First Rise. Place in a greased bowl and let rise until puffy, like a pillow.
- Prepare the Pan. Grease and dust with semolina.
- Shape the Loaf. Form into a tight log and place seam-side down in the pan.
- Second Rise. Let rise until about 1 inch above the pan.
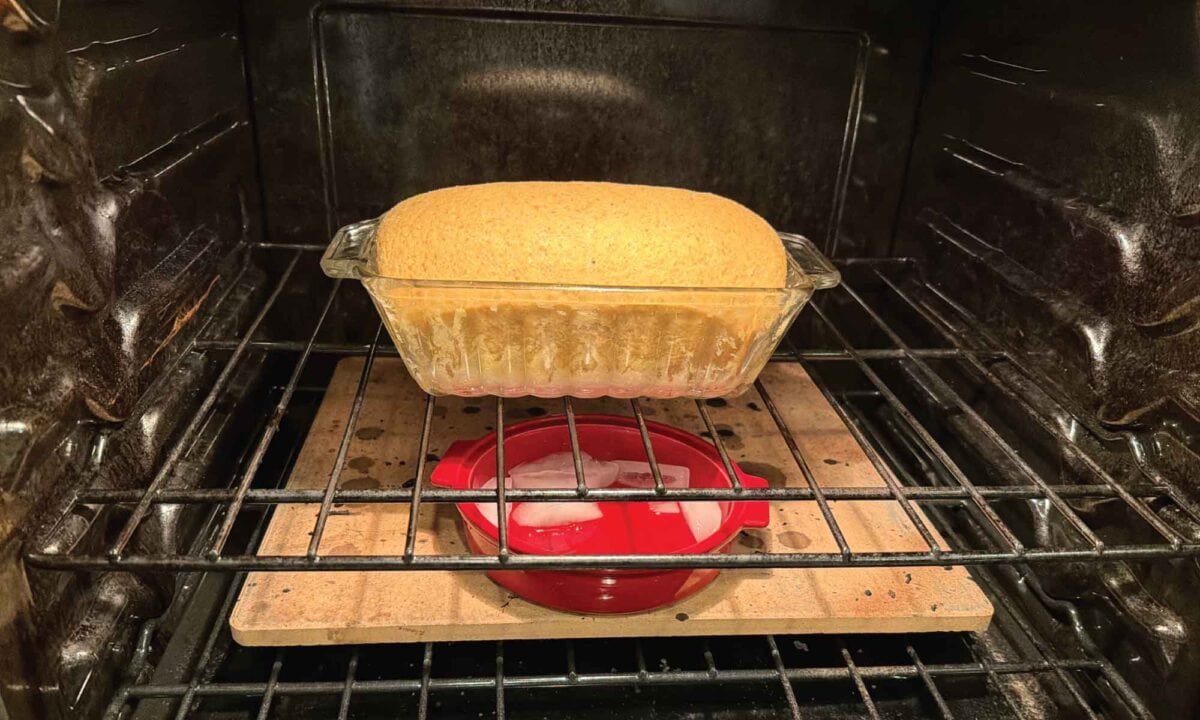
- Bake. Bake with steam (ice cubes) at 350°F (177°C) until golden brown.
- Cool. Cool completely before slicing.
Recipe Tips
- Let the dough guide you—look for texture, not time.
- Hydration will vary depending on your flour.
- Barley and oat flour both tenderize the crumb beautifully.
- Steam helps create a better rise and crust.
- Always cool fully before slicing to avoid a gummy interior.
Storing
Store bread well wrapped, at room temperature for up to 3 days. Or slice and freeze, well wrapped, for up to 3 months.
After You Bake
Once your loaf has cooled, take a moment to enjoy what you’ve created.
Notice the aroma, the texture, and the feel of the bread in your hands—these are the quiet rewards of traditional baking.
And if it’s not perfect, that’s perfectly all right. Each loaf teaches you something new, and over time, you’ll come to understand your dough in a deeply intuitive way.
Slice, serve, and share with those you love.
That is the heart of The Maslin Method for The Modern Pioneer Kitchen!
Grand Teton Ancient Grains
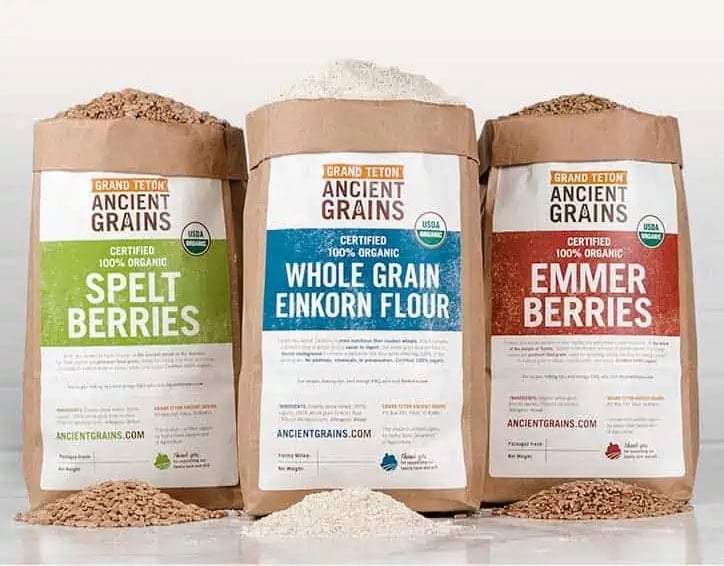
Check out the organic berries and flours available from Grand Teton Ancient Grains. I love their high-quality Einkorn, Emmer, Spelt, Millet, and more you can get to create nutritious and delicious baked goods.
Exclusive Newsletter Discount Code
Sign up for my Mary’s Nest newsletter for an exclusive discount code you can use on your order of berries and flours. This discount is available for a limited time, so be sure to stock up on the Ancient Grains you would enjoy using to bake delightful breads, desserts, and more.
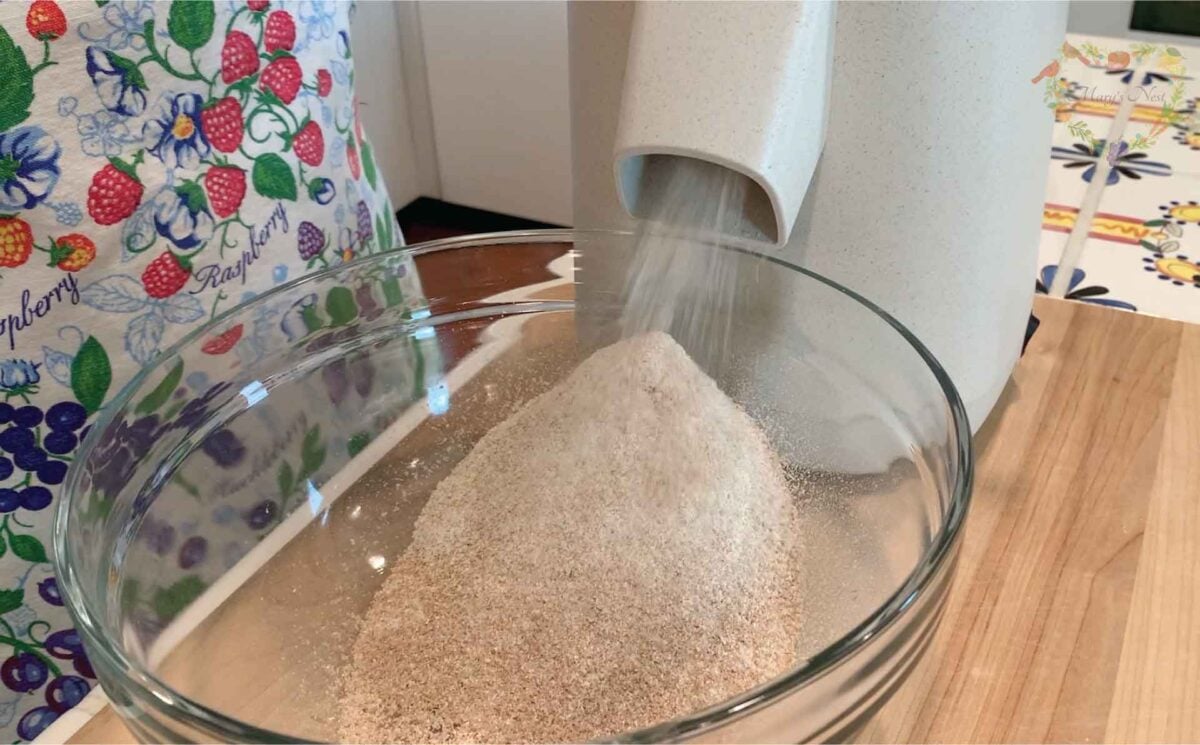
And if you’re looking for a grain mill to make fresh flour from your wheat berries, I recommend the Mockmill electric grain grinder. (See below.)
Grind Your Own Flour with the Mockmill
When it comes to electric grain mills, after I did A LOT of research, I decided to buy a Mockmill. And am I so happy I did! The Mockmill is a very affordable but beautifully crafted German-made mill that stone grinds grain with settings ranging from 1 to 10—fine to coarse ground grain.
Learn more about Mockmill electric grain mills for making fresh flour and their Flake Lover’s Flaker that flakes whole grain in minutes. (This is not a sponsored post, I bought the Mockmill products that I show you, and I’m a happy user of their devices in my kitchen.)
- Get the Mockmill 100 Stone Grain Mill (Same product I show you in my unboxing video.)
- Mockmill 100 Grain Mill unboxing
- Flake Lover’s Flaker from Mockmill in action (Using this device, you can flake whole grain in minutes.)

Order YOUR COPY Now!
The Modern Pioneer Cookbook
Seasonal ingredients, traditional techniques, and nourishing recipes. Over 85 traditional, from-scratch recipes! Discover for yourself how you can use simple ingredients and traditional techniques to cook the modern pioneer way.

Order YOUR COPY Now!
The Modern Pioneer Pantry
Simple ingredients, timeless techniques, and a well-stocked pantry. Discover over 100 nourishing recipes to preserve food and turn pantry staples into homemade meals. Build a wholesome, traditional pantry—just like a modern pioneer!
Start Your Traditional Foods Journey
Sharing my passion for traditional cooking goes beyond my YouTube cooking school—it also comes to life in the pages of my cookbooks. Both of my books, The Modern Pioneer Cookbook and The Modern Pioneer Pantry, are proudly published by Penguin Random House.
The first is filled with time-honored recipes to help you create a traditional foods kitchen, while the second is your complete guide to home food preservation. Order both books today to start or continue your traditional foods journey.
Download Your Free 36-Page Pantry List
For an extensive list of the traditional foods you can make and purchase to stock your pantry, be sure to download my free 36-page Traditional Foods Pantry List. This comprehensive eBook is full of links to recipe videos, helpful articles, and more!

Join the Traditional Foods Kitchen Academy
Are you looking for more traditional foods videos? If so, I invite you to join the Traditional Foods Kitchen Academy. Members of this optional paid YouTube community get access to exclusive videos and other members-only perks. Plus, your YouTube comments include a special members-only badge.
Kitchen Academy Videos
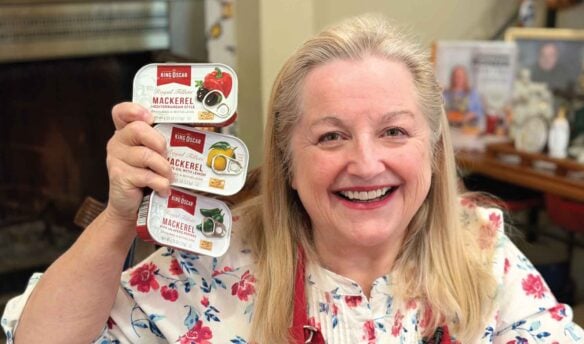
Why We Should Incorporate Mackerel Into Our Diet
Easy and nourishing ways to enjoy mackerel into your meals.

The Gentle Power of Fermented Beverages—All Year Long
Learn how fermented beverages gently support digestion year-round, shifting with the seasons to nourish the gut through traditional, living drinks.

How to Make Oatmeal Higher in Protein (The Old-Fashioned Way)
Turn simple oats into a hearty, protein-rich porridge.
Stay in Touch with Mary’s Nest
- Subscribe to My YouTube Channel for Traditional Foods Videos (Free) - When you subscribe, be sure to click on the notification bell that will let you know each time I upload a new video.
- Subscribe to Mary’s Traditional Foods Newsletter (Free) - Get a free 36-page eBook for signing up: How to Stock Your Essential Traditional Foods Four-Corners Pantry.
- Join the Traditional Foods Kitchen Academy - For more detailed videos and exclusive members-only perks, join my YouTube membership community.
- Order The Modern Pioneer Cookbook - Get a hardcover book of Mary's nourishing recipes from a Traditional Foods Kitchen. This bestselling cookbook is published by Penguin Random House with their DK imprint.
- Order The Modern Pioneer Pantry - Get Mary's latest hardcover cookbook about preserving food and making delicious meals from your Four Corners Pantry. Mary's second cookbook is also published by Penguin Random House.
I look forward to having you join me in my Texas Hill Country Kitchen!
I’d like to receive more tips and recipes from Mary’s Nest.
The Modern Pioneer Flagship Maslin Hearth Loaf
Equipment
- 1 9 x 5-inch or 8 1/2 x 4 1/2-inch loaf pan
- 1 Medium mixing bowl
- 1 Wooden spoon or Danish dough whisk
- 1 Measuring cups and spoons for both dry and liquid measures
- 1 Clean, lightweight kitchen towel (such as a flour sack towel) or alternative cover
- 1 Shallow oven-safe pan
- 1 Wire cooling rack
Ingredients
For the Maslin Flour Blend
- 3 1/2 – 4 cups whole wheat flour Hard red wheat, hard white wheat, a hard red heritage wheat such as Red Fife or Turkey Red, or any combination.
- 3/4 cup whole spelt flour
- 1/4 cup hulled barley flour (not pearled or malted) or oat flour See Baker's Notes.
For the Dough
- The Maslin Flour Blend, divided
- 1-2 tbsps sunflower lecithin, optional See Baker's Notes.
- 1-2 tbsps vital wheat gluten, optional See Baker's Notes.
- 1 1/4 – 1 1/2 cups warm water
- 1/4 cup orange juice
- 1 whole large egg
- 1-2 egg yolks See Baker's Notes.
- 1/4 cup olive oil Aa mild, buttery variety such as Arbequina. See Baker's Notes.
- 1/4 cup honey, maple syrup, or molasses
- 2 /14 tsps instant yeast Or one 0.25-ounce packet.
- 2 tsps fine-ground sea salt
- 6 ice cups
For Kneading and Preparing the Pan
- Finely milled semolina, also known as "semola rimacinata" For dusting
- Olive oil or Butter For greasing
Instructions
- Combine the Dry Ingredients. In the large mixing bowl, add 3 1/2 cups whole wheat flour and, if using, the sunflower lecithin and/or the vital wheat gluten. Whisk well to fully incorporate. (If you are using the sunflower lecithin, add only 1 tablespoon for this first loaf. If you are using vital wheat gluten, add only 1 tablespoonful for this initial loaf. After the bread is baked, you can decide if you want to add the additional tablespoons to future loaves.)
- Add the Water. Measure 1 1/4 cups of the water with the orange juice. Then add the liquid to the whole wheat flour and mix well until fully incorporated. If the mixture appears overly wet, add an additional 1 tablespoon of whole wheat flour at a time and mix well until the mixture looks like cookie dough. If the mixture appears overly dry, add 1 tablespoon of water at a time and mix well until the mixture looks like cookie dough.
- Rest Time. Allow the dough to rest, loosely covered, for 30 minutes to 1 hour, allowing the flour to start absorbing the water. This rest time, often referred to as an autolyse or short-term soaker, allows the bran to soften, making the dough easier to knead. If desired, you can use a more traditional soaker method by allowing the dough to rest, loosely covered, for 12-24 hours at room temperature, but include 1/2 teaspoon of the salt (mixed with the water and orange juice) for this rest. (The salt will help to prevent spoilage.) If, after 24 hours of a room temperature soak, you are not ready to bake, you can refrigerate the soaked flour, tightly covered, up to 3 days.
- Mix the Remaining Ingredients. In the medium bowl, whisk the remaining flours together along with the instant yeast and the salt (or the remaining salt if you used the room-temperature soaker method). Set aside. In a liquid measuring cup, add the whole egg and extra yolk(s), the olive oil, and the honey. Whisk well to combine. Sprinkle the flour, yeast, and salt mixture over the soaked whole wheat flour. Now pour the liquid mixture over the flour mixture.
- Form the Dough. Work the mixture together with your clean hands or use a wooden spoon or Danish dough whisk to stir until a soft dough begins to form. Your hands work best for this process. Continue mixing until all the ingredients are incorporated, adding additional whole wheat flour if the mixture appears overly wet (up to an additional 1/4 cup), or add additional water, a little at a time, if the mixture appears dry (up to an additional 1/4 cup). Make these additions until the dough is soft and slightly tacky but not overly sticky.
- Knead Until Smooth. Turn the dough out onto a surface lightly floured with the finely milled semolina, and knead for about 8-10 minutes (if hand kneading, this can take longer), until smooth and elastic. The dough should feel soft and smooth under your hands. During the kneading process, occasionally remove a small piece of dough and roll it into a ball in your hands. Then flatten it into a disk and begin to stretch it. If you can stretch the dough, without it tearing, to the point where it becomes transparent and light can shine through it, it has been sufficiently kneaded. This is known as the windowpane test.
- First Rise (Bulk Fermentation). Once the dough passes the windowpane test, shape all the dough into a lightly greased bowl and roll the ball around in the bowl so that it is completely coated with the oil. Cover the bowl with a piece of lightly oiled plastic wrap, a reusable food-safe "shower cap" designed for bread bowls, or a damp towel. Let rise at room temperature until it appears puffy like a pillow (it won't necessarily double in size, and the finger-poke test is not reliable with 100% whole grain dough), about 90 minutes to 3 hours, depending on your kitchen temperature. (Possibly as little as 90 minutes in a 75°F [24°C] kitchen. Possibly up to 3 hours in a 65°F [18°C] kitchen.)
- Prepare the Loaf Pan. As the dough nears the end of its first rise, grease the loaf pan generously with butter. Lightly dust with the finely milled semolina, tapping out any excess.
- Shape the Loaf. Gently deflate the dough in the bowl, and turn it out onto a surface lightly floured with the finely milled semolina. Flatten the dough into a rectangle approximately 8 by 12 inches. (Just eyeball it. This does not need to be perfect.) Fold the top two corners into the center to create a slight triangle or "house roof" shape. (This narrows the "top" of the dough, ensuring that as you roll the dough into a log, it stays uniform without bulging on the ends and will fit perfectly in the pan without crowding the ends.) Now begin to roll the dough toward you as you use your thumbs to keep the roll tight with a gentle tucking motion. This technique will create a tight log. Pinch the ends together and tuck them under slightly to create a neat loaf shape, then place the dough seam-side down into the prepared pan.
- Second Rise. Cover the loaf with the lightly oiled plastic wrap, the reusable food-safe cover, or the damp towel used to cover for the first rise. Let the loaf rise at room temperature until the dough is just about 1 inch above the pan, with the center of dough slightly higher, about 45-90 minutes, depending on your kitchen temperature. (Note the risen center of the dough is sometimes referred to as the crown.)
- Preheat the Oven. While the loaf is rising, preheat your oven to 500°F (260°C).
- Bake. Once the loaf has risen to approximately 1 inch above the rim of the loaf pan, place the loaf pan onto the middle rack of the oven. Next, add the ice cubes to the shallow, oven-safe pan and place it on the lower rack of the oven. Close the oven door, and immediately reduce the temperature to 350°F (177°C). Bake for 30–40 minutes, until the crust is a rich golden brown, but check the loaf at 15 minutes. If the loaf is beginning to brown too quickly, loosely tent it with foil. The bread is done when the internal temperature reaches about 200°F (93°C). If you do not have a thermometer, when the bread appears fully baked, remove the loaf from the oven, and then remove it from the loaf pan and tap the bottom—if it sounds hollow, it is baked through.
- Cool. Remove the bread from the loaf pan and transfer it to a wire rack to cool completely before slicing. If you slice hot 100% whole grain bread, the interior (crumb) may appear gummy. For a soft crust, rub the top of the bread, while it's still warm, with butter, and, if desired, sprinkle with salt.
- Storage. Store bread well wrapped, at room temperature for up to 3 days. Or slice and freeze, well wrapped, for up to 3 months.
Video
Notes
Shop for My Favorite Items
Favorite Baking Supplies
- Glass Storage Jars
- Stackable Glass Bowl Set
- Glass Measuring Cups
- Stainless Steel Measuring Cups and Spoons
- Danish Dough Whisk
- Glass Loaf Pan
- Oval Dutch Oven
- Round Cast Iron Bread Oven
- Oval Cast Iron Bread Oven
Favorite Kitchen Supplies
- Favorite Aprons
- Spice Grinder
- Countertop Burner (On my kitchen island in many recipe videos.)
- Handheld Vacuum Sealing System
- Vacuum Lids
- Whisk
- Silica Gel Packets (Helps keep moisture from building up in your mix)
- Cast Iron Dutch Oven
- 8-Quart Slow-Cooker
- Fat Separator (Clever kitchen device to help you decant bone broth)
- Flour Sack Towels
- pH Strips (Helps you check on the acidity of your vinegar)
Amazon Shop and Shopping Guide
- Visit Mary’s Nest Amazon Shop
- Get a 30-day Audible trial with a free audiobook
- Visit my Shopping Guide page
Get up to 15% off for stocking your Traditional Foods Pantry and equipping your Modern Pioneer Kitchen, including discounts from US Wellness Meats, Farmhouse Teas, Backwoods Home, Masontops, Cultures for Health, Survival Garden Seeds, Redmond Real Salt, and More!