Learn how to make Flaked Cereal at home with this healthy cereal recipe. Use the ingredients you want, and you’ll never have to buy boxed cereal again.

Affiliates note: As an Amazon Associate I earn from qualifying purchases. My content may contain affiliate links to products and services. If you click through and make a purchase, I’ll receive a small commission. It does not affect the price you pay.
Table of Contents
- Why Make Homemade Flaked Cereal?
- Keep Your Cereal Nutritious Without Extrusion
- What Type of Whole Grain is Best for Flaked Cereal?
- Can You Use Sprouted Flour to Make Flaked Cereal?
- More Wholesome Breakfast Recipes
- The Modern Pioneer Pantry
- More Pantry Recipes
- The Modern Pioneer Cookbook
- Homemade Flaked Cereal Recipe
- Shop for items used in this blog post or video
Why Make Homemade Flaked Cereal?
The grocery store offers so many boxed cereal choices, so why would we ever want to make it homemade? First, boxed cereal can be costly in comparison to making a homemade version. A 15-ounce box of flaked wheat cereal (less than a pound!) can easily cost you about $4.00. You can probably make that same amount in your kitchen for less than $1.00!
But the issue of nutrition is even more important. Unfortunately, to make the processed cereal flakes, puffs, “O” s, etc., that you see at the grocery store, the whole grain needs to go through a process known as “extrusion.”
Keep Your Cereal Nutritious Without Extrusion
The American Association of Cereal Chemists observed that the extrusion process creates new proteins (that might be damaged or “denatured” proteins) that are not found in the original grain and that these proteins may create nervous system problems. (Cereal Chemistry, American Association of Cereal Chemists, Mar/Apr 1998 V 75 – 2, pp. 217-221)
The extrusion process can denature protein, and this process can lead to a loss of essential amino acids, including lysine, arginine, histidine, cysteine, methionine, and tryptophan. (You can read more about this finding in section 2.2 of this scientific article on Extrusion.)
By making a homemade Flaked Cereal, you avoid the extrusion process and protect the proteins in the whole grain that you use to make your cereal.
What Type of Whole Grain is Best for Flaked Cereal?
A nice feature about making your own homemade Flaked Cereal is that you can use any whole grain flour you want. You can use the whole wheat flour that is easy to find at most grocery stores.
However, if you are farther along on your journey transitioning from a processed foods kitchen to a traditional foods kitchen, you can certainly make this cereal using any ancient grain flour, including whole grain Einkorn or Spelt flours. And as I show you in the following video, you can even make your own Einkorn flour at home.

Can You Use Sprouted Flour to Make Flaked Cereal?
You can use sprouted flour to make homemade flaked cereal. In fact, using sprouted flour is a time saver because you get to skip one of the steps in the recipe.
If you would like to learn how to make your own sprouted flour, watch my sprouted flour tutorial video where I walk you through the process with step-by-step instructions.

More Wholesome Breakfast Recipes
If you are looking for more wholesome breakfast recipes, check out the following videos.
- Breakfast Casserole Recipe with Many Easy Variations
- Sourdough Starter Pancakes – What to Do with Discarded Sourdough Starter
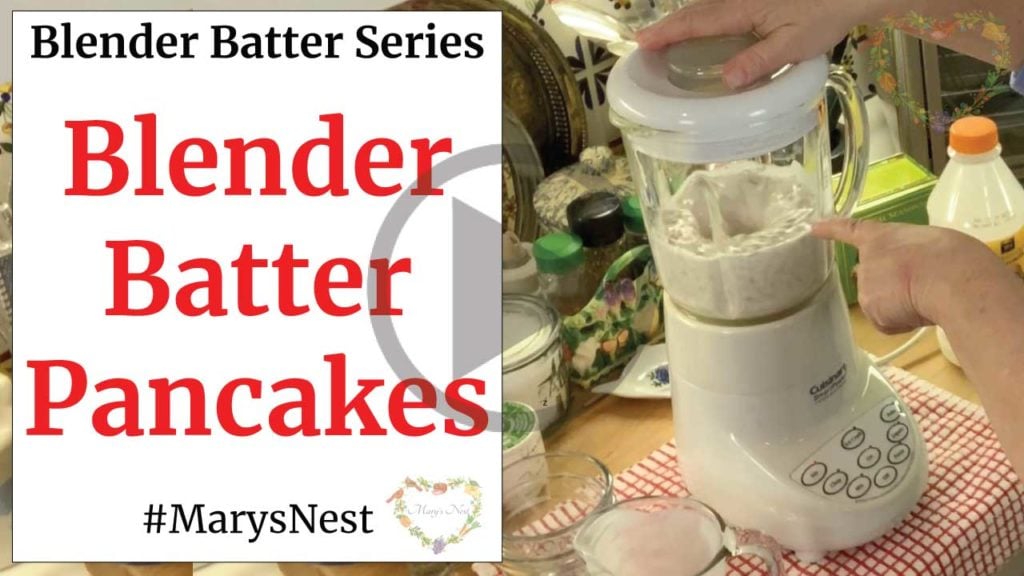
- Whole Grain Blender Batter Pancake Recipe – No Grain Mill required
- Whole Grain Blender Batter Waffles – No Grain Mill Required
I highly recommend you try the blender batter pancakes and waffles. You won’t believe how easy they are to make and how light, fluffy, and delicious they are. No one will ever know that you made them using whole grains! Yes, that’s right. You use the whole grain. You don’t even need to turn the grain into flour first.


Order YOUR COPY Now!
The Modern Pioneer Pantry
Simple ingredients, timeless techniques, and a well-stocked pantry. Discover over 100 nourishing recipes to preserve food and turn pantry staples into delicious, homemade meals. Build a wholesome, traditional pantry—just like a modern pioneer!
More Pantry Recipes
And if you would like to create your own flavored extracts to use when making your homemade Flaked Cereal or other baked goods, be sure to watch the following videos. I show you how to make your own “perpetual” vanilla extract along with nine other flavored extracts. These extracts are more staples for your pantry that you’ll never have to buy again!
- How to Make Homemade Extracts – 10 Flavors!
- How to Make Homemade Vanilla Bean Extract – A Perpetual Vanilla Extract Recipe

- How to Make Homemade Extracts – Flavored Extracts – Baking Basics

And speaking of your pantry, be sure to download my free 36-page pantry list eBook to learn about all the homemade and store-bought products you can store in your Four Corners Pantry.


Order YOUR COPY Now!
The Modern Pioneer Cookbook
Seasonal ingredients, traditional techniques, and nourishing recipes. Over 85 traditional, from-scratch recipes! Discover for yourself how you can use simple ingredients and traditional techniques to cook the modern pioneer way.
Stay in Touch with Mary’s Nest
- Subscribe to My YouTube Channel for Traditional Foods Videos (Free) - When you subscribe, be sure to click on the notification bell that will let you know each time I upload a new video.
- Subscribe to Mary’s Traditional Foods Newsletter (Free) - Get a free 36-page eBook for signing up: How to Stock Your Essential Traditional Foods Four-Corners Pantry.
- Join the Traditional Foods Kitchen Academy - For more detailed videos and exclusive members-only perks, join my YouTube membership community.
- Order The Modern Pioneer Cookbook - Get a hardcover book of Mary's nourishing recipes from a Traditional Foods Kitchen. This bestselling cookbook is published by Penguin Random House with their DK imprint.
- Order The Modern Pioneer Pantry - Get Mary's latest hardcover cookbook about preserving food and making delicious meals from your Four Corners Pantry. Mary's second cookbook is also published by Penguin Random House.
I look forward to having you join me in my Texas Hill Country Kitchen!
I’d like to receive more tips and recipes from Mary’s Nest.
Homemade Flaked Cereal

Equipment
- Spatula or wooden spoon
- 2-3 half-sheet size baking sheets (18" x 13")
- Parchment paper or waxed paper, optional
Ingredients
- 6 cups Whole grain flour, any variety, including whole wheat, Spelt, Einkorn, Kamut, etc. (1) Whole grain sprouted flour may also be used. (2) Gluten-free whole grain flours may also be used.
- 1 tsp Salt
- 1 tsp Cinnamon, optional Other spice flavorings may also be used up to 1 teaspoon.
- 2 cups Whole milk yogurt (full-fat) If making a non-dairy option, see Note below regarding Whole Milk.
- 2 cups Whole milk (full-fat) (1) If milk is not available, you can replace it with water to thin the yogurt. (2) If making a non-dairy option, you may omit the yogurt and milk and replace these ingredients with 4 cups of water or juice and a tablespoon of some sort of acid, such as lemon juice or raw apple cider vinegar.
- 1/2 cup Maple syrup or honey, optional (1) Sweetening your homemade flaked cereal is completely optional. (2) If you do sweeten it, a dry sugar, such as Sucanat, maple sugar, coconut sugar, or date sugar, may be substituted for the maple syrup or honey. If a dry sugar is used, you will want to increase the amount to 3/4 cup.
- 1 tsp Vanilla extract Alternatively, other flavored extracts may be used, such as almond extract.
- 1/4 cup Butter or Coconut oil, melted and cooled 1/4 cup of butter is equal to a 1/2 "stick" of butter. Ghee or mild-flavored oil may be substituted. If using oil, choose one that is the least processed, such as an avocado oil. Avoid soybean oil and other highly processed oils.
Instructions
- In a large bowl, add flour, salt, and cinnamon or other spice (if using). Whisk together well to distribute the salt and cinnamon with the flour. Set aside.
- In a separate bowl, mix together the yogurt and milk (or other liquid being used) and add in vanilla extract or another flavored extract, and sweetener, if using. Stir well.
- Pour the liquid into the dry ingredients. Mix well until the flour mixture is fully incorporated with the liquid and a dough has formed.
- Cover the bowl with the dough in it and set aside for 8-12 hours in a warm place out of direct sunlight. If you are not comfortable leaving this dough on your counter, you may refrigerate it, but increase the "soak" time to 18 hours. If you are using sprouted flour, you can skip this soak time and proceed directly with the next step.
- After the soak time is complete, pour the melted fat over your dough and work it into the dough until it is completely incorporated. Set aside.
- Preheat the oven to 300°F.
- Next, prepare 2-3 half-sized baking sheets (18" x 13"). If you are not using parchment paper to roll out your dough, then grease each baking sheet with whatever fat you are using in your dough mixture. Set aside.
- You may also use waxed paper for the rolling process. However, waxed paper can NOT go into the oven, so both the top and bottom sheet of waxed paper would need to be removed when you transfer the rolled dough to the baking sheet. And you will want to make sure that you are transferring your dough to a greased baking sheet.
- If using parchment paper to roll out your dough, place the parchment paper on a flat surface.
- Divide the dough into two pieces. Place one piece of dough on the prepared parchment paper, and cover the dough with a second piece of parchment paper. If you are not using parchment paper, place the piece of dough directly on your greased baking sheet.
- Roll out the dough either between the parchment paper or directly on the baking sheet until it is approximately 1/8" thick or less. If you are rolling out the dough between the parchment paper, you will want to roll it to the approximate size of your baking sheet. If you are rolling out the dough directly on your baking sheet, grease your rolling pin. (You may also use your hands to pat out the dough to the desired thickness, but make sure you grease your hands.)
- If at any time, some dough oozes out between the parchment paper or seems too thick to be rolled out thinly on the baking sheet, remove some of the dough and return it to the bowl of dough. If this happens to you, you will most likely need to divide the dough into three portions and use three baking sheets.
- If using parchment paper, once you have rolled the dough to the desired thickness, remove the top sheet of parchment paper from the dough. If the parchment paper sticks, dip your fingers in a bit of water and use your moistened fingers to help release the parchment paper from the dough.
- Transfer the dough, using the lower piece of parchment paper, to the baking sheet.
- Place the baking sheet on the middle rack in the preheated oven and bake until the dough is golden brown and crisp, approximately 45 minutes to 1 hour or more. The baking time will depend greatly on how thin you have rolled out your dough and may take more than 1 hour.
- If you are baking two baking sheets of dough at one time on different racks in your oven, rotate the baking sheets from one rack to the other halfway through the baking time.
- Once the dough is fully baked, remove the baking sheets from the oven and allow the baked dough to cool on the baking sheets. The dough should now be fully baked and quite hard to the touch and crisp.
- Once the baked dough is completely cooled, you can break the baked dough into small pieces by hand. (See video.) You can also cover the baked dough with parchment paper or waxed paper and roll over it with a rolling pin a few times until the baked dough is broken into a lot of small pieces.
- Once the dough—which is now your homemade flaked cereal—is completely broken into small pieces, you will want to store it in an airtight container. This cereal is shelf-stable, unrefrigerated, and you can keep it in your pantry. It will stay fresh and crisp for 3-4 weeks.
- When you are ready to eat the cereal, you can put it in a bowl with milk just as you would a boxed flaked cereal from the grocery store. You can also eat your flaked cereal dry as a snack.
Video
Notes
Shop for items used in this blog post or video
Favorite Cereal Making Supplies
- Magic Whisk
- 10-Piece Glass Bowl Set
- Stainless Steel Measuring Cups and Spoons
- Spatula Spoon
- Baking Sheet
- Parchment Paper
Amazon Shop and Shopping Guide
- Visit Mary’s Nest Amazon Shop
- Get a 30-day Audible trial with a free audiobook
- Visit my Shopping Guide page
Get up to 15% off for stocking your Traditional Foods Pantry and equipping your Modern Pioneer Kitchen, including discounts from US Wellness Meats, Farmhouse Teas, Backwoods Home, Masontops, Cultures for Health, Survival Garden Seeds, Redmond Real Salt, and More!
Recommended Reading
- The Modern Pioneer Cookbook
- The Modern Pioneer Pantry
- Nourishing Traditions
- Spelt: Meals, Cakes, Cookies & Breads From the Good Grain
- Einkorn: Recipes for Nature’s Original Wheat: A Cookbook
- Essential Eating Sprouted Baking: With Whole Grain Flours That Digest as Vegetables
- Honey & Oats: Everyday Favorites Baked with Whole Grains and Natural Sweeteners


can I use coconut or almond flour?
Hi Sharon,
I haven’t tried those ingredients, but they should work in this recipe. Please experiment with them and keep me posted.
Thanks for your comment and for being a subscriber and a sweet friend!
Love and God bless,
Mary