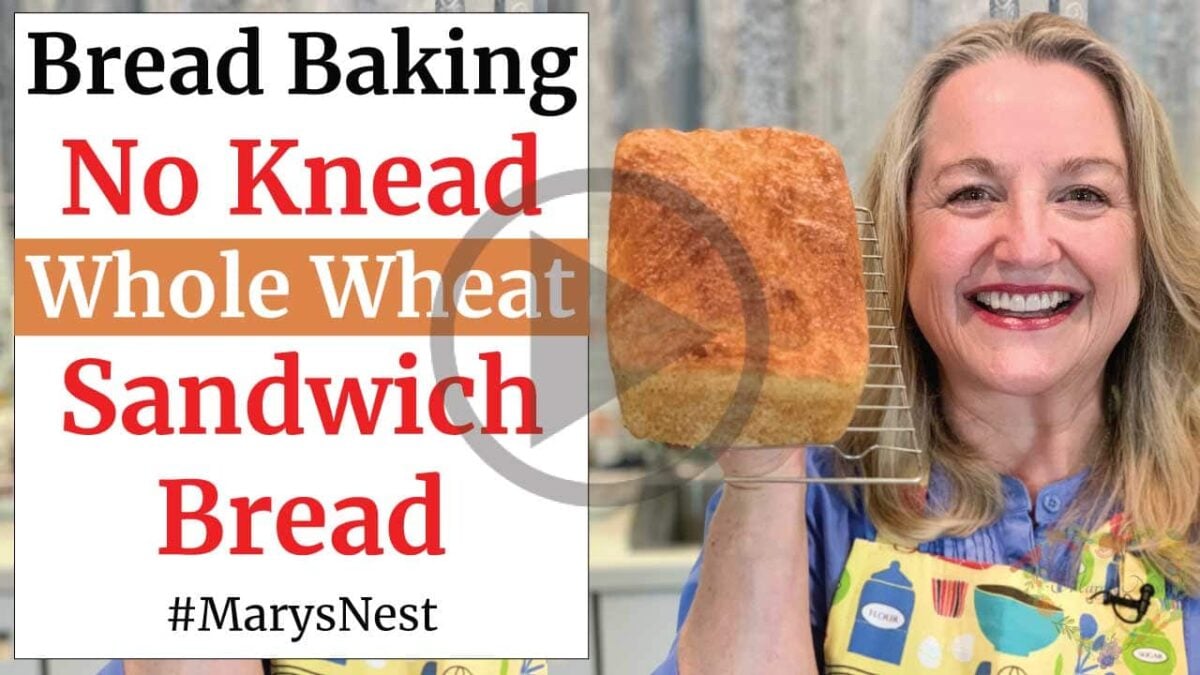
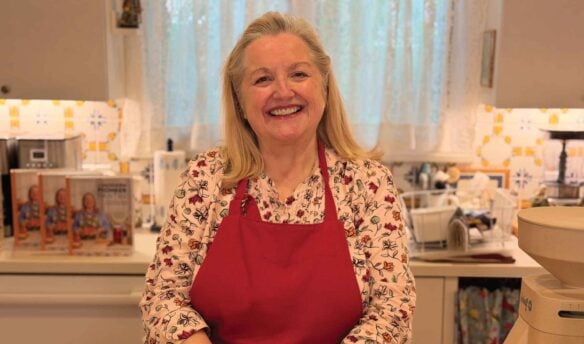
Learn How to Make Super Soft No Knead Whole Wheat Sandwich Bread with this easy recipe. This is another great bread to make that will help you transition from a Processed Foods Kitchen to a Traditional Foods Kitchen.
Affiliates note: As an Amazon Associate I earn from qualifying purchases. My content may contain affiliate links to products and services. If you click through and make a purchase, I’ll receive a small commission. It does not affect the price you pay.
Table of Contents
- The Traditional Foods Kitchen
- No Knead Bread Made with Yeast
- Why Whole Wheat in the First Place?
- More Bread Recipes
- The Modern Pioneer Cookbook
- The Modern Pioneer Pantry
- Start Your Traditional Foods Journey
- Download Your Free 36-Page Pantry List
- Join the Traditional Foods Kitchen Academy
- Kitchen Academy Videos
- No Knead Whole Wheat Sandwich Bread Recipe
- Shop for items used in this blog post or video
The Traditional Foods Kitchen
If you are in the process of transitioning from a processed foods kitchen to a traditional foods kitchen, bread can present a challenge. You may still be buying sandwich bread at the store, but now, you want to learn how to make your own bread. There’s just one problem. The process of making sourdough frightens you. And you’re certainly not ready to start soaking and sprouting grains to make your own sprouted flour! So what do you do?
No Knead Bread Made with Yeast
As I have shared with you in the past, I am not a fanatic when it comes to making traditional foods. Yes, sourdough is great, and so is bread made with sprouted flour. They’re both easy to digest and allow our bodies to absorb nutrients more easily. However, those two types of bread can also seem daunting to make to those new to traditional foods.
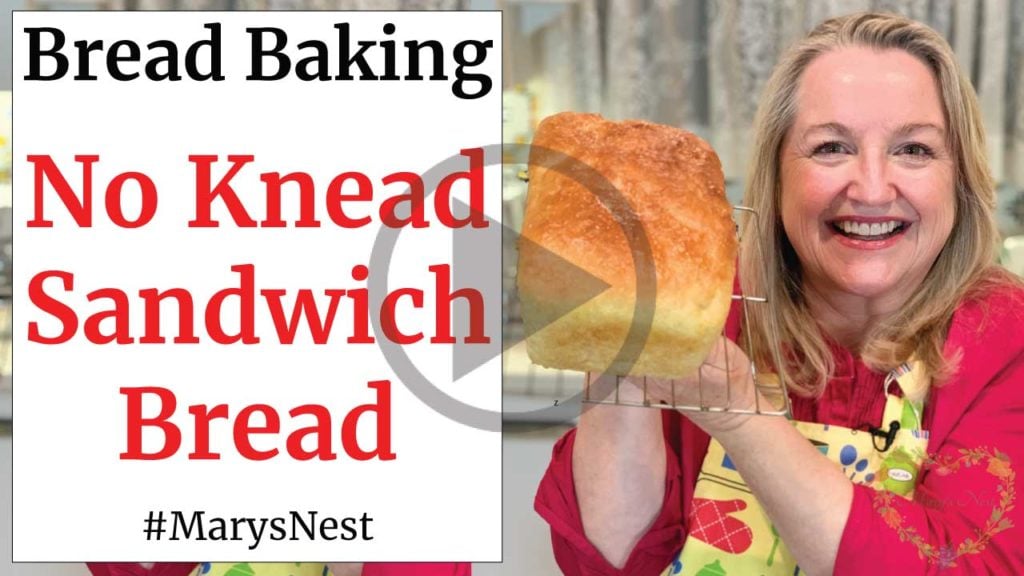
So when it comes to making bread as a beginner, I have no problem helping you learn this skill—as you’re starting out—by making a no knead sandwich bread that uses yeast. My super soft No Knead Sandwich Bread made with all-purpose flour is an example of this.
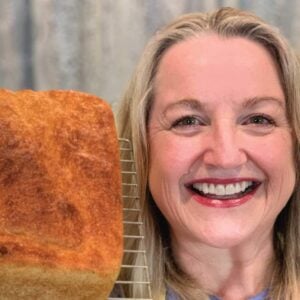
Whole Wheat Sandwich Bread
Just as with my all-purpose flour No Knead Sandwich Bread, this recipe for No Knead Whole Wheat Sandwich Bread, works the same way. The only difference is that we’re going to make this bread with half all-purpose flour and half whole wheat flour to help you, your family, and your friends get used to the taste and texture of whole wheat. But yes, if you’re ready to jump into a 100% whole wheat sandwich bread, I share how to do this in the recipe below and in my How to Make No Knead Whole Wheat Sandwich Bread Video.
The nice thing about any of my recipes for no knead bread is that there’s no need (sorry for the pun) to worry about the finger-poke test or the window-pane test. And even better, by using packaged yeast to give your breads a rise, you don’t have to worry about a sourdough starter.
All you have to do is mix a few simple ingredients (that are available at pretty much every grocery store) together to create your dough, let the mixture rise for about an hour and a half, transfer your dough to a loaf pan for another short rise…and then bake it. There is very little work on your part. And then…Voila!…Fresh homemade bread in a few hours! And your home-baked sandwich bread is going to be better than anything you can buy at the grocery store.
Why Whole Wheat in the First Place?
But you might be wondering, why you can’t just make and eat a sandwich bread made with all-purpose flour? And that’s a great question! Yes, homemade bread—regardless of the type of flour that you use—is going to be better than store-bought packaged bread that often contains lots of other unnecessary—and possibly unhealthy—ingredients that were added to prolong shelf life. When we make bread homemade, we don’t need to add these ingredients. But where does whole wheat flour fit into all of this?
Whole wheat flour, unlike all-purpose flour, contains the bran and the “germ” of the grain, which maintains the fiber and nutrition of the flour. When you bake with whole wheat flour, you are including that fiber and nutrition in your bread. And scientists tell us that a high-fiber nutrient-rich diet is best for maintaining or improving our overall health.
More Bread Recipes
Now that you’ve created your homemade No Knead Whole Wheat Sandwich bread, you can also make my traditional No Knead Sandwich Bread using all-purpose flour for those in your family who are not ready to transition to whole wheat bread.
And next, be sure to try out my Faster No Knead Bread that creates a bakery worthy “boule” with very little work on your part. It’s perfect for the beginner!

And if you’re ready to venture into the world of sourdough, be sure to check out my Foolproof Sourdough Starter made with rye flour, or my Complete Guide to Sourdough Starter that will walk you through a step-by-step process for making a starter with all-purpose flour. And then I’ll walk you through how to make a beautiful sourdough boule.


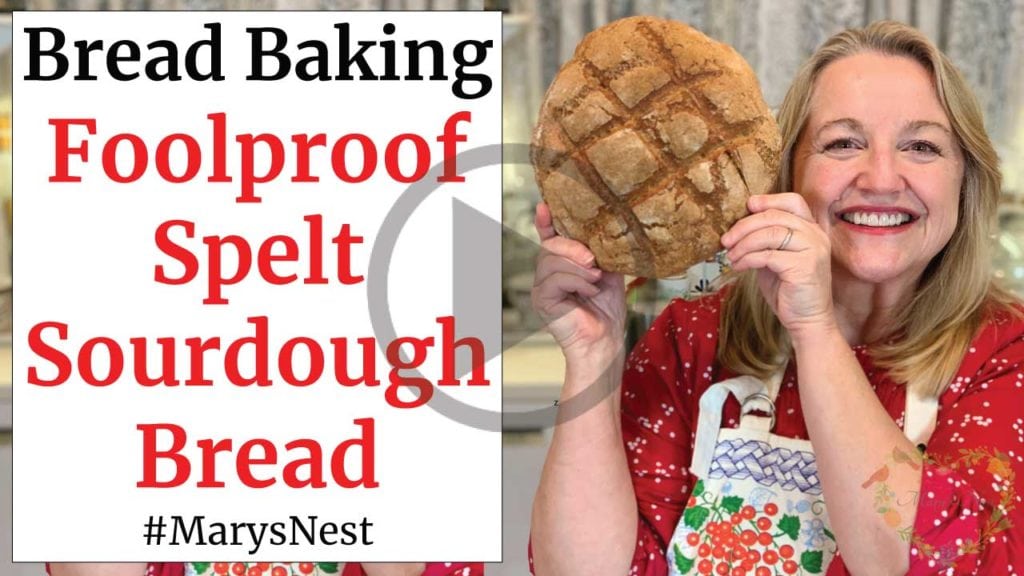
Once you’re ready to bake some sourdough bread, I’ve got you covered with three great recipes, including a No Knead Sourdough Bread, a Traditional Sourdough Boule, and a No Knead Spelt Boule.


Finally, if you’re feeling especially adventurous, be sure to check out my step-by-step tutorial where I walk you through how to soak and sprout your own grain, then dry it and turn it into sprouted flour!


Order YOUR COPY Now!
The Modern Pioneer Cookbook
Seasonal ingredients, traditional techniques, and nourishing recipes. Over 85 traditional, from-scratch recipes! Discover for yourself how you can use simple ingredients and traditional techniques to cook the modern pioneer way.

Order YOUR COPY Now!
The Modern Pioneer Pantry
Simple ingredients, timeless techniques, and a well-stocked pantry. Discover over 100 nourishing recipes to preserve food and turn pantry staples into delicious, homemade meals. Build a wholesome, traditional pantry—just like a modern pioneer!
Start Your Traditional Foods Journey
Sharing my passion for traditional cooking goes beyond my YouTube cooking school—it also comes to life in the pages of my cookbooks. Both of my books, The Modern Pioneer Cookbook and The Modern Pioneer Pantry, are proudly published by Penguin Random House.
The first is filled with time-honored recipes to help you create a traditional foods kitchen, while the second is your complete guide to home food preservation. Order both books today to start or continue your traditional foods journey.
Download Your Free 36-Page Pantry List
For an extensive list of the traditional foods you can make and purchase to stock your pantry, be sure to download my free 36-page Traditional Foods Pantry List. This comprehensive eBook is full of links to recipe videos, helpful articles, and more!

Join the Traditional Foods Kitchen Academy
Are you looking for more traditional foods videos? If so, I invite you to join the Traditional Foods Kitchen Academy. Members of this optional paid YouTube community get access to exclusive videos and other members-only perks. Plus, your YouTube comments include a special members-only badge.
Kitchen Academy Videos
Baking with Whole Grains: The Maslin Method, Grain Mills, and America’s Bread Basket
Explore whole grain baking with The Maslin Method, fresh-milled flour, grain mills, heritage wheats, and more.
A Sweet Season of Celebration and New Beginnings with The Maslin Method Baking School Series
Celebrate the close of a heartfelt book tour and the exciting launch of The Maslin Method Baking School for traditional baking.

Why We Should Incorporate Mackerel Into Our Diet
Easy and nourishing ways to enjoy mackerel into your meals.
Stay in Touch with Mary’s Nest
- Subscribe to My YouTube Channel for Traditional Foods Videos (Free) - When you subscribe, be sure to click on the notification bell that will let you know each time I upload a new video.
- Subscribe to Mary’s Traditional Foods Newsletter (Free) - Get a free 36-page eBook for signing up: How to Stock Your Essential Traditional Foods Four-Corners Pantry.
- Join the Traditional Foods Kitchen Academy - For more detailed videos and exclusive members-only perks, join my YouTube membership community.
- Order The Modern Pioneer Cookbook - Get a hardcover book of Mary's nourishing recipes from a Traditional Foods Kitchen. This bestselling cookbook is published by Penguin Random House with their DK imprint.
- Order The Modern Pioneer Pantry - Get Mary's latest hardcover cookbook about preserving food and making delicious meals from your Four Corners Pantry. Mary's second cookbook is also published by Penguin Random House.
I look forward to having you join me in my Texas Hill Country Kitchen!
I’d like to receive more tips and recipes from Mary’s Nest.
No Knead Whole Wheat Sandwich Bread
Equipment
- 2 Loaf Pans (approximately 8 1/2" X 4 1/2")
Ingredients
- 2 cups All-purpose flour
- 2 cups Whole wheat flour Standard whole wheat (made from red wheat) is used here, but you can also substitute with the whole grain "white" whole wheat flour (made from white wheat).
- 2 teaspoons Fine ground sea salt
- 1/4 cup Honey, pourable Can substitute alternatives of 2 tablespoons of maple syrup, 2 tablespoons of white sugar, or alternative sugars such as Sucanat, date sugar, or maple sugar.
- 2 tablespoons Butter, melted Oil such as coconut oil, avocado oil, or olive oil can be substituted. Avoid using highly processed vegetable oils, such as canola oil or corn oil.
- 2 1/4 cups Water, warm Temperature should be 110°F if using active yeast, up to 130°F if using instant yeast. Warm to touch is sufficient.
- 2 1/4 teaspoons Dry yeast, active or instant 2 1/4 teaspoons of yeast is equivalent to one 1/4 ounce packet of yeast.
- 2 tablespoons Butter, optional For rubbing on top crust
Instructions
- Whisk together in a large bowl both flours, salt, and yeast. (If using a dry sugar, add it in now as well.)
- Add water, melted butter (or oil if using), and honey to bowl with the flour mixture.
- Mix all ingredients until they come together to form a wet, "shaggy" (sticky) dough.
- Cover dough with a plastic wrap or a towel dusted with flour (so the dough will not stick to the towel), place the bowl of dough in a warm place (see Baker's Tip immediately following), and allow the dough to rise for 1 1/2 hours if using instant yeast or 1 3/4 hours if using active yeast.
- Baker's Tip: A "warm" place in your kitchen can be in an oven that is off but has an electric light or pilot light on. An alternate warm place can be on top of a refrigerator.
- After the rise time, deflate the dough by pressing down on the dough with your hands. Afterward, divide the dough into two equal portions. Handling the dough is best done with well-greased hands.
- Take two well-buttered loaf pans and transfer equal portions of dough into each loaf pan. Even out the dough into the corners of the pans using well-greased hands. (The dough will be very sticky.) This is a very important step. Make sure that the loaf pans are VERY well-buttered (or oiled if using butter alternative). This will ensure that the exterior sides and bottom of the bread will be soft.
- Preheat the oven to 375°F (191°C) with oven rack in the middle position.
- As the oven is preheating, leave the dough in the loaf pans, uncovered, and allow to rise in a warm place for approximately 20-40 minutes until the dough is even with the rim of the loaf pan. (Rise time will depend on the temperature in your kitchen.)
- Place loaf pans on the middle rack in the oven, and allow the dough to bake for approximately 40 minutes until the top crust is golden brown. (See Baker's Tip immediately following.) When you tap the top of the loaf, it should sound hollow.
- Baker's Tip: Every oven is different and whole wheat can often brown more quickly than all-purpose flour. If you are making this bread for the first time, check it at 30 minutes to make sure it is not over browning. If it is over browning, but is not yet fully baked (when you tap the top, it does not sound hollow), then cover the loaf pans with aluminum foil and allow to continue baking for an additional 5-10 minutes.
- Using pot holders, remove the loaf pans from the oven and place the pans on a cooling rack. Immediately rub each top crust with butter. Once the loaf pans can be handled comfortably, remove the bread from the loaf pans and transfer the bread onto the cooling rack.
- Allow the bread to cool completely before slicing.
- Bread can be stored at room temperature in a bread box or cloth bag. It will stay fresh for 2-3 days. Bread can also be stored in the refrigerator, well-wrapped (such as in a plastic storage bag) in the refrigerator. It will stay fresh for up to 1 week. Bread may also be frozen. Wrap well in plastic wrap and then aluminum foil and then place it into a plastic freezer bag. Bread will stay fresh and free of freezer burn for 2-3 months.
Video
Notes
Shop for items used in this blog post or video
Favorite Bread Making Supplies
- Baking Apron (This is the one that I’m wearing in the video.)
- 10-Piece Glass Bowl Set
- Danish Dough Whisk
- BreadSmart Plastic Handle Danish Dough Whisk and Kit (See the BreadSmart discount promo code below.)
- Wooden Scraping Spoon
- Plastic Bench Scrape
- Metal Bench Scrape
- ️Metal Loaf Pans
- ️Glass Loaf Pans
- Cast-Iron Dutch Oven
Use promo code MARYSNST for a one-time 15% off Masontops and Breadsmart products on Amazon.com.
Favorite Yeasts for Bread Making
- SAF Instant Yeast
- SAF Premium Instant Yeast
- SAF Gold Instant Yeast
- Red Star Active Dry Yeast
- Fleischmann’s Active Dry Yeast
- Bob’s Red Mill GLUTEN FREE Active Dry Yeast
Amazon Shop and Shopping Guide
- Visit Mary’s Nest Amazon Shop
- Get a 30-day Audible trial with a free audiobook
- Visit my Shopping Guide page
Get up to 15% off for stocking your Traditional Foods Pantry and equipping your Modern Pioneer Kitchen, including discounts from US Wellness Meats, Farmhouse Teas, Backwoods Home, Masontops, Cultures for Health, Survival Garden Seeds, Redmond Real Salt, and More!


This turned out great! Your instructions and tips were spot on and super helpful.
Hi Jeanne,
Thanks for your kind comment. I’m happy that the recipe turned out wonderfully for you!
Love and God bless,
Mary
Can you use a sprouted whole wheat flour in this recipe?
Thank you!
Definitely! 🙂
Mary ,I’m so excited my bread came out beautifully! It was quick and couldn’t have been easier! I got excited right before I put the breads in the oven to bake and I sprinkled one with oats and the other with caraway seeds!! I’m liking the caraway seeds. Next is rye. Have you ever made the marble rye bread which has the light and dark rye? I’d love to see a video on that . You are a wonderful teacher.! Off to slather my bread!! Thanks.
Hi Brenda, Wonderful to hear this!! Yes, I have made marbled rye – I love it!! And I will add that to the list of my video requests. Once things cool down here in central Texas, I’ll definitely be back to baking! Love, Mary
Mary ,Mary ,I’m so excited my bread came out beautifully! It was quick and couldn’t have been easier! I got excited right before I put the breads in the oven to bake and I sprinkled one with oats and the other with caraway seeds!! I’m liking the caraway seeds. Next is rye. Have you ever made the marble rye bread which has the light and dark rye? I’d love to see a video on that . You are a wonderful teacher.! Off to slather my bread!! Thanks.
I have just tried this wheat version of your no knead bread. We love the white version. I wanted to let you know that I used my pullman covered loaf pan and this one batch fits perfectly. I make one fresh sandwich looking bread loaf every other day for our large family.