Affiliates note: As an Amazon Associate I earn from qualifying purchases. My content may contain affiliate links to products and services. If you click through and make a purchase, I'll receive a small commission. It does not affect the price you pay.
Get 10 Tips to Make the Best Fried Chicken
Learn these 10 tips for how to make the best fried chicken. You’ll never have soggy, greasy, burnt, or undercooked chicken again. Your fried chicken will be perfect every time!
Affiliates note: As an Amazon Associate I earn from qualifying purchases. My content may contain affiliate links to products and services. If you click through and make a purchase, I’ll receive a small commission. It does not affect the price you pay.
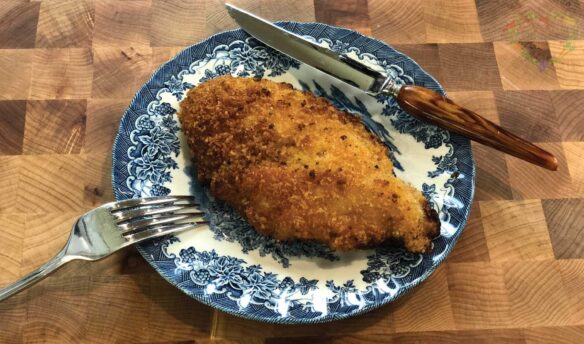
The Best Fried Chicken
Fried chicken can be a challenge, especially if you are new to home cooking. However, it’s worth learning how to make this delicious recipe to enjoy at home for special occasions. In my step-by-step recipe video, I walk you through my 10 tips to help you become an expert at making fried chicken. It’ll be tasty and not greasy. You’ll choose your homemade fried chicken over the restaurant’s version anytime!
What’s the Best Oil for Frying Chicken?
When it comes to choosing the right oil or fat to make fried chicken, you have three main choices:
- Beef Tallow
- Lard
- Peanut Oil
Beef Tallow
Although peanut oil is a popular option for making fried chicken, I choose beef tallow as my go-to frying fat. The beef tallow from pasture-raised cattle is high in the essential fatty acid omega-3. From the article below, you can read how omega-3 plays an important role in supporting brain and heart health. Whenever I have the opportunity to add an ingredient with omega-3 fats into our diet, I’ll always choose that option.
- Fatty Acid Analysis of Grass-fed and Grain-fed Beef Tallow (Weston A Price article)
Also, if you have never fried chicken in tallow, you are in for a treat! Nothing can crisp up fried food like tallow. And don’t worry. The tallow won’t impart a beefy flavor. Frying foods in beef tallow will give your fried food a pure and crispy crunch!
Lard
Lard is a superb fat to fry chicken in because it imparts a wonderful flavor to fried chicken. Southern cooks, who are often experts in frying chicken, will use peanut oil, but they are also known to include a tablespoon or more of bacon grease into their frying pan to provide that wonderfully rich flavor only lard can offer.
Peanut Oil
In contrast to the omega-3 fatty acids provided by beef tallow, peanut oil is high in the essential omega-6 fatty acids. Although we need that type of fat in our diet, we get plenty of omega-6 fatty acids if we are eating the standard western diet. So whenever I can limit adding an ingredient that contains omega-6 in our diet, I always try to replace it with a fat high in omega-3. That’s why I choose beef tallow to make fried chicken.
Looking for Beef Tallow?
If you can’t find beef tallow in your neighborhood supermarket or farmer’s market, check out US Wellness Meats to see if they have beef tallow in stock. (And sometimes they have lamb tallow too!)
- Use discount code MARYNEST and my link to save 15% off regular-priced items on your US Wellness Meats order.
- Shop for tallow on US Wellness Meats
This is not a sponsored post. I’m a long-time customer of US Wellness Meats because I have always been impressed by the quality of their products. Check out my US Wellness Meats unboxing video to see the types of products you can get, including bones for beef bone broth!


Splatter Screen for Making Fried Chicken
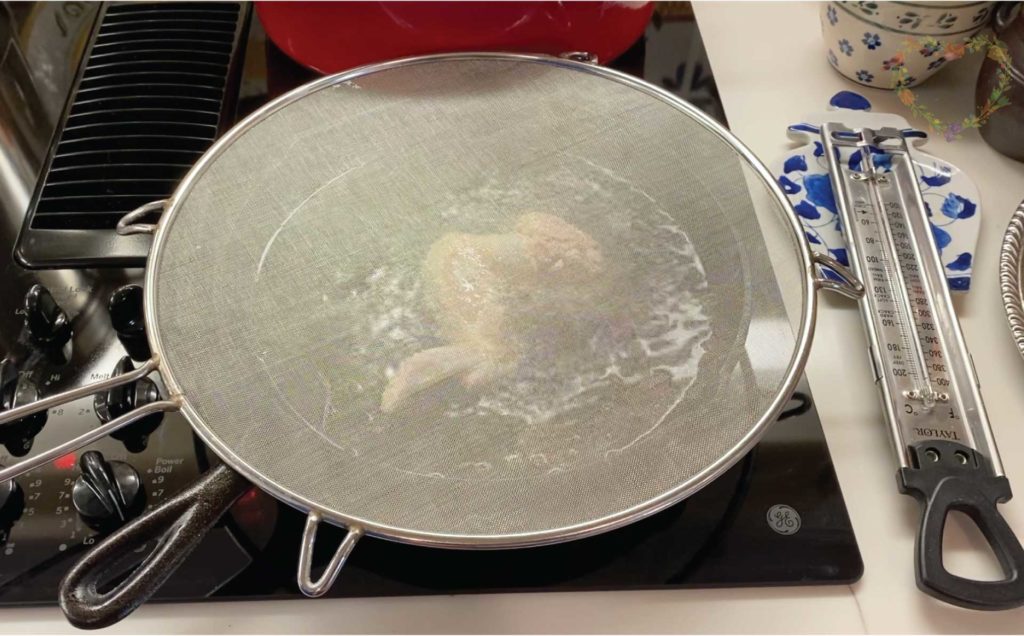
When it comes to pan frying chicken or anything for that matter, you definitely want to have a splatter screen handy. This kitchen tool will save you time on stovetop clean up, but more importantly, this handy device helps prevent hot oil splattering on your hands and saving you from an unpleasant burn.
Easy Chicken Recipes
It’s completely understandable that you might not be making fried chicken every week. (Homemade fried chicken is a labor of love!) But if you are like me and enjoying serving some type of chicken every week, you’ll appreciate these easy chicken recipes. You’ll find lots of meals that you can make in one pot or one pan.
Kitchen Academy Videos
Are you looking for more traditional foods videos? I invite you to join the Traditional Foods Kitchen Academy. Members of this optional paid YouTube community get access to exclusive videos, live streams, and other members-only perks. Plus, your YouTube comments include a special members-only badge.
In the following members-only video, I talk about the Surprising Differences Between Mainstream and Traditional Super Foods.

Stay in Touch with Mary’s Nest
- Subscribe to My YouTube Channel for Traditional Foods Videos (Free) - When you subscribe, be sure to click on the notification bell that will let you know each time I upload a new video.
- Subscribe to Mary’s Traditional Foods Newsletter (Free) - Get a free 36-page eBook for signing up: How to Stock Your Essential Traditional Foods Four-Corners Pantry.
- Join the Traditional Foods Kitchen Academy - For more detailed videos and exclusive members-only perks, join my YouTube membership community.
- Order The Modern Pioneer Cookbook - Get a hardcover book of Mary's nourishing recipes from a Traditional Foods Kitchen. This bestselling cookbook is published by Penguin Random House with their DK imprint.
- Order The Modern Pioneer Pantry - Get Mary's latest hardcover cookbook about preserving food and making delicious meals from your Four Corners Pantry. Mary's second cookbook is also published by Penguin Random House.
I look forward to having you join me in my Texas Hill Country Kitchen!
I’d like to receive more tips and recipes from Mary’s Nest.
Perfect Fried Chicken

Equipment
- 10 inch or 12 inch frying pan (don't use non-stick)
- Deep frying thermometer, optional
- Splatter screen, optional
- Cooked food thermometer, optional
Ingredients
Brine Ingredients
- 2 cups Buttermilk
- 2 cups Water
- 1 tbsp Salt
Fried Chicken Ingredients
- 1 whole Chicken, cut up into 10 pieces Cut breast pieces in half for a total of 10 pieces of chicken.
- 3 cups All-purpose flour
- 1/2 cup Cornstarch
- 1 tbsp Salt
- 1 tsp Ground black pepper
- 1 1/2 tsp Sweet paprika
- 1 tsp Onion powder
- 1 tsp Cayenne powder
- 3 cups Solid fat or oil Make sure that you have 3/4" of melted fat or oil in your frying pan. This usually means that the melted fat or oil should fill at least 1/3 of the frying pan.
Instructions
Instructions for Brining Chicken
- Mix buttermilk, water, and salt together. Stir well to make sure that the salt is completely dissolved.
- Place cut-up chicken into a baking dish, bowl, or plastic bag.
- Pour brine over chicken.
- If using a baking dish or bowl, cover with plastic wrap. If using a plastic bag, seal well and place in a bowl in the event the bag leaks.
- Put the chicken into the refrigerator and allow it to brine for a little as 4 hours or for up to 12 hours.
- Remove the brined chicken from the refrigerator and then take each piece out of the brine and dry well. Transfer the dried chicken to a platter, and set the platter aside.
- Allow the chicken to come up to room temperature for 30 minutes to 1 hour before frying. You want the chicken to come up to room temperature so that it cooks evenly.
Instructions for Frying Chicken
- Add flour, cornstarch, salt, pepper, paprika, onion powder, and cayenne pepper to a medium-sized bowl. Whisk well to fully incorporate the mixture.
- Thoroughly dredge each piece of dried chicken in the flour mixture. Tap off any excess flour mixture and transfer chicken to a wire rack or a plate. Continue until all the chicken has been dredged and set aside. (See video.)
- Discard any remaining flour mixture since the raw chicken has contaminated it.
- Place the fat or oil into a frying pan on medium-low to medium heat. You want the fat or oil to be approximately 350°F.
- Once the fat or oil comes up to temperature, fry three to four pieces of chicken at a time, starting with the skin side down. DO NOT overcrowd the pan.
- When you place the chicken pieces into the frying pan, the temperature of the oil will begin to drop to 300°F-325°F. This the perfect temperature range to cook fried chicken. Do not raise the heat.
- Wings can take approximately 3-4 minutes per side to cook. Legs can take approximately 5 minutes per side to cook. And breasts and thighs can take approximately 7 minutes per side to cook.
- After the appropriate cooking time, turn over each piece of chicken over in the frying pan. Allow the chicken to finish cooking until the skin is a crispy golden brown and the chicken is cooked through so that when sliced into, the juices run clear.
- Transfer the cooked chicken to a clean wire rack or plate to cool slightly before serving. DO NOT place the chicken on a paper towel. This will create steam and cause the skin to become soggy.
Video
Notes
Shop for items used in this blog post or video
Favorite Kitchen Supplies
- Beef Tallow (Or get your tallow from US Wellness Meats with a 15% coupon)
- Splatter Screen
- Cast Iron Frying Pan
- 10-Piece Glass Bowl Set
- Favorite Aprons
- 8-Quart Instant Pot
- 8-Quart Slow-Cooker
- Fat Separator (Clever kitchen device to help you decant bone broth)
- Stainless Steel Strainer
- Flour Sack Towels
- 2-Cup Glass Storage Jars with Lids
- Half Gallon Canning Jars
- Large Enameled Dutch Oven
- Stainless Steel Soup Pot
- Masontops Fermentation Kit (promo code below)
- Mockmill Grain Grinder and Whole Grains (promo code below)
Use promo code MARYSNST for a one-time 15% off Masontops and Breadsmart products on Amazon.com.
Learn more about Mockmill electric grain mills for making fresh flour and their Flake Lover's Flaker that flakes whole grain in minutes.
Amazon Shop and Shopping Guide
- Visit Mary’s Nest Amazon Shop
- Visit my Shopping Guide page
Get up to 15% off for stocking your Traditional Foods Pantry and equipping your Modern Pioneer Kitchen, including discounts from US Wellness Meats, Farmhouse Teas, Backwoods Home, Masontops, Cultures for Health, Survival Garden Seeds, Redmond Real Salt, Mother Earth News, and More!
Recommended Reading
Disclaimer:I am not a medical doctor, a medical professional, a dietician, or a nutritionist. All content found on the MarysNest.com website, including text, images, videos, eBooks or eGuides, social media, or other formats, were created solely for informational purposes only. The content is not intended to be a substitute for professional medical advice, diagnosis, or treatment. Always seek the advice of your physician or other qualified healthcare provider with any questions you may have regarding a medical condition or proper nutritional advice. Never disregard professional medical advice or delay in seeking it because of something you have watched in a video or read on this website. Use caution when following the recipe in this video. The creator and publisher of this video and website will not be held responsible for any adverse effects that may arise from the use of this recipe and method or any other recipe and method on this website or corresponding video channel.