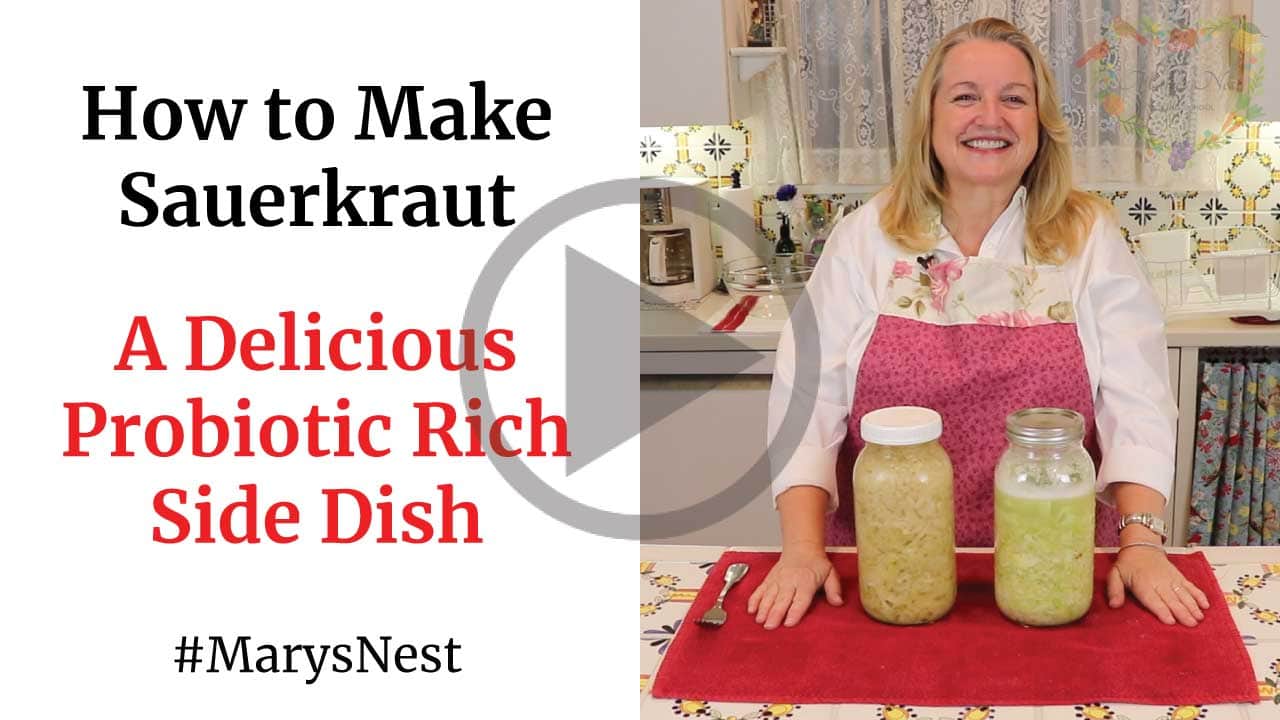
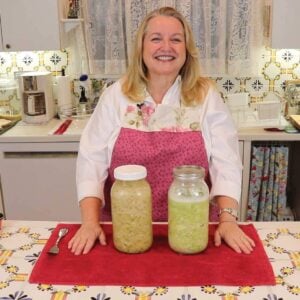
Homemade sauerkraut is a wonderful nutrient-rich food that is slightly tangy and a touch effervescent. It makes the perfect accompaniment to any meal because sauerkraut is high in good bacteria called probiotics, as well as enzymes. Both aid the digestive tract by improving gut health and assisting with digestion, allowing our bodies to better absorb nutrients from the food we eat.
Affiliates note: As an Amazon Associate I earn from qualifying purchases. My content may contain affiliate links to products and services. If you click through and make a purchase, I’ll receive a small commission. It does not affect the price you pay.
Table of Contents
- What is Sauerkraut?
- Why Make Your Own Sauerkraut?
- Sauerkraut Ingredients
- How to Make Sauerkraut
- Storing Tips
- Recipe Tips
- Sauerkraut FAQs
- Fermented Condiment Recipes
- Download Your Free 36-Page Pantry List
- Join the Traditional Foods Kitchen Academy
- How to Make Homemade Sauerkraut Recipe
- Shop for items used in this blog post or video
What is Sauerkraut?
Homemade sauerkraut is fresh cabbage that is naturally fermented with salt. Once the fermentation process is complete, the sauerkraut is rich in Vitamin C and gut-loving good bacteria known as probiotics. Sauerkraut was a staple of pioneer kitchens, providing much-needed nutrients during the winter months when fresh fruits and vegetables were unavailable.
Sauerkraut is generally considered a condiment or side dish and is served in small amounts alongside fatty meats to aid in digestion.
Vegetables are often fermented in the fall during the harvest season. As spring approaches and fermented foods are coming close to their prime and need to be used up, traditional cultures often added their remaining sauerkraut to a pot of soup.
If you want to explore another method for making sauerkraut, I highly recommend making Sauerkraut with Oranges for a Vitamin C Boost.
Why Make Your Own Sauerkraut?
Here are just a few reasons to consider if you’re just getting started with making homemade sauerkraut.
- Sauerkraut is a delicious probiotic-rich side dish, and even more important, it is an easy recipe for beginning ferments.
- It’s the perfect accompaniment to any meal for its probiotic qualities and for adding flavor to dishes!
- It’s cheap and easy to do!
If you find making your own sauerkraut easy, you’ll want to try making your own fermented pickles, fermented carrots, and fermented tomatoes and basil.
In addition to food, you can also make fermented drinks. First, start out with a ginger bug and then make a fermented ginger ale. This probiotic-rich homemade soda is excellent for good gut health.
Sauerkraut Ingredients
Find the full printable recipe with measurements below.
For this homemade sauerkraut recipe, I recommend the following ingredients:
- Cabbage: This recipe works great with green cabbage. If you want to make red cabbage sauerkraut it works too.
- Salt: I am using coarse ground Celtic sea.
- Apple: I like to call the process of adding an apple the “insurance policy.” Apples contain nutrients that good bacteria love to gobble up, so it helps get your fermentation off to a good start. Green apples work best since the color blends in well with the cabbage, but you can use a red apple if you don’t mind the red color specks that may appear in the final product. However, you can leave out the apple and still achieve a batch of fermented cabbage.
How to Make Sauerkraut
Step 1 – Remove a few outer leaves of the head of cabbage and set them aside for later. Cut the head of the cabbage in half, cut out the core, and keep it for later.
Step 2 – Slice each half of the head of cabbage into thin strips.
Step 3 – Place the shredded cabbage and the salt in a bowl. Pound it with a kraut pounder or similar utensil, such as a potato masher, for approximately 5 minutes until the cabbage begins to release some of its juices.
Step 4 – Place the shredded cabbage and salt mixture in a half-gallon jar that has a lid.
Step 5 – Cut the apple and remove the core and seeds. Add the cut pieces to a blender.
Step 6 – Coarsely chop the core of the cabbage and add it to the blender with the apple. Add enough water to the blender to cover the chopped apple and cabbage core. Blend to make a slurry.
Step 7 – Add the apple and cabbage mixture to the shredded cabbage and salt in your jar and mix it to combine.
Step 8 – Press the cabbage down in the jar to compact it.
Step 9 – Take the reserved cabbage leaves, fold them, and put them into the half-gallon jar on top of the shredded cabbage mixture.
Step 10 – Place a small jar on top of the folded cabbage leaves to weigh it down and keep the entire mixture underwater.
Step 11 – Place the jar in an undisturbed place such as the corner of a kitchen counter, on top of a refrigerator, or in a cabinet or pantry that has a room temperature range somewhere between 68°F and 72°F (20°C and 22°C).
PRO TIP: The jar should be placed somewhere out of direct sunlight as ferments do not like temperature fluctuations.
Step 12 – As the cabbage begins to ferment, you should see bubbles in the jar. Release the cap of the jar to release some of the carbon dioxide produced by the fermentation process. You will want to do this each day until your sauerkraut is ready.
Step 13 – After 7 days your sauerkraut is ready to taste. If you like the taste then you can store it in the fridge. If you are not satisfied with the level of fermentation, allow it to continue to ferment for up to 14 days at room temperature before refrigerating.
Storing Tips
Vegetable ferments need to be stored at 40°F (4°C). This can be on the top shelf of your refrigerator or in the door of your refrigerator. They cannot be stored at room temperature.
Once refrigerated, sauerkraut is at its best when consumed within the first 2-3 months, but you can enjoy it for up to 6 months. After 6 months, the texture may become less palatable.
Recipe Tips
Here are some of my top tips for how to make homemade sauerkraut so your batch comes out great from the start!
- The best temperature for making sauerkraut is between 68°F and 72°F (20°C and 22°C). However, they can tolerate slightly warmer temperatures up to about 75°F (24°C).
- If your kitchen is warmer, limit the number of days you allow your vegetable to ferment to approximately three days, and then finish it under refrigeration. Fermentation will take at least two weeks longer when using refrigeration but you will be more successful since it decreases the chance of mold or bad bacteria developing.
- For an added gut health benefit you can drink some of the “Kraut Juice,” the liquid that accumulates in the jar where you made the sauerkraut. The juice is filled with good bacteria! If you can’t fathom drinking kraut juice, use some of it in place of the vinegar in your favorite homemade salad dressing or save it to use with your next ferment.
- Vegetable ferments can taste a bit salty at the beginning. However, over time, the ferment will become less salty as the vegetable—in this case, cabbage—absorbs the brine, creating a more flavorful vegetable, and the brine clinging to the fermented cabbage will taste less salty.
Sauerkraut FAQs
Yes, sauerkraut is good for you when it is made through the natural fermentation process. When cabbage is fermented to make sauerkraut, it enhances the Vitamin C content of the cabbage and also becomes rich in good probiotics that are excellent for improving gut health.
You can, however, some of the good bacteria will die off, and once defrosted, the texture will be considerably softer.
Technically, fermented foods are high in good bacteria, which protects them from spoilage. However, if you ever observe the appearance of odd colors—often caused by mold—or detect a foul odor (as opposed to a yeasty or somewhat vinegary aroma), you should discard your sauerkraut.
Fermented Condiment Recipes
Simple Fermented Ketchup Recipe That Tastes Like Store Bought
This healthy recipe is a delicious way to introduce fermented foods to your family.
How to Make Easy Homemade Fermented Mustard
Enjoy these three tasty probiotic-rich mustards.
How to Make Fermented Salsa – Step-by-Step Tutorial for Beginners
Create this probiotic-rich condiment that’s delicious and good for your gut health too!
How to Make the Best Fermented Hot Sauce
With this special ingredient, you can use any peppers you want to make this tasty hot sauce!
Download Your Free 36-Page Pantry List
For an extensive list of the traditional foods you can make and purchase to stock your pantry, be sure to download my free 36-page Traditional Foods Pantry List. This comprehensive eBook is full of links to recipe videos, helpful articles, and more!
And if you’re looking for a printed book full of my traditional foods recipes to show you how to create a traditional foods kitchen, be sure to order your copy of my new bestselling book, The Modern Pioneer Cookbook.
Join the Traditional Foods Kitchen Academy
Are you looking for more traditional foods videos? If so, I invite you to join the Traditional Foods Kitchen Academy. Members of this optional paid YouTube community get access to exclusive videos and other members-only perks. Plus, your YouTube comments include a special members-only badge.
In the following members-only video series, I talk about the Art of Fermentation.
Stay in Touch with Mary’s Nest
- Subscribe to My YouTube Channel for Traditional Foods Videos (Free) - When you subscribe, be sure to click on the notification bell that will let you know each time I upload a new video.
- Subscribe to Mary’s Traditional Foods Newsletter (Free) - Get a free 36-page eBook for signing up: How to Stock Your Essential Traditional Foods Four-Corners Pantry.
- Join the Traditional Foods Kitchen Academy - For more detailed videos and exclusive members-only perks, join my YouTube membership community.
- Order The Modern Pioneer Cookbook - Get a hardcover book of Mary's nourishing recipes from a Traditional Foods Kitchen. This bestselling cookbook is published by Penguin Random House with their DK imprint.
- Preorder The Modern Pioneer Pantry - Be one of the first to get Mary's hardcover book about preserving food and making delicious meals from your Four Corners Pantry. Mary's second cookbook is also published by Penguin Random House.
I look forward to having you join me in my Texas Hill Country Kitchen!
I’d like to receive more tips and recipes from Mary’s Nest.
How to Make Homemade Sauerkraut
Equipment
- 1 Half Gallon Jar with lid
- 1 4 oz jar
Ingredients
- 1 head Cabbage
- 2 tablespoons Coarse ground Celtic sea salt
- 1 Apple
- 1 Filtered water
Instructions
- Remove a few outer leaves of the head of cabbage and reserve.
- Cut the head of cabbage in half and cut out the core. Reserve the core.
- Slice each half of the head of cabbage into thin strips.
- Place the shredded cabbage and the salt in a bowl and pound with a kraut pounder or similar utensil, such as a potato masher, for approximately 5 minutes until the cabbage begins to release some of its juices.
- Place the shredded cabbage and salt mixture in a half-gallon jar that has a lid.
- Quarter the apple and remove the core and seeds. Coarsely chop and add to a blender.
- Coarsely chop the core of the cabbage and also add to the blender.
- Add sufficient water to the blender to cover the chopped apple and cabbage core. Whirl in the blender to make a slurry.
- Add the apple/cabbage core slurry to the shredded cabbage and salt mixture in the half-gallon jar.
- Stir the mixture together in the jar and then press it down to compact it. (If you prefer, you can do this in a bowl and then transfer it to the jar. However, I find it is better to do this in the jar so that you are assured of having the correct amount of cabbage with the correct amount of salt. If you do this in a bowl, you may not be able to precisely know how much cabbage will fit into the jar.)
- Take the reserved cabbage leaves, fold them, and put them into the half-gallon jar on top of the shredded cabbage mixture.
- Take a small 4-ounce glass jelly jar and put it into the half-gallon jar on top of the folded cabbage leaves. The jelly jar will work as a weight to hold the entire mixture underwater.
- Add additional water, if needed, to reach the neck of the half-gallon jar, allowing for approximately 1 inch of headspace. Place the lid on the jar.
- Place the filled half-gallon jar in an undisturbed place such as the corner of a kitchen counter, on top of a refrigerator, or in a cabinet or pantry that has a room temperature range somewhere between 68°F and 72°F (20°C and 22°C). (See Recipe Notes below.) The jar should also be out of direct sunlight as ferments do not like temperature fluctuations.
- After a few days, the cabbage should begin to ferment, and you should see bubbles in the jar. Release the cap of the jar to allow some of the carbon dioxide produced by the fermentation process to be released. Re-tighten the jar lid.
- Recheck the jar every day and release some of the carbon dioxide by loosening the lid. Then re-tighten the lid.
- After 7 days, taste the sauerkraut. Keep in mind that it will continue to ferment once placed in the refrigerator. If you like the taste, refrigerate it. It's now ready to enjoy. If you are not satisfied with the level of fermentation, allow it to continue to ferment for up to 14 days at room temperature before refrigerating. I do not recommend fermenting the cabbage longer than 14 days as it may become quite soft and less palatable.
- As to storage, vegetable ferments need to be stored at 40°F (4°C). This can be on the top shelf of your refrigerator or in the door of your refrigerator. They cannot be stored at room temperature.
Video
Notes
Nutrition
Shop for items used in this blog post or video
Favorite Fermentation Supplies
- Half Gallon Canning Jars
- 4-Ounce Jelly Jars
- pH Strips
- Ball Mason Jar Leak-Proof Lids, Wide Mouth
- Wooden Kraut Pounder
Favorite Masontops Supplies
- Masontops Complete Fermentation Kit
- Silicone Pickle Pipes
- Fermentation Glass Weights
- Wooden Pickle Packer
Use promo code MARYSNST for a one-time 15% off Masontops and Breadsmart products on Amazon.com.
Favorite Kitchen Supplies
- Favorite Aprons
- Spice Grinder
- Countertop Burner (On my kitchen island in many recipe videos.)
- Handheld Vacuum Sealing System
- Vacuum Lids
- Whisk
- Silica Gel Packets (Helps keep moisture from building up in your mix)
- Cast Iron Dutch Oven
- 8-Quart Slow-Cooker
- Fat Separator (Clever kitchen device to help you decant bone broth)
- Flour Sack Towels
- pH Strips (Helps you check on the acidity of your vinegar)
Amazon Shop and Shopping Guide
- Visit Mary’s Nest Amazon Shop
- Visit my Shopping Guide page
Get up to 15% off for stocking your Traditional Foods Pantry and equipping your Modern Pioneer Kitchen, including discounts from US Wellness Meats, Farmhouse Teas, Lehman's, Masontops, Cultures for Health, Survival Garden Seeds, Redmond Real Salt, Plan to Eat, and More!
Recommended Reading
- The Modern Pioneer Cookbook
- Nourishing Traditions
- The Art of Fermentation: An In-Depth Exploration of Essential Concepts and Processes from around the World
- Wild Fermentation: The Flavor, Nutrition, and Craft of Live-Culture Foods (2nd edition)
- Fermented Vegetables: Creative Recipes for Fermenting 64 Vegetables & Herbs in Krauts, Kimchis, Brined Pickles, Chutneys, Relishes & Pastes
- The Farmhouse Culture Guide to Fermenting: Crafting Live-Cultured Foods and Drinks with 100 Recipes from Kimchi to Kombucha
- Traditionally Fermented Foods: Innovative Recipes and Old-Fashioned Techniques for Sustainable Eating






Love, love, love this recipe! I use a ferment lid for ease and it taste fantastic 😋
So happy to hear this!!
Hi Mary! Today my daughter and I have put up fermented salsa, fermented cucumber pickles, fermented carrots, and now we are getting ready to do the sauerkraut. Thank you so much for the wealth of fermenting knowledge you’ve shared with us! It has been a huge help and great motivation. BTW, you’ve got a typo in step 3 of your instructions… I don’t think you really want us slicing up our baggage! 😂 Blessings! ❤️
Hi Julene, SO happy to hear this!! Oh my…I better correct that typo! LOL!! Love, Mary
Hi Mary, I made the sauerkraut according to your instructions and everything was going well up until the morning of the 5-6th day. There was a good inch of liquid at the top which was bubbling away nicely. I burped the jar every day and some of the liquid was leaking out on the plate underneath. This morning the liquid in the top has disappeared. Can I remedy this somehow. Kraut tastes ok but would like to leave it ferment for another couple days.
Hi Michele, Please forgive the delay! You can do one of two things. You can press down on the kraut to see if it will release any more liquid. If not, you can top it off with a bit of salted water and allow it to continue to ferment. Keep me posted on how it turns out. Love, Mary
I have not tried this recipe yet but I was wondering how often you need to replace the lid you use during fermentation? The canning lids are supposedly single use but I was hoping I could use them again after one batch of sauerkraut. What is your recommendation?
Hi Emma, Fermentation and canning are different so I think you would be able to re-use the canning lids for fermentation with no problem. Love, Mary
Hi Mary!
I made the Sauerkraut a few weeks ago. Followed the recipe to a “T,” and it turned out beautifully! I had some red cabbage left over, so I chose to use a half head of red cabbage and half green. The color is gorgeous! Homemade Sauerkraut, at least your recipe anyway, is sooo much tastier than canned! Plus the gradification factor of having made it myself added to my delight! Thank you so much for the detailed video and recipe. It made me feel much more comfortable trying what I considered a daunting DIY recipe. I look forward to making more of your recipes! In fact, I plan on using the extra time at home in this period of “Social Distancing” to delve into learning more of the lost ways-type of projects and recipes.
Take Care and Stay Well!
Cheri
Thank you for responding. I am in the early stages of discovering the benefits of clean home cooking.
I have been watching your videos for some time now. I have enjoyed them. thank you. Take care and stay healthy. Jeanne
This will be my first attempt at making sauerkraut. You specify coarse Celtic Sea Salt. Can any coarse sea salt be used? Thanks Jeanne
Hi Jeanne, Thanks for visiting. Yes, you can use any coarse sea salt – or fine sea salt, just half the amount. You want to avoid processed salts that contain chemicals or anti-caking agents which will interfere with the fermentation process. Do you enjoy making other traditional foods? If so, I have a playlist of some of my videos titled “Mastering the Basics of Traditional Nutrient Dense Foods Cooking”. It’s a series of 15 detailed videos that covers How to Make Bone Broth, Cultured Dairy, Ferments, Sourdough Starter (my foolproof stater), Sourdough Bread, Soaked and Sprouted Nuts and Beans, and How to Soak and Sprout Grains to Make your own Sprouted Flour at Home. You can watch it here: https://www.youtube.com/playlist?list=PLkRuW3pBo2U3b4eu0QraZReKlGzA11h3y And please share the playlist with any other folks you think might be interested in learning about these types of things. I’m passionate about the book Nourishing Traditions by Sally Fallon (of the Weston A Price Foundation) and want to help as many people as I can learn how to make Traditional “Nutrient Dense” Foods.
Please let me know if you have any questions. I’m so happy to help! And I’m SO glad you’re here!! Love and God Bless, Mary❤️😘❤️
PS – Do you know about our FB group? It’s called Mary’s Nest Modern Pioneers. Come join us! We have a lot of fun chatting about Traditional Foods: https://www.facebook.com/groups/171869080205145/?source_id=210509998974645
Please explain how or whether to sterilize or not to sterilize jars/lids for making sauerkraut. I have read differing views . I’ve got all of my equipment ready to roll but am hung up on this one aspect.
Thanks, Dee
You don’t need to sterilize your jars and lids but they do need to have been washed well in hot soapy water and left to air dry. Hope this helps. The bottom line is you just want your jars to be very clean…
So that you don’t introduce any bad bacteria. Love, Mary
Hi Mary
I live in South Africa and our local cabbages are much bigger-looking than that in your you Tube video. I only used half a one but my sauerkraut, although delicious, is a touch salty. Could you please give me an average weight for the cabbage so I can get the ratio right next time?
Thank you so much.
Hi Sally, you want about a 2% salinity rate. So, if you have approximately a 3 pound cabbage that would mean 2 tablespoons of a course ground sea salt or 1 tablespoon of a fine ground see salt. That said, ferments will be salty in the beginning. But once you put it into your refrigerator it will mellow over the coming weeks. Keep me posted. Let me know how it all turns out. Love, Mary❤️🤗❤️
I am so happy I have found you, Mary! You are a wonderful resource, I’ll be accessing more of your recipes as soon as I have time to cook more. Thank you
Hi Mary,
Just wanted to let you know I followed your instructions (Apple and all) and – let it ferment for 5 days – and the kraut came out wonderfully. I basically did it in real time with you in the video – haha. You made an otherwise intimidating recipe apprehensible – thank you!
Pilar
Hi Mary
More info on above request.
On the first day I twisted lid and released the gas and retightened the lid several times. The next day twice a day instead of your instructions to do once a day. Could this have caused the brownish color at top of jar or is it possible I contaminated it? The cabbage in lower 90% of jar looks good.
Hi Evan, Thanks again for the info. Check what I said in the previous response to your comment and keep me posted. Love and God Bless, Mary
Thank you Mary.
Love your website, and your commentary.
I will be making more fermented recipes.
I’m splitting my cabbage into two jars. Should I add a little extra salt?
Hi Christine, That’s a great question. I think you should be OK but if you think you have left any brine behind, you can top your jars with a bit of salt as an insurance policy.
Do you enjoy making other traditional foods? If so, I have a playlist of some of my videos titled “Mastering the Basics of Traditional Nutrient Dense Foods Cooking”. It’s a series of 15 detailed videos that covers How to Make Bone Broth, Cultured Dairy, Ferments, Sourdough Starter (my foolproof stater), Sourdough Bread, Soaked and Sprouted Nuts and Beans, and How to Soak and Sprout Grains to Make your own Sprouted Flour at Home. You can watch it here: https://www.youtube.com/playlist?list=PLkRuW3pBo2U3b4eu0QraZReKlGzA11h3y And please share the playlist with any other folks you think might be interested in learning about these types of things. I’m passionate about the book Nourishing Traditions by Sally Fallon (of the Weston A Price Foundation) and want to help as many people as I can learn how to make Traditional “Nutrient Dense” Foods.
Please let me know if you have any questions. I’m so happy to help! And I’m SO glad you’re here!! Love and God Bless, Mary❤️😘❤️
PS – Do you know about our FB group? It’s called Mary’s Nest Modern Pioneers. Come join us! We have a lot of fun chatting about Traditional Foods: https://www.facebook.com/groups/171869080205145/?source_id=210509998974645
Hi Mary
I followed your recipe for sauerkraut and made my first batch 5 days ago. The first day I released the gas and retightened the lid. After day three, I noticed the cabbage in the neck of the 1/2 gallon jar looks a brownish color.
Is this from the apple, normal or does it mean my batch may be bad?
I am waiting for 7 days before I open, remove the weighted jar and top cabbage leaves to taste it.
Hi Evan, Thank you so much for your comment. Without seeing a picture, it’s hard for me to tell exactly. Ferments can be so persnickety! Sometimes there is discoloration if something pops up from under the brine and is not submerged. This is not necessarily be a bad thing – however – you need to keep an eye out for mold. Is there anything fuzzy looking? If not, you should be OK. Hope this helps. Keep me posted. Have you seen my playlist all about making different fermented vegetables? You can look through it here: https://www.youtube.com/playlist?list=PLkRuW3pBo2U2EhVspEV5d4Xs2s4pcbHbr I think you will enjoy these videos.
Do you enjoy making other traditional foods? If so, I have a playlist of some of my videos titled “Mastering the Basics of Traditional Nutrient Dense Foods Cooking”. It’s a series of 15 detailed videos that covers How to Make Bone Broth, Cultured Dairy, Ferments, Sourdough Starter (my foolproof stater), Sourdough Bread, Soaked and Sprouted Nuts and Beans, and How to Soak and Sprout Grains to Make your own Sprouted Flour at Home. You can watch it here: https://www.youtube.com/playlist?list=PLkRuW3pBo2U3b4eu0QraZReKlGzA11h3y And please share the playlist with any other folks you think might be interested in learning about these types of things. I’m passionate about the book Nourishing Traditions by Sally Fallon (of the Weston A Price Foundation) and want to help as many people as I can learn how to make Traditional “Nutrient Dense” Foods.
Please let me know if you have any questions. I’m so happy to help! And I’m SO glad you’re here!! Love and God Bless, Mary❤️😘❤️
PS – Do you know about our FB group? It’s called Mary’s Nest Modern Pioneers. Come join us! We have a lot of fun chatting about Traditional Foods: https://www.facebook.com/groups/171869080205145/?source_id=210509998974645
Hi Mary !!!!!
I’m a fermenting fool now,thanks to you !
When do I add caraway seeds to my ‘kraut ?
Hi Linda, Thanks so much for visiting! You are so funny…glad you are a fermenting fool!! Love being on this traditional foods journey with you!! You can add the caraway seeds right in the beginning when you are adding everything else into you jar. Please let me know if you have any other questions. I’m so happy to help! Love, Mary
I’m splitting my cabbage into two jars. Should I add a little extra salt?
Hi Mary !!!!!
I’m a fermenting fool now, thanks to you !
When do I add caraway seeds to my ‘ kraut?