Learn how to make fruit scrap vinegar with pineapple rinds. You can make this easy recipe at home to create a raw vinegar with the probiotic-rich “mother.” (The mother is a colony of good bacteria, also called beneficial bacteria, which is abundant in the probiotics that enhance our gut health.)
Affiliates note: As an Amazon Associate I earn from qualifying purchases. My content may contain affiliate links to products and services. If you click through and make a purchase, I’ll receive a small commission. It does not affect the price you pay.
Table of Contents
- How to Make Fruit Scrap Vinegar at Home
- Do You Have to Make Alcohol Before Making Vinegar?
- Aerobic Fermentation Is All You Need for Fruit Scrap Vinegar
- How to Use pH Paper to Check Your Fruit Scrap Vinegar
- Steps to Use Your pH Paper
- What is Kahm Yeast?
- What Can You Do with Fruit Scrap Vinegar?
- More Homemade Vinegar Recipes
- More Pineapple Recipes
- Kitchen Treasures from the Garbage
- Masontops Mason Jar Fermentation Kit Discount Coupon
- More Homemade Vinegars with Heidi
- Download Your Free 36-Page Pantry List
- The Modern Pioneer Cookbook
- Kitchen Academy Videos
- How to Make Fruit Scrap Vinegar with Pineapple Rinds Recipe
- Shop for items used in this blog post or video
How to Make Fruit Scrap Vinegar at Home
Have you ever opened a bottle of wine, not finished it, and put the opened bottle back into your pantry? Then, maybe a few weeks to a month later, you go to retrieve that wine and find that it tastes like vinegar. What happened?
When alcohol is exposed to air (specifically oxygen), an aerobic bacteria in the air known as acetobacter bacteria converts the wine or other alcohols, like beer, into acetic acid, which is more commonly known as vinegar.
Thus, when your wine was exposed to the air after being uncorked, the acetobacter bacteria that naturally exists in the air went to work to start the process of making vinegar.
Do You Have to Make Alcohol Before Making Vinegar?
So how does this process translate when making vinegar at home using fruit scraps? Do you have to make an anaerobic (without oxygen) alcohol fermentation first, such as to create wine or beer, before you can make vinegar?
The good news is that the answer is no; you do not need to make alcohol first. Most home cooks are not set up with all the equipment necessary to make wine and beer or other alcohols at home. So not having to make alcohol is the beauty of making homemade vinegar with fruit scraps.
Aerobic Fermentation Is All You Need for Fruit Scrap Vinegar
The simple method of making fruit scrap vinegar at home uses a shortcut. Technically, the process of making fruit scrap vinegar at home does not follow the traditional two-step process involved in making vinegar. This traditional process begins with anaerobic alcohol fermentation and ends with aerobic fermentation.
Instead, you can make both the alcohol and the vinegar in one step, which is why making homemade fruit scrap vinegar is so easy.
You just need to leave fruit scraps (or cut-up fruit) and water mixed together in a loosely covered jar for about a week until it turns into a mild alcohol. The mixture turns into alcohol because the naturally occurring yeasts in the fruit and water mixture quickly gobble up all the natural fruit sugars.
Does this sped-up process of making alcohol produce a high-quality alcohol, such as a tasty wine or beer? Probably not. But it’s all you need to kickstart the ultimate vinegar-making process.
As the mixture starts its first alcoholic ferment, it will smell very yeasty and beer-like. Next, you just need to continue to let it sit in its jar, loosely covered, for about three more weeks until the mixture transitions to its second stage of fermentation and becomes vinegar!
How to Use pH Paper to Check Your Fruit Scrap Vinegar
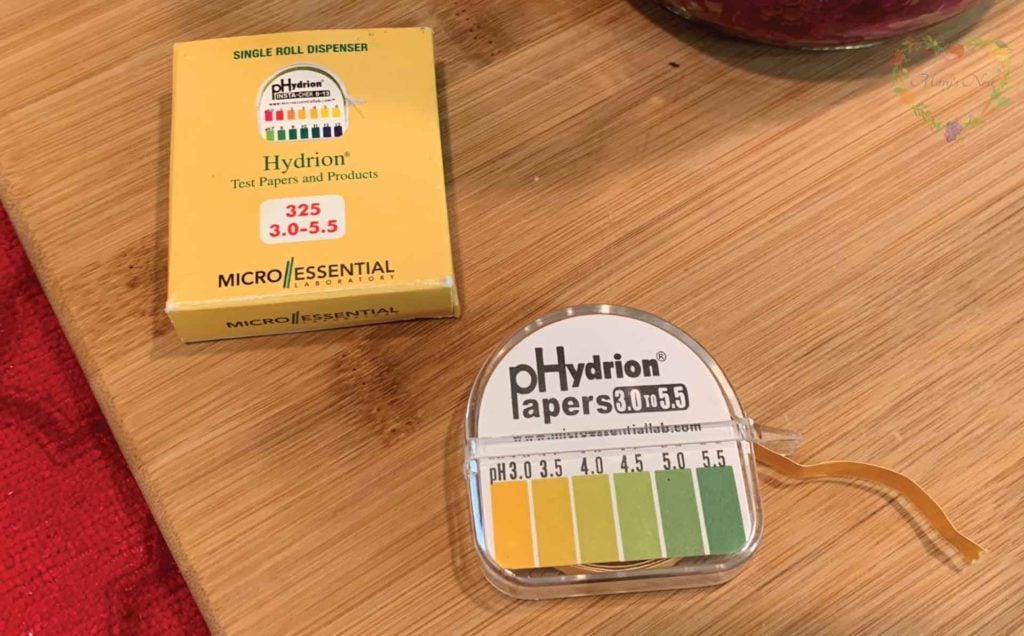
If you’re new to making vinegar, especially fruit scrap vinegar with pineapple rinds or strawberry tops, you’ll want to make sure you have some pH paper or strips handy. You can use these strips to test to make sure that your liquid is acidic enough to decant as vinegar or if your liquid will need more time to turn into vinegar.
Steps to Use Your pH Paper
You can check to see if your vinegar is ready to decant with the following steps:
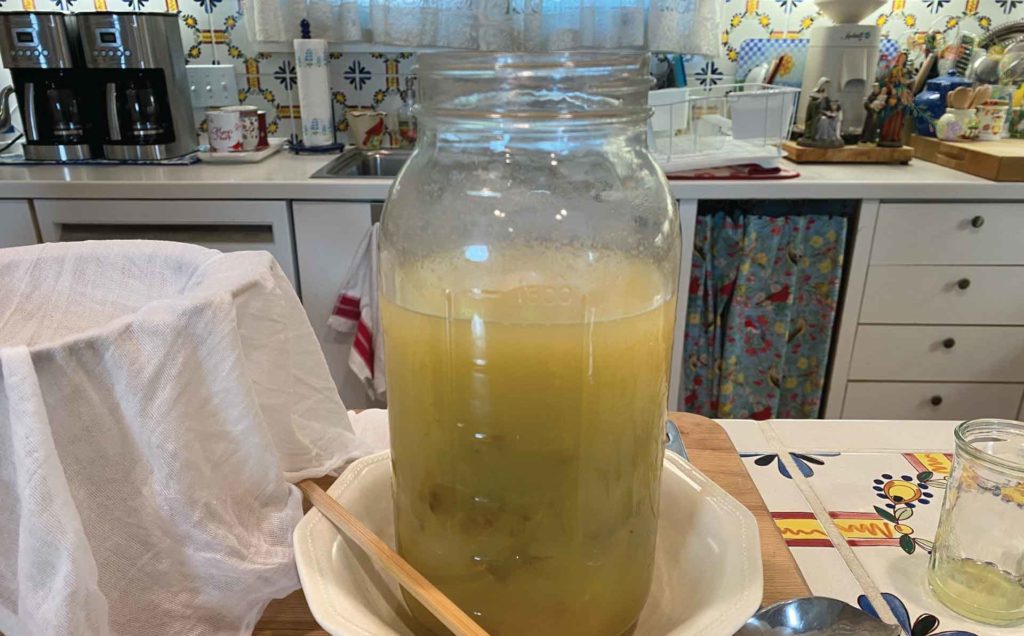
- Use a spoon to get some of the liquid from your vinegar container. You can keep it on the spoon or put it into a small cup. (You don’t want to put the pH paper directly into your vinegar container.)
- Tear off a strip of the pH paper.
- Dip the pH paper into the liquid on your spoon or small cup.
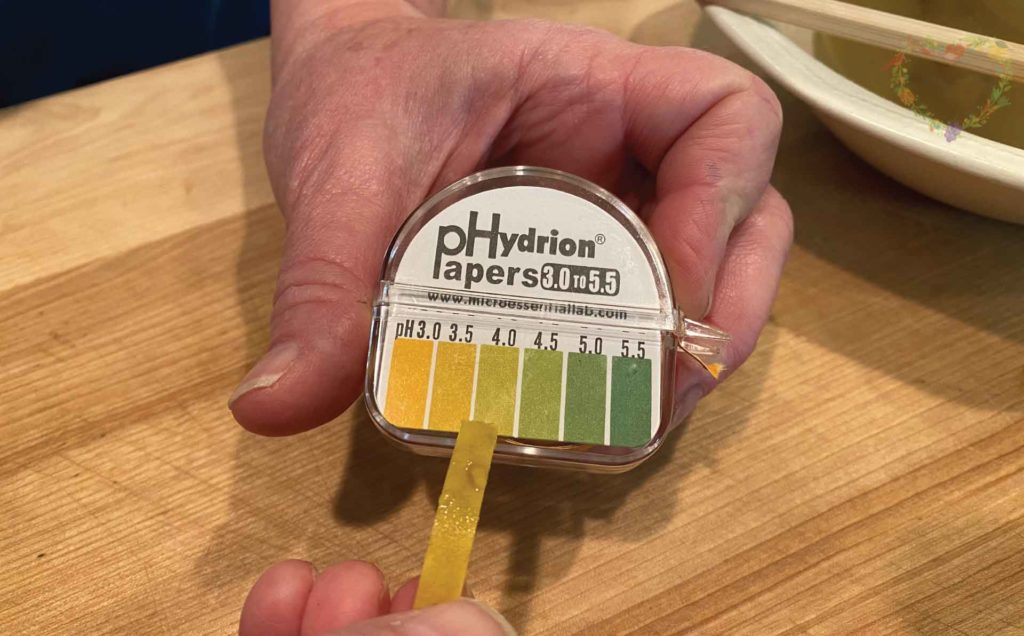
- If the pH paper shows a reading under 4.0, your vinegar is ready to decant.
- If the pH paper shows a reading above 4.0, you need to let your vinegar set for a while longer. Check your vinegar with the pH paper again in a few days.
In my pineapple vinegar video, I show you the process of checking my vinegar with pH paper. As you can see in the image below, my vinegar is between 3.5 and 4.0, so it’s ready to decant.
In general, when I am making raw apple cider vinegar, I like my pH to be between 3.0 and 3.5. However, when making vinegar with sweeter fruits like pineapple scraps, I find that it is difficult to reach a lower acidity level than 3.5. But as long as the pH is below 4.0, we have reached an acceptable level of acidity for homemade vinegar.
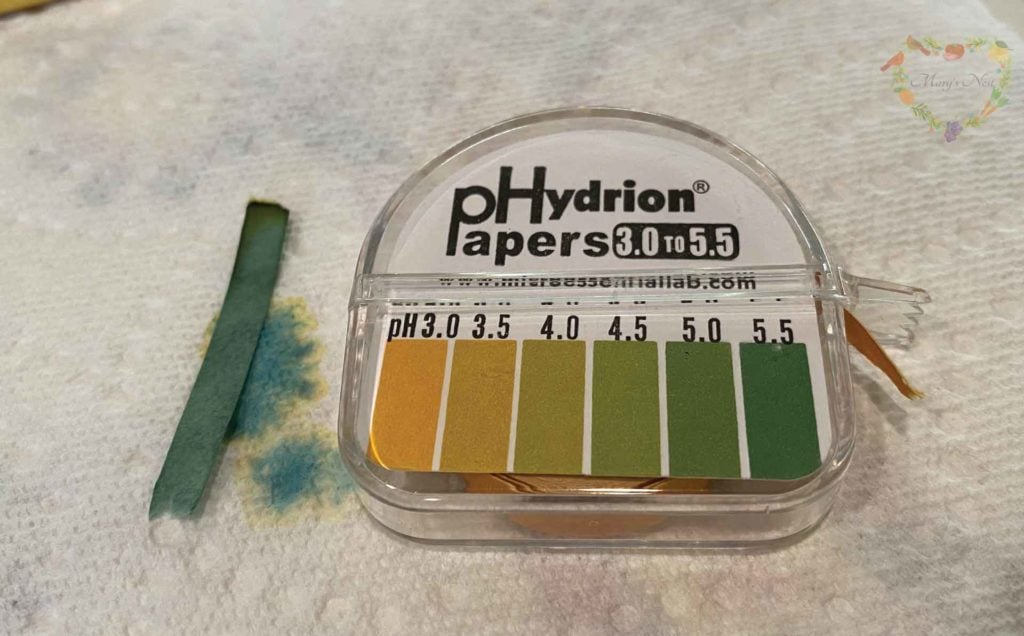
In contrast, the following image shows you a pH strip that’s been dipped into water. The pH of tap water can range from 6.5 and 8.5, but since the pH paper in this example only goes up to 5.5, the pH strip registers at the high end of the range (3.0 to 5.5), which is 5.5.
For testing vinegar, I’m only interested in pH values below 4.0. So a pH strip that shows 5.5 is definitely not vinegar!
What is Kahm Yeast?
When it comes to making fruit scrap vinegars, especially those that start with the scraps of sweet fruits, you might discover a white spider-web film forming across the top of your vinegar in the making. This white film is kahm yeast. It is not harmful, but it is persnickety! But don’t worry. Just skim it off the top, and then give your vinegar liquid a good stir.
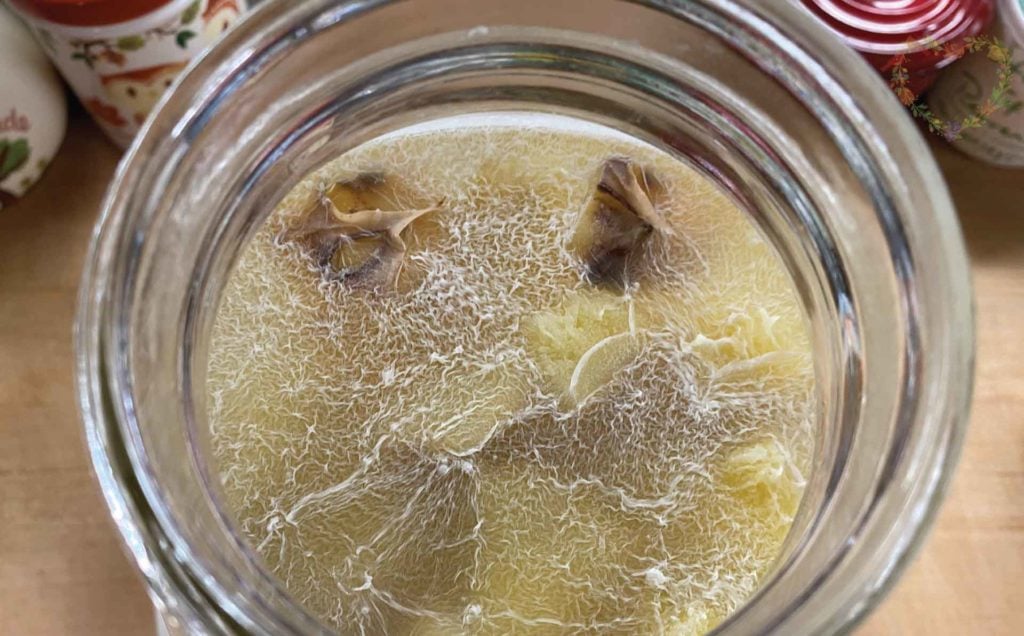
Kahm yeast may return, but if it does, just do the same thing all over again. Skim off the kahm yeast and give everything a good stir. The kahm yeast should eventually stop forming and should no longer be a problem. And it will no longer be a problem once you strain and decant your vinegar.
- Note: Kahm yeast is not mold. Mold is usually multi-colored and fuzzy. If you encounter mold, I recommend throwing out your vinegar and starting over.
What Can You Do with Fruit Scrap Vinegar?
Once you have successfully made your pineapple fruit scrap vinegar, you can use it in the same way you would use any vinegar in your pantry, such as making:
- A tasty salad dressing
- A flavorful marinade that also works as a tenderizer for tough cuts of meat
- An addition to your bone broth ingredients to provide the acid to help draw out the collagen from the bones.
Should You Use Fruit Scrap Vinegar in Bone Broth?
I normally would not recommend using homemade vinegar to make bone broth, since you’ll lose the vinegar’s mother when the bone broth is simmering. Instead, a store-bought vinegar or alcohol would work the best, such as Red Vermouth, Port, Marsala, or Madeira.

However, if you’d rather not purchase store-bought vinegar or alcohol, your homemade fruit scrap vinegar, such as your pineapple vinegar or apple cider vinegar, would work well. You might even get a light and pleasant sweetness in your decanted bone broth when making it with fruit scrap vinegar.
Should You Use Fruit Scrap Vinegar for Cleaning?
I do not recommend using any fruit scrap vinegar for cleaning. Fruit scrap vinegars tend to lean on the sweeter side, which can make them a bit sticky. That’s the last thing you want in a homemade cleaning product!
However, in my homemade citrus vinegar video, I show you how to make a vinegar that’s perfect for cleaning. So be sure to watch that recipe video if you enjoy making homemade cleaning products.
More Homemade Vinegar Recipes
If you find that you enjoy making homemade vinegar, be sure to try making homemade raw apple cider vinegar. It’s easy to do and costs a lot less to make than what you will pay for it at the grocery store!
Not only can you make vinegar using apples or other fruit scraps, but you can also make an assorted variety of vinegars using citrus and citrus peels. I walk you through the entire process in the following video.
When it comes to making fruit scrap vinegars, strawberry fruit scrap vinegar is one of the prettiest and most flavorful. Learn how easy it is to do in the video below, and you will never want to throw out your strawberry tops again!
More Pineapple Recipes
If you love pineapple, try the following recipes:
- Pineapple Mint Shrub Mocktail – This delightful drinking vinegar makes a sweet and tangy nonalcoholic beverage.
- Superfood Smoothies – One of the recipes shows you how to make an Anti-inflammatory Pineapple Turmeric Superfood Smoothie.
- Electrolyte Drink – You can use pineapple for the juice ingredient.

Kitchen Treasures from the Garbage
In my fruit scrap vinegar video, I show you the bottles I use to decant the pineapple vinegar. I have an assorted collection that I’ve collected over the years from recycling, thrift stores, and, yes, even from the garbage.
The following videos show you the treasures I’ve found in the garbage for my kitchen and garden. You may have good luck too!

Masontops Mason Jar Fermentation Kit Discount Coupon
Although you don’t need any special equipment to start making ferments, the Masontops kit can help you simplify the process and enable you to create your ferment successfully. In my Masontops unboxing video, I show you my Masontops Complete Mason Jar Fermentation Kit and go over everything the kit includes.
- Use promo code MARYSNST for a one-time 15% off Masontops and Breadsmart products on Amazon.com. (This is not a sponsored post. Masontops provided me with a special discount code for my viewers. I like their products, and I think you will too.)
More Homemade Vinegars with Heidi
If you’d like to learn how to make more homemade vinegars, be sure to visit Heidi’s Rain Country Homestead Etsy shop and YouTube channel.
Heidi also makes beautiful aprons. Here’s one of the aprons she made for me that you may have seen me wear in some of my videos. If you love unique aprons, visit her Etsy shop to view her lovely collection of handcrafted items, including aprons, skirts, vacuum chambers, and more. She takes special orders too!
A while back, Heidi sent around a mystery box that made its way to different YouTube creators, including me. I show you what’s in the Homestead Carousel Mystery Box in the following video.

Download Your Free 36-Page Pantry List
As you continue on your journey, leaving a processed foods kitchen behind and creating a traditional foods kitchen, you will want to be sure to stock your pantry with the right foods.
For an extensive list of the traditional foods you can make and purchase to stock your pantry, be sure to download my free 36-page Traditional Foods Pantry List. This comprehensive eBook is full of links to recipe videos, helpful articles, and more!

And if you’re looking for a printed book full of my traditional foods recipes that shows you how to create a traditional foods kitchen, be sure to preorder your copy of my new book, The Modern Pioneer Cookbook.

Order YOUR COPY Now!
The Modern Pioneer Cookbook
Seasonal ingredients, traditional techniques, and nourishing recipes. Over 85 traditional, from-scratch recipes! Discover for yourself how you can use simple ingredients and traditional techniques to cook the modern pioneer way.
Kitchen Academy Videos
Are you looking for more traditional foods videos? If so, I invite you to join the Traditional Foods Kitchen Academy. Members of this optional paid YouTube community get access to exclusive videos, live streams, and other members-only perks. Plus, your YouTube comments include a special members-only badge.
In the following members-only video series, I talk about How to Master the Art of Fermentation.


Stay in Touch with Mary’s Nest
- Subscribe to My YouTube Channel for Traditional Foods Videos (Free) - When you subscribe, be sure to click on the notification bell that will let you know each time I upload a new video.
- Subscribe to Mary’s Traditional Foods Newsletter (Free) - Get a free 36-page eBook for signing up: How to Stock Your Essential Traditional Foods Four-Corners Pantry.
- Join the Traditional Foods Kitchen Academy - For more detailed videos and exclusive members-only perks, join my YouTube membership community.
- Order The Modern Pioneer Cookbook - Get a hardcover book of Mary's nourishing recipes from a Traditional Foods Kitchen. This bestselling cookbook is published by Penguin Random House with their DK imprint.
- Order The Modern Pioneer Pantry - Get Mary's latest hardcover cookbook about preserving food and making delicious meals from your Four Corners Pantry. Mary's second cookbook is also published by Penguin Random House.
I look forward to having you join me in my Texas Hill Country Kitchen!
I’d like to receive more tips and recipes from Mary’s Nest.
How to Make Fruit Scrap Vinegar with Pineapple Rinds
Equipment
- 1 Sixty-four ounce jar
- 1 Coffee filter or scrap of clean fabric
- 1 Rubberband
- Wooden chopstick or wooden spoon
- 1 Bowl Large enough in which the jar can sit in and be steady.
Ingredients
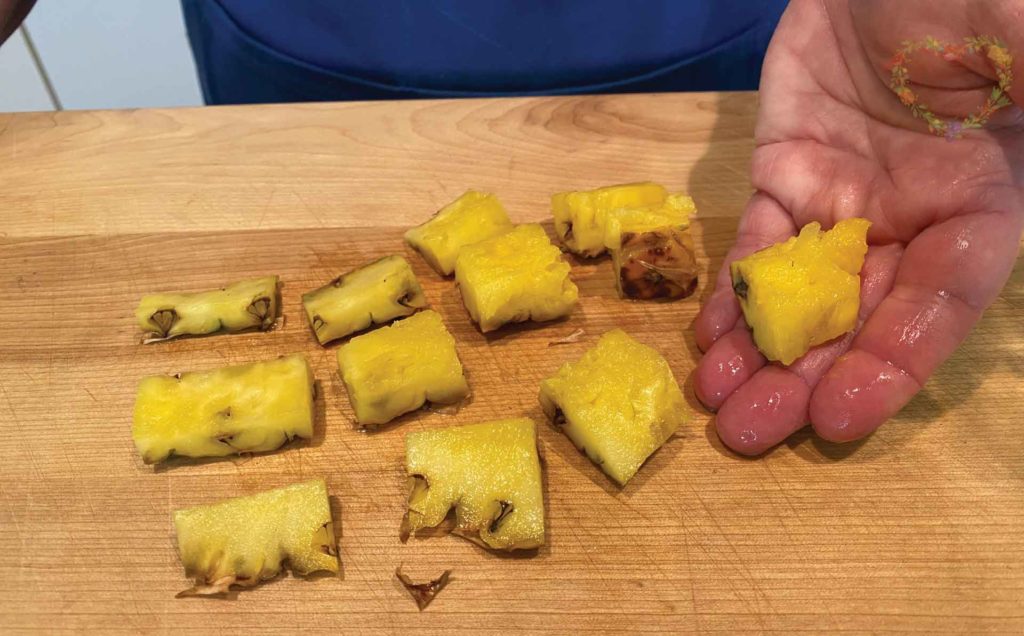
- 1 Pineapple rind, chopped into 1-inch pieces
- Water, preferably filtered
- 1/4 cup Sugar, optional
Instructions
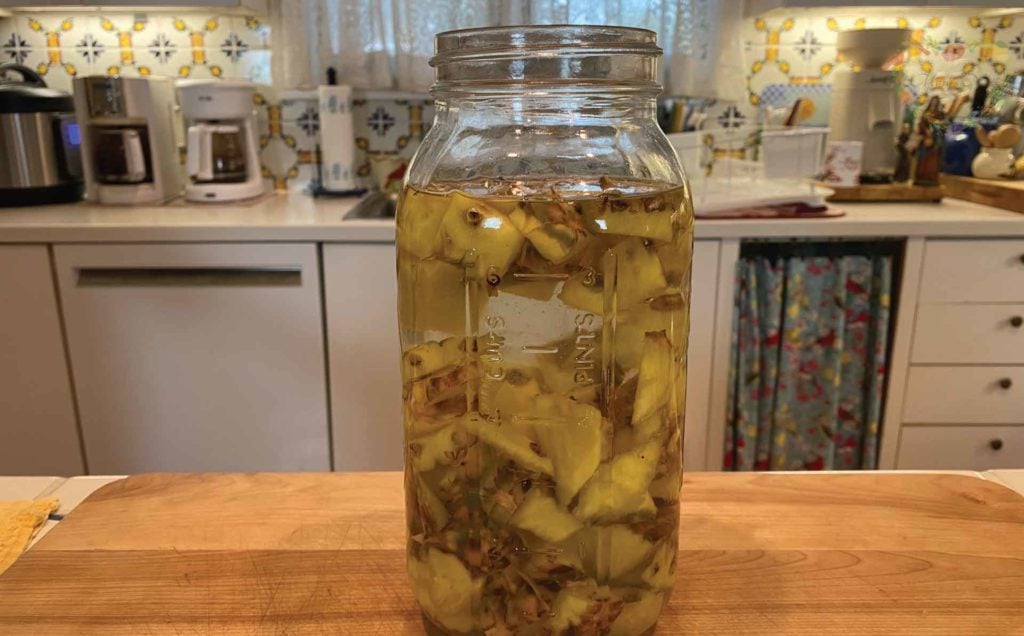
- Place all pineapple scraps into the 64-ounce jar.
- Add water to the jar to completely cover the pineapple scraps, leaving 1-2 inches of headspace at the top of the jar.
- Stir the mixture well using a wooden chopstick or the handle of a wooden spoon.
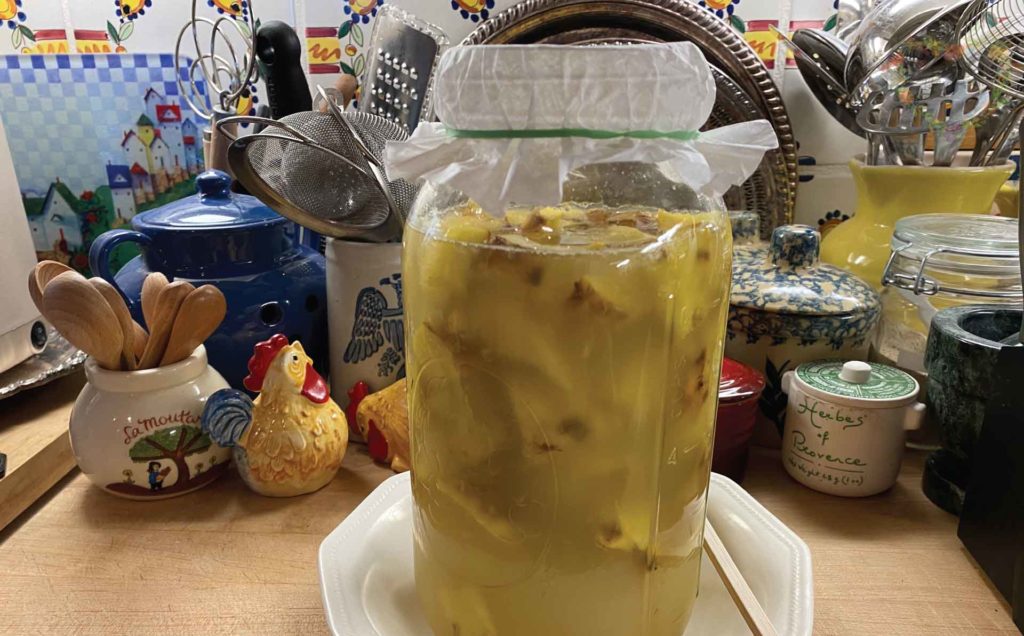
- Cover the jar with the coffee filter or clean fabric and secure it with the rubber band.
- Place the jar into the bowl and set it aside in an undisturbed area of your kitchen out of direct sunlight.
- Each day, remove the covering from the top of the jar and stir the mixture for about 30 seconds. Stirring twice per day is best. After stirring the mixture, return the covering to the top of the jar.
- Within a few days, you should notice bubbling in the mixture, and the aroma should be yeasty and similar to the aroma of beer. If this does not happen, add the 1/4 cup of sugar and stir the mixture vigorously.
- Continue to stir the mixture, preferably twice per day, for a total of 30 days.
- After 30 days, use pH paper or strips to check the acidity level of the vinegar. (See video for how to use the pH paper.)
- If the ph of the vinegar is 4.0 or lower, it has reached an acceptable acidity level. I generally recommend allowing your vinegar to reach a pH acidity level between 3.5 to 3.0.
- To strain your vinegar, line a mesh strainer with a flour sack towel or some cheesecloth and place the lined mesh strainer over a clean bowl. Pour the vinegar into the lined mesh strainer. (See video for the straining technique.)
- Transfer the vinegar from the bowl into a clean bottle that can hold 32 ounces. Or divide the vinegar into smaller bottles. Put a cap on the bottle.
- You can store your homemade pineapple scrap vinegar in the pantry, but if you prefer, you can refrigerate it. Technically, because vinegar is highly acidic, it is what is known as "self-preserving" and does not need to be refrigerated. However, refrigerating your vinegar will not hurt it.
- Although unlikely, if your vinegar develops mold or a foul smell at any time, discard it.
- Technically, your vinegar should last indefinitely, but I recommend using it within one year. (See video for a more detailed explanation about shelf life.)
Video
Notes
Shop for items used in this blog post or video
Favorite Vinegar Making Supplies
- Half Gallon Canning Jars
- pH Strips
- Large Measuring Cup
- 10-Piece Glass Bowl Set
- Mesh Strainers
- Flour Sack Towels
- Storage Lids
Favorite Kitchen Supplies
- Favorite Aprons
- Spice Grinder
- Countertop Burner (On my kitchen island in many recipe videos.)
- Handheld Vacuum Sealing System
- Vacuum Lids
- Whisk
- Silica Gel Packets (Helps keep moisture from building up in your mix)
- Cast Iron Dutch Oven
- 8-Quart Slow-Cooker
- Fat Separator (Clever kitchen device to help you decant bone broth)
Amazon Shop and Shopping Guide
- Visit Mary’s Nest Amazon Shop
- Visit my Shopping Guide page
Get up to 15% off for stocking your Traditional Foods Pantry and equipping your Modern Pioneer Kitchen, including discounts from US Wellness Meats, Farmhouse Teas, Backwoods Home, Masontops, Cultures for Health, Survival Garden Seeds, Redmond Real Salt, Mother Earth News, and More!
Recommended Reading
- Homebrewed Vinegar: How to Ferment 60 Delicious Varieties, Including Carrot-Ginger, Beet, Brown Banana, Pineapple, Corncob, Honey, and Apple Cider Vinegar
Disclaimer:I am not a medical doctor, a medical professional, a dietician, or a nutritionist. All content found on the MarysNest.com website, including text, images, videos, eBooks or eGuides, social media, or other formats, were created solely for informational purposes only. The content is not intended to be a substitute for professional medical advice, diagnosis, or treatment. Always seek the advice of your physician or other qualified healthcare provider with any questions you may have regarding a medical condition or proper nutritional advice. Never disregard professional medical advice or delay in seeking it because of something you have watched in a video or read on this website. Use caution when following the recipe in this video. The creator and publisher of this video and website will not be held responsible for any adverse effects that may arise from the use of this recipe and method or any other recipe and method on this website or corresponding video channel.