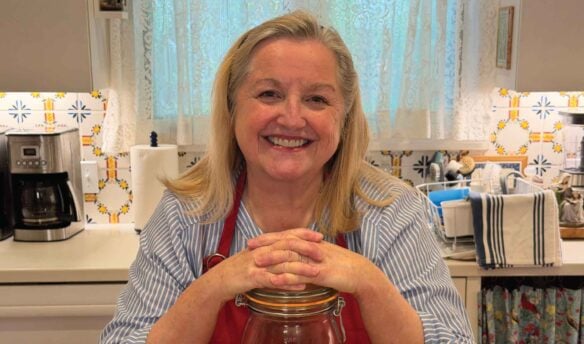
In this Complete Sourdough Starter Guide, you’ll learn how to make Sourdough Starter, diagnose and fix problems that might occur, and discover how to maintain your starter to keep it bubbly and strong.
And this couldn’t be easier! You don’t need a scale, a thermometer, or a proofing box. All you need is all-purpose flour and water. So let’s get started!
Affiliates note: As an Amazon Associate I earn from qualifying purchases. My content may contain affiliate links to products and services. If you click through and make a purchase, I’ll receive a small commission. It does not affect the price you pay.
Table of Contents
- The Modern Pioneer Cookbook
- No Scale Required to Make Sourdough Starter
- Let’s Start Our Sourdough Starter
- When Day Three Arrives
- Is It Time to Bake Sourdough Bread?
- What If Something Goes Wrong with My Sourdough Starter?
- More Sourdough Recipes
- More Baking Recipes
- Grind Your Own Flour with the Mockmill
- Download Your Free 36-Page Pantry List
- Join the Traditional Foods Kitchen Academy
- More Kitchen Academy Videos
- The Complete Sourdough Starter Guide Recipe
- Shop for items used in this blog post or video

Order YOUR COPY Now!
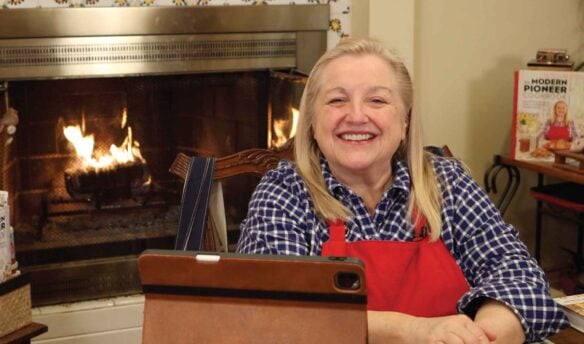
The Modern Pioneer Cookbook
Seasonal ingredients, traditional techniques, and nourishing recipes. Over 85 traditional, from-scratch recipes! Discover for yourself how you can use simple ingredients and traditional techniques to cook the modern pioneer way.
No Scale Required to Make Sourdough Starter
People have been making sourdough starter for thousands of years. And many of them never had a scale to weigh their ingredients. So if you don’t have a scale, don’t worry. You can do this. I never want a lack of equipment to stand in the way of anyone being able to make sourdough starter—or any nutrient dense food for that matter.
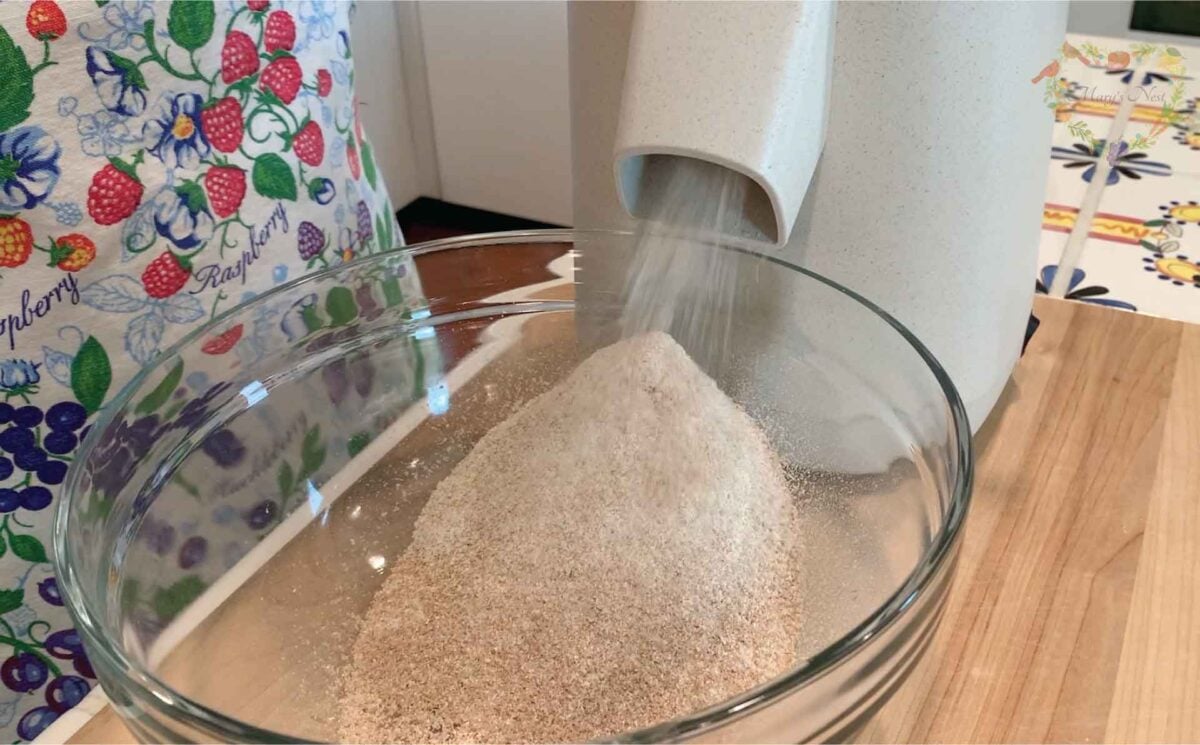
So if you don’t have a scale, how do you know you have the right amount of flour and water in the correct proportions? It’s easy. Instead of putting your measuring cup into your flour, dip a clean spoon into your flour and use the spoon to fill your measuring cup. This will give you approximately the same amount of flour by weight as your measuring cup full of water. Is it 100% exact? No. But it doesn’t matter. It’s close enough.
Let’s Start Our Sourdough Starter
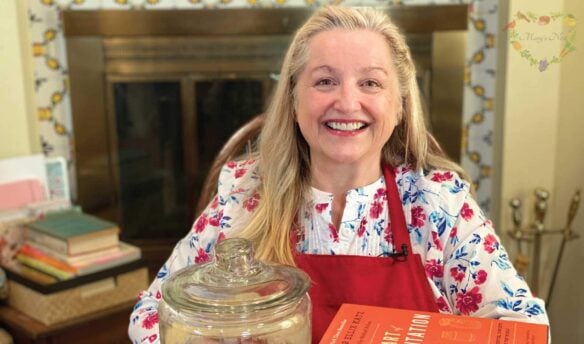
The first thing you want to do is get a bowl or a jar to mix your starter. To the vessel that you choose, add your flour and water and stir well to make a slurry. Cover the bowl or jar loosely, and leave it in a warm place between 70-80°F. This is basically room temperature.
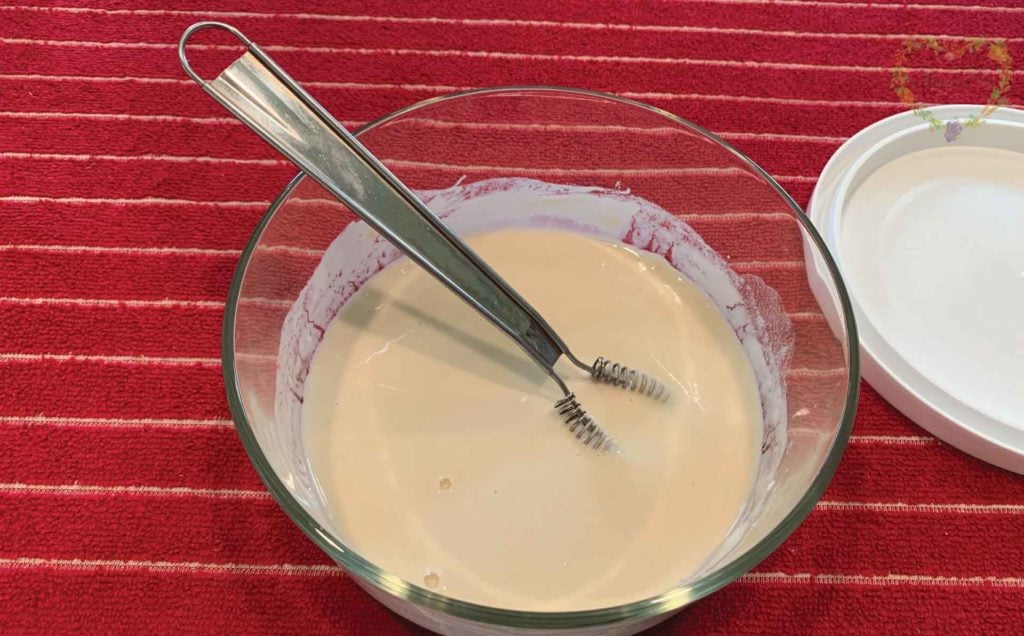
I started with a half cup of flour and a half cup of water, but you can use any amount you want, as long as the flour and water are in the same amounts. This makes for a 100% hydration starter. I find this type of starter is easiest for beginners to have success.
When Day Three Arrives
After having left your starter-in-the-making for two days, you are now ready to feed it. You’ll want to remove half of the mixture from your bowl (this is known as “discarded sourdough starter”), and you’ll want to feed what is left in the bowl with the same proportional amounts of water and flour that you started with. In my example, I use one-half cup of flour and one-half cup of water. Next, I stir it, cover it, and let it rest for 12 hours.
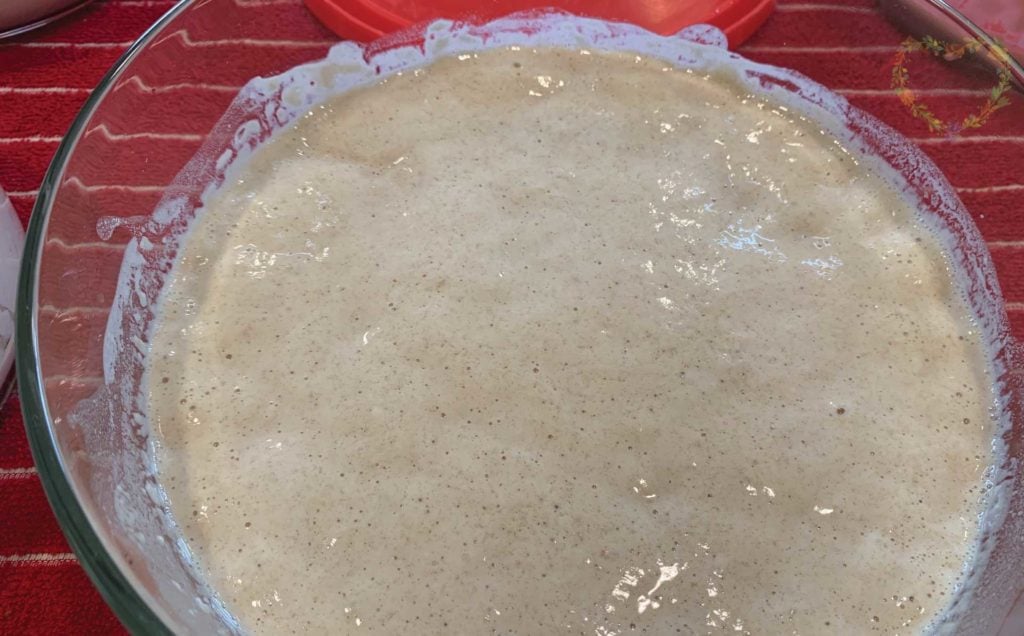
After 12 hours, you’ll want to repeat the process all over again. And you will continue to do this every 12 hours until your starter is bubbly and frothy. This process can take as little as 7 days or as long as 10 or more days.
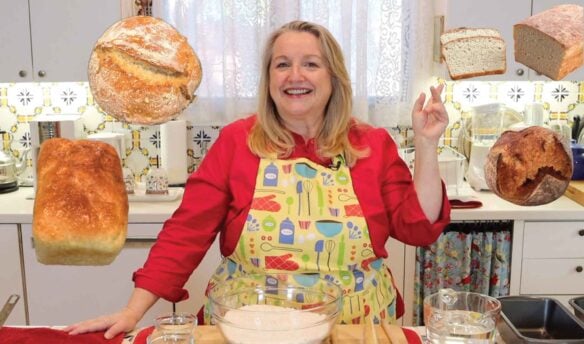
Is It Time to Bake Sourdough Bread?
Once your starter is bubbly and frothy, you’re ready to bake bread. But keep in mind that a new sourdough starter is often not as strong as a mature starter. And by mature, I mean a starter that has been alive for a long time.
You can still bake bread with your young starter, but you will find that over time, as your starter matures, the rise of your bread will improve.
With your starter ready, you can now bake a nice round boule of sourdough bread. As a beginner, I highly recommend that you try my Fast No-Knead Sourdough Bread since it has a short rise time and a mild flavor. This can be very helpful if you and your family are new to the taste of sourdough bread as you are making the transition form a processed foods kitchen to a traditional foods kitchen and incorporating more traditional foods into your diet.
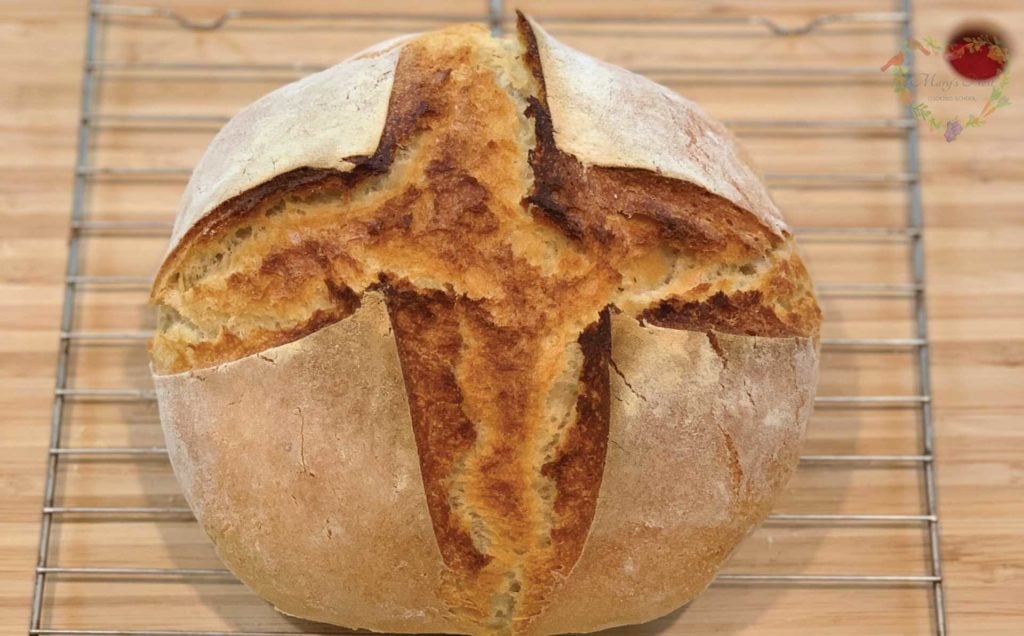
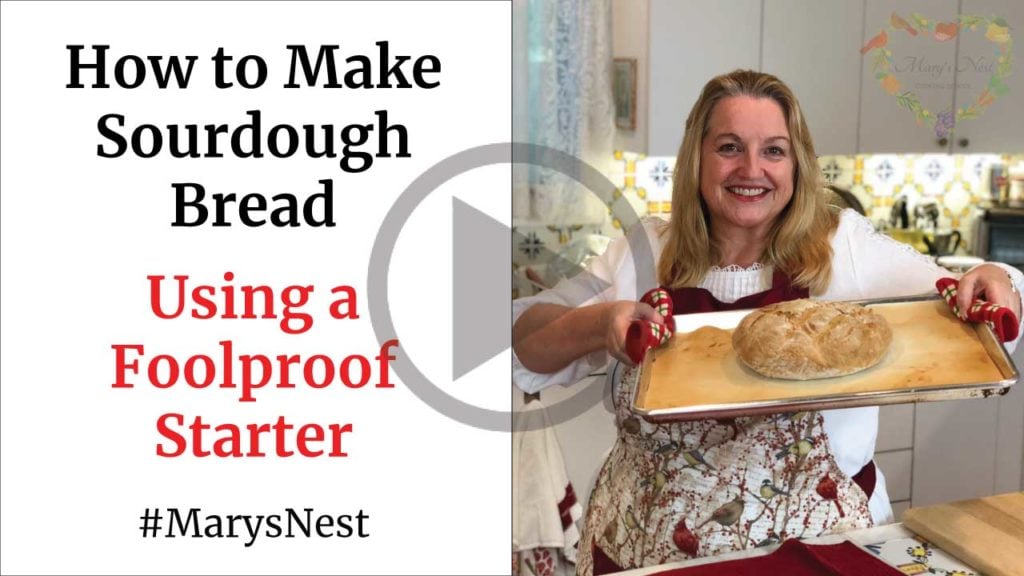
As you become more experienced at baking sourdough bread and want to try a recipe with a long rise time, visit my How to Make Sourdough Bread Using a Foolproof Starter post for a step-by-step video and printable recipe.
What If Something Goes Wrong with My Sourdough Starter?
OK, what if after 7 days or even longer, you see no activity in your starter? What if you starter smells like nail polish remover? What if you stored your starter in the refrigerator and a black liquid formed on top? Not to worry!
All of these things can happen, and all can be remedied. Be sure to check out my Complete Sourdough Starter Guide video, where I diagnose these problems and more at the 12:20 mark.
And if you have any problems or questions that I have not addressed in the video, check the video comments, since I have may have answered a previous viewer’s question that’s similar to yours. You can also leave me a comment on the video or this blog post.
More Sourdough Recipes
For what to do with all your Sourdough Starter, watch the Discarded Sourdough Starter Recipes playlist. To learn more about how to make sourdough starter and bread, watch the following recipe videos.


And if you need a little help getting your sourdough starter underway, check out the Busy Mother’s Sourdough Secret.

In the following videos, I show you how to make sourdough bread with different types of flour.
More Baking Recipes
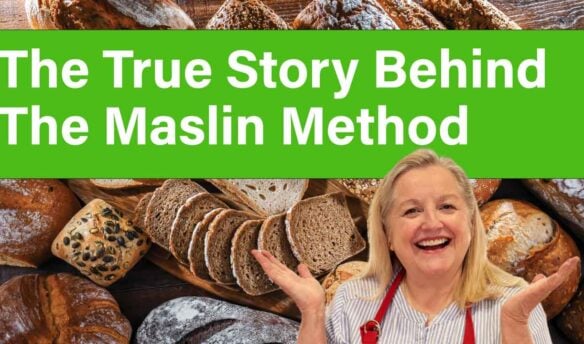
The True Story Behind The Maslin Method
Learn how The Maslin Method began as a simple way to teach grain blending, whole grain baking, and old-fashioned kitchen wisdom.

A Cozy Visit to a Mountain Homestead in Oregon
Join me as I visit my friend Michele’s cozy Oregon mountain homestead for homemade meals and sweet friendship.
Baking with Whole Grains: The Maslin Method, Grain Mills, and America’s Bread Basket
Explore whole grain baking with The Maslin Method, fresh-milled flour, grain mills, heritage wheats, and more.
Grind Your Own Flour with the Mockmill
When it comes to electric grain mills, after I did A LOT of research, I decided to buy a Mockmill. And am I so happy I did! The Mockmill is a very affordable but beautifully crafted German-made mill that stone grinds grain with settings ranging from 1 to 10—fine to coarse ground grain.
Learn more about Mockmill electric grain mills for making fresh flour and their Flake Lover’s Flaker that flakes whole grain in minutes. (This is not a sponsored post, I bought the Mockmill products that I show you, and I’m a happy user of their devices in my kitchen.)
- Mockmill 100 Grain Mill unboxing
- Get the Mockmill 100 Stone Grain Mill (Same product I show you in my unboxing video.)
- Flake Lover’s Flaker from Mockmill in action (Using this device, you can flake whole grain in minutes.)
Download Your Free 36-Page Pantry List
For an extensive list of the traditional foods you can make and purchase to stock your pantry, be sure to download my free 36-page Traditional Foods Pantry List. This comprehensive eBook is full of links to recipe videos, helpful articles, and more!

And if you’re looking for a printed book full of my traditional foods recipes and that shows you how to create a traditional foods kitchen, be sure to order your copy of my bestselling book, The Modern Pioneer Cookbook.
Join the Traditional Foods Kitchen Academy
Are you looking for more traditional foods videos? If so, I invite you to join the Traditional Foods Kitchen Academy. Members of this optional paid YouTube community get access to exclusive videos and other members-only perks. Plus, your YouTube comments include a special members-only badge.
In the following members-only video, I talk about How to Make Any Baking Recipe a Sourdough Recipe.

More Kitchen Academy Videos
A Sweet Season of Celebration and New Beginnings with The Maslin Method Baking School Series
Celebrate the close of a heartfelt book tour and the exciting launch of The Maslin Method Baking School for traditional baking.
Why We Should Incorporate Mackerel Into Our Diet
Easy and nourishing ways to enjoy mackerel into your meals.
The Gentle Power of Fermented Beverages—All Year Long
Learn how fermented beverages gently support digestion year-round, shifting with the seasons to nourish the gut through traditional, living drinks.
Stay in Touch with Mary’s Nest
- Subscribe to My YouTube Channel for Traditional Foods Videos (Free) - When you subscribe, be sure to click on the notification bell that will let you know each time I upload a new video.
- Subscribe to Mary’s Traditional Foods Newsletter (Free) - Get a free 36-page eBook for signing up: How to Stock Your Essential Traditional Foods Four-Corners Pantry.
- Join the Traditional Foods Kitchen Academy - For more detailed videos and exclusive members-only perks, join my YouTube membership community.
- Order The Modern Pioneer Cookbook - Get a hardcover book of Mary's nourishing recipes from a Traditional Foods Kitchen. This bestselling cookbook is published by Penguin Random House with their DK imprint.
- Order The Modern Pioneer Pantry - Get Mary's latest hardcover cookbook about preserving food and making delicious meals from your Four Corners Pantry. Mary's second cookbook is also published by Penguin Random House.
I look forward to having you join me in my Texas Hill Country Kitchen!
I’d like to receive more tips and recipes from Mary’s Nest.
The Complete Sourdough Starter Guide

Ingredients
- All-purpose flour
- Non-chlorinated water
Instructions
- Using a teaspoon, spoon all-purpose flour into a ½ measuring cup.
- Add flour into a bowl or jar.
- Add a half cup of water to the flour, and stir well to make a slurry.
- Cover the bowl loosely, and allow to rest in a warm place between 70°F – 80°F (21°C – 27°C). (This is room temperature.)
- On the third day, remove half of the starter-in-the-making, add ½ cup flour and ½ cup of water to the remaining mixture, and stir to incorporate. Cover bowl loosely and allow to rest for 12 hours.
- After 12 hours have passed, repeat the process of removing half of the starter-in-the-making, adding a ½ cup flour and a ½ cup of water to the remaining mixture, and stirring to incorporate. Cover bowl loosely, and allow to rest for 12 hours.
- Continue this process every 12 hours until the starter becomes bubbly and frothy. This process can take as little as seven days or as long as 10 days or more. Once the starter is bubbly and frothy, it is now ready to use to bake sourdough bread.
- If you bake regularly and want to leave your starter on the counter, feed it every 12 hours as outlined above—discarding some of the starter and feeding it with fresh flour and water.
- If you do not bake regularly, you can seal your starter in the bowl or a jar and refrigerate it. You will still want to feed it once per week, repeating the process outlined above—discarding some of the starter and feeding it with fresh flour and water.
Video
Notes
Shop for items used in this blog post or video
Favorite Sourdough Starter and Baking Supplies
- 3 Glass Bowls with Red Lids
- 4 Glass Bowls with Red Lids
- 4 Glass Bowls with White Lids
- Small Magic Whisk
- Baking Sheets
- Parchment Paper
- Stainless Steel Bench Scrape
- Plastic Bench/Bowl Scrape
- Enameled Cast Iron Dutch Oven
- Breadsmart bread baking kit
Amazon Shop and Shopping Guide
- Visit Mary’s Nest Amazon Shop
- Visit my Shopping Guide page
Get up to 15% off for stocking your Traditional Foods Pantry and equipping your Modern Pioneer Kitchen, including discounts from US Wellness Meats, Farmhouse Teas, Backwoods Home, Masontops, Cultures for Health, Survival Garden Seeds, Redmond Real Salt, Mother Earth News, and More!
Recommended Reading
- The Modern Pioneer Cookbook
- Nourishing Traditions
- Sourdough: Recipes for Rustic Fermented Breads, Sweets, Savories, and More
- Whole Grain Sourdough at Home: The Simple Way to Bake Artisan Bread with Whole Wheat, Einkorn, Spelt, Rye and Other Ancient Grains
- New World Sourdough: Artisan Techniques for Creative Homemade Fermented Breads; With Recipes for Birote, Bagels, Pan de Coco, Beignets, and More

Hi Mary,
I followed all your directions, half a cup of flour(all purpose) half a cup of filtered water, and left it covered for 48 hours when I went to feed it, it smelled good had bubbles but also had pinkish streaks in it. Could it have developed mold already. I took a picture f it but can’t send it to you.
Cloaire
Hi Claire,
If it smells good and has bubbles, that’s a good sign. However, I’m not sure what the pink streaks are that you’re seeing. And that may not be a good sign. Mold may be multicolored and eventually appear fuzzy. The pink streaks may be the beginning of mold developing. Unfortunately, it can happen even under the best conditions. In general, when in doubt, I always recommend discarding the starter and starting over.
To help get ideas on what your pink streaks may be, you could post the picture on my Facebook group for folks to see and comment on at https://www.facebook.com/groups/171869080205145
I hope this helps.
Love and God bless,
Mary
Hello Mary, I would like to ask you for advice, please. I live in Algeria and it is very hot (±38 degrees Celsius). I made a sour dough starter from water and whole grain wheat flour, feeding it every 24 hours, not removing any of the dough though,as the instructions I followed didn’t say that. During the first three days it looked lovely, very much alive with lots of bubbles, very frothy. I continued feeding and then on day four all of a sudden it seemed all action was gone, not a single bubble. I tried baking with it anyway. My bread smelled and tasted fantastic, but did not rise one bit. Do you think under these circumstances I should start baking after three days, is it possible my starter was already ready? Or should I wait until autumn to try again in cooler temperatures, I know sour dough does not like heat in general?
Thank you!
Hi Julia, Don’t worry – you don’t need to start over. Just put your starter in the fridge but still feed it every day. After about a week or so, the natural yeasts in the starter should be strong again and start to bubble. When you are ready to bake bread, take it out of the fridge the night before and feed it and keep it on your counter. See how it looks in the morning. If it is nicely bubbled and doubled in size, you can bake with it. Keep me posted. Love, Mary
Dear Mary you saved my “sourdough journey” during my quarantine!!! I almost gave up with all the confusing instructions on line! I was up around midnight and there you were on my search!!!!
thank you, thankyou!!
My question today, after a weekend break from endless sourdough bread baking and gifting loaves to all my friends, my 3 jars of starter “hooch”all look different. One is brown, one is greenish brown and one is yellowish, and a lot of liquid, 1/2” of fluid. The 2 dark fluids have a sort of spicy/strange smell. Is that what you call nail polish odor? Did I work them too hard? I do use whole wheat bread flour.
Hi Margret, So happy you are baking! Not exactly sure about your starters without seeing them but sounds like they are very hungry given all the hooch. Feed them at least every 8 hours for the next few days. Love, Mary
If I begin using stone ground white whole wheat flour for my starter should I feed it with the same or use all purpose?
Hi Louise, Thanks so much for your comment. You can use any flour you want to feed your starter. It does not matter what you start with. You can transition it at anytime. Hope this helps. Do you enjoy making other traditional foods? If so, I have a playlist of some of my videos titled “Mastering the Basics of Traditional Nutrient Dense Foods Cooking”. It’s a series of 15 detailed videos that covers How to Make Bone Broth, Cultured Dairy, Ferments, Sourdough Starter (my foolproof stater), Sourdough Bread, Soaked and Sprouted Nuts and Beans, and How to Soak and Sprout Grains to Make your own Sprouted Flour at Home. You can watch it here: https://www.youtube.com/playlist?list=PLkRuW3pBo2U3b4eu0QraZReKlGzA11h3y And please share the playlist with any other folks you think might be interested in learning about these types of things. I’m passionate about the book Nourishing Traditions by Sally Fallon (of the Weston A Price Foundation) and want to help as many people as I can learn how to make Traditional “Nutrient Dense” Foods.
Please let me know if you have any questions. I’m so happy to help! And I’m SO glad you’re here!! Love and God Bless, Mary❤️😘❤️
PS – Do you know about our FB group? It’s called Mary’s Nest Modern Pioneers. Come join us! We have a lot of fun chatting about Traditional Foods: https://www.facebook.com/groups/171869080205145/?source_id=210509998974645
Hi Mary! So excited to try your starter!! I just have a question. When you write, “After 12 hours, you’ll want to repeat the process all over again. And you will continue to do this every 12 hours until your starter is bubbly and frothy.”
Does that mean I need to discard half of it and then add 1/2 c flour and 1/2 c water every 12 hours?
Hi Chani, Thanks so much for leaving a comment. Yes, that is exactly what you do, but don’t worry about having to discard some of the starter. You can save it and use it to make other recipes. Here is a link: https://www.youtube.com/playlist?list=PLkRuW3pBo2U09KJ3fwoO4ud9jpyS9FhiJ Do you enjoy making other traditional foods? If so, I have a playlist of some of my videos titled “Mastering the Basics of Traditional Nutrient Dense Foods Cooking”. It’s a series of 15 detailed videos that covers How to Make Bone Broth, Cultured Dairy, Ferments, Sourdough Starter (my foolproof stater), Sourdough Bread, Soaked and Sprouted Nuts and Beans, and How to Soak and Sprout Grains to Make your own Sprouted Flour at Home. You can watch it here: https://www.youtube.com/playlist?list=PLkRuW3pBo2U3b4eu0QraZReKlGzA11h3y And please share the playlist with any other folks you think might be interested in learning about these types of things. I’m passionate about the book Nourishing Traditions by Sally Fallon (of the Weston A Price Foundation) and want to help as many people as I can learn how to make Traditional “Nutrient Dense” Foods.
Please let me know if you have any questions. I’m so happy to help! And I’m SO glad you’re here!! Love and God Bless, Mary❤️😘❤️
PS – Do you know about our FB group? It’s called Mary’s Nest Modern Pioneers. Come join us! We have a lot of fun chatting about Traditional Foods: https://www.facebook.com/groups/171869080205145/?source_id=210509998974645
Hi Mary thank you so much for your wonderful YouTube videos. I am attempting my first ever starter and keeping my fingers crossed I have success. Your instructions and info are so simple and valuable and I just wanted to let you know how greatly appreciated they are. All the best,Danika
When you have kept your starter in the refrigerator but want to feed it, do you need to let it come to room temp first then feed?
Hi Charlene, Great question. No, you do not need to let it come to room temp. You can feed it right aways and put it back into your fridge. Love, Mary
Mary, I really need help. I’ve always lived in West Texas where humidity wasn’t a problem. Now, we live close to Dallas! The humidity is horrible! My dough won’t rise and I’ve tried several times reducing the liquid portion of the recipe. I so miss homemade bread.
Hi Mary, so sorry to hear you are having these challenges. I gather you must be making sourdough. Anything in the family of ferments can be very persnickety. Let’s try and diagnose this together. Have you tried using a more dense starter? One that has more flour and less water? If you put a piece of your starter in a glass of water does it float to the top? I would keep working with your starter until you are 100% sure that a dollop of it will float to the top of a glass of water. Then I would try baking with it and see what happens. Keep me posted. Love, Mary❤️🤗❤️
Hi Mary,
I love your videos! Thanks for the great information and tips.
My sourdough starter is two days old; I used whole wheat flour. It is bubbling, but there are small areas that are a greenish color and one area looks a bit yellow. Is this normal? It smells mildly yeasty, not unpleasant at all.
Thanks so much!
Hi Kim, thank you for the kind words!! I’m not 100% sure what that might be. But I am worried – based on your description – that it may be mold. Are these colorful spots fuzzy! If so you will need to discard your starter and start all over again. Keep me posted. Love, Mary
I have starter that I keep in my refrigerator that I have kept for quite awhile. Because there’s only two of us I only bake every ten to fourteen days I don’t use it very often. When if gets low I keep some from the baking and feed it and put it in the fridge. How do I feed that starter in the fridge without throwing it away? Love your videos! Thanks, Janet
Hi Janet, Thanks so much for commenting and for the kind words. You do need to “discard” some of the starter – but that does not mean you have to throw it away. You can save it – even in the freezer – to use to make something else like pancakes, flatbreads, etc. Here is my discard playlist: https://www.youtube.com/playlist?list=PLkRuW3pBo2U09KJ3fwoO4ud9jpyS9FhiJ So remove a bit and then feed your starter and then re-refrigerate it. If you really don’t want to “discard” any starter, then just make sure you have a really large container that can hold the starter that you will be feeding every week. Hope that makes sense. 🙂
Do you enjoy making other traditional foods? If so, I have a playlist of some of my videos titled “Mastering the Basics of Traditional Nutrient Dense Foods Cooking”. It’s a series of 15 detailed videos that covers How to Make Bone Broth, Cultured Dairy, Ferments, Sourdough Starter (my foolproof stater), Sourdough Bread, Soaked and Sprouted Nuts and Beans, and How to Soak and Sprout Grains to Make your own Sprouted Flour at Home. You can watch it here: https://www.youtube.com/playlist?list=PLkRuW3pBo2U3b4eu0QraZReKlGzA11h3y And please share the playlist with any other folks you think might be interested in learning about these types of things. I’m passionate about the book Nourishing Traditions by Sally Fallon (of the Weston A Price Foundation) and want to help as many people as I can learn how to make Traditional “Nutrient Dense” Foods.
Please let me know if you have any questions. I’m so happy to help! And I’m SO glad you’re here!! Love and God Bless, Mary❤️😘❤️
PS – Do you know about our FB group? It’s called Mary’s Nest Modern Pioneers. Come join us! We have a lot of fun chatting about Traditional Foods: https://www.facebook.com/groups/171869080205145/?source_id=210509998974645
With equal parts water and flour, my starter looks more like a dough and not a slurry. Should I add more water until it is a slurry? But then it would not be equal parts flour and water. I used Red Mill 100% Stone Ground Whole Wheat Flour and Kroger Natural Spring water. On a scale I measured out 58g of each. When I combined them it turned into a thick dough rather than a slurry. How can I fix this?
Hi Brianna, don’t worry. The conditions in every kitchen and the weather outside play a role in creating a sourdough starter. It can be thick or it can be like a slurry, either way it will start collecting the yeast in the air in your kitchen. Keep feeding it with flour and water based on the conditions in your kitchen and then after a few days start placing a dollop in a glass of water. If it floats to the top – whether it’s thick or thin – then it is ready to bake with. Keep me posted. Love, Mary❤️🤗❤️