Learn how to make no-knead sourdough bread using the stretch and fold method to create a light and airy crumb that is never dense. When it comes to baking sourdough breads, if a recipe calls for kneading, you can use the stretch and fold method instead. You’ll find more sourdough recipes and traditional techniques like this one in my bestselling book, The Modern Pioneer Cookbook.
When you stretch and fold your dough, you activate the gluten in the wheat flour. This activation makes it easier to shape the dough into a boule or a bâtard, which are the two common styles usually used to shape sourdough bread. You’ll be making a light and tasty sourdough boule (a round loaf) in today’s recipe.
Affiliates note: As an Amazon Associate I earn from qualifying purchases. My content may contain affiliate links to products and services. If you click through and make a purchase, I’ll receive a small commission. It does not affect the price you pay.
Table of Contents
- Recipes from The Modern Pioneer Cookbook
- The Modern Pioneer Cookbook
- How to Make Stretch and Fold Sourdough Breads
- How to Use the Stretch and Fold Method for the Best Results
- How to Shape a No-Knead Sourdough Bread
- How to Bake a No-Knead Sourdough Bread
- Creating a Sourdough Starter
- How to Choose the Right Flour for Making Sourdough Bread
- Stocking Your Baking Pantry
- More Sourdough Recipes
- Grind Your Own Flour with the Mockmill
- Redmond Real Salt
- Cultures for Health
- Download Your Free 36-Page Pantry List
- Kitchen Academy Videos
- More Kitchen Academy Videos
- How to Make No-Knead Sourdough Bread Using the Stretch and Fold Method Recipe
- Shop for items used in this blog post or video
Recipes from The Modern Pioneer Cookbook
If you want to learn how to create a traditional foods kitchen and make more traditional recipes, such as bone broth, sourdough, ferments, cultured dairy, and more, be sure to get my bestselling book, The Modern Pioneer Cookbook.

Order YOUR COPY Now!
The Modern Pioneer Cookbook
Seasonal ingredients, traditional techniques, and nourishing recipes. Over 85 traditional, from-scratch recipes! Discover for yourself how you can use simple ingredients and traditional techniques to cook the modern pioneer way.
How to Make Stretch and Fold Sourdough Breads
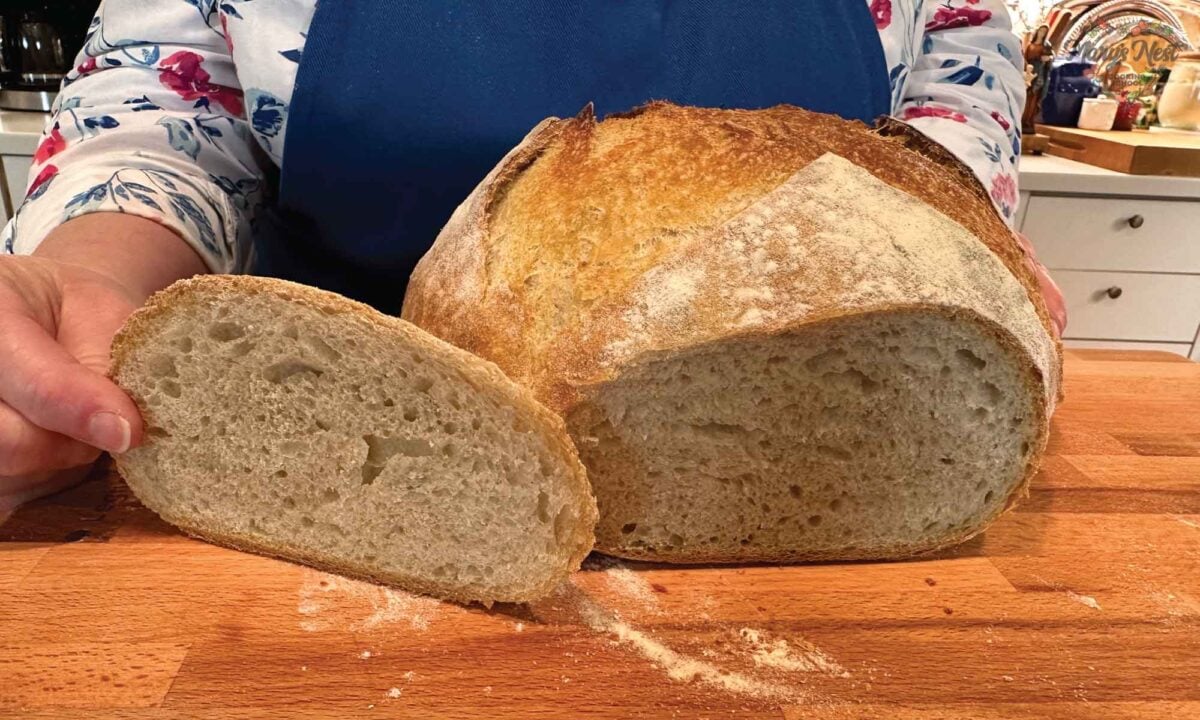
When it comes to making no-knead sourdough breads, home bakers can sometimes find that their final product—a baked sourdough bread—is a bit on the dense side. That is certainly not the most appetizing sourdough bread! If you want a no-knead sourdough bread with a light and airy crumb (the bread’s interior), it’s best to use the stretch and fold method.
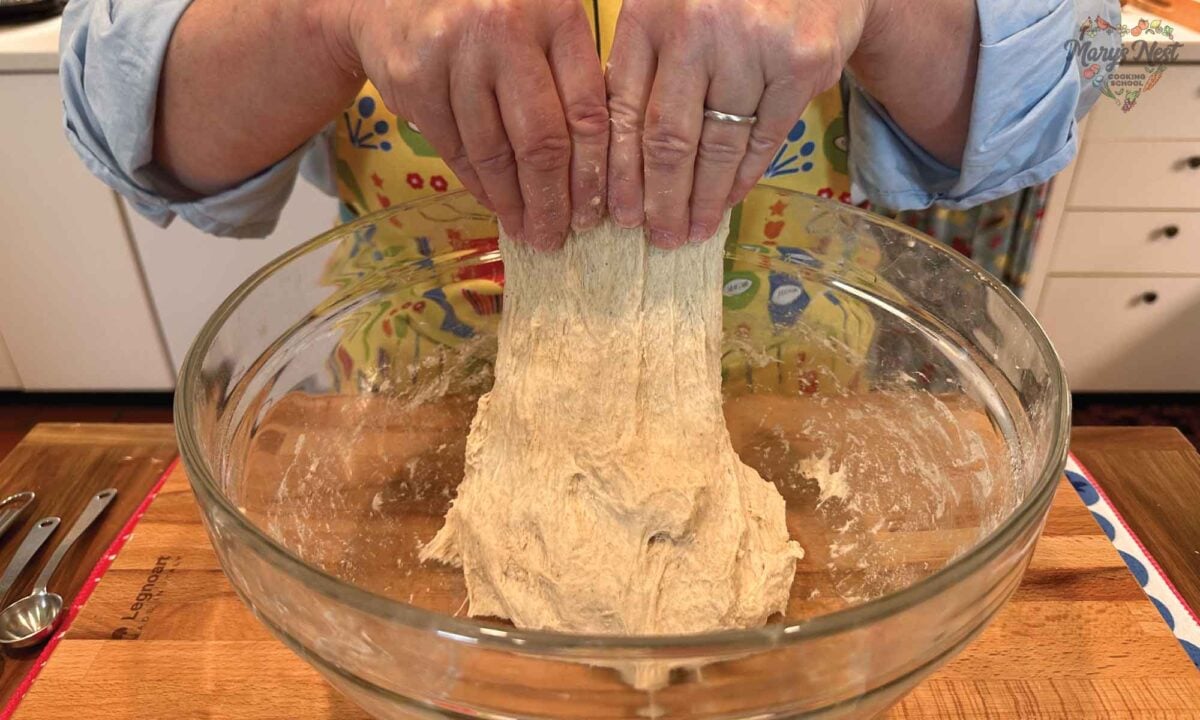
As I show you in my recipe video, the stretch and fold method is easy to do and does not require any kneading! All you do is use wet hands to pull up on the dough and then fold it over itself. That’s it. It’s much easier on a home baker’s hands than trying to knead the dough for ten minutes or longer. Plus, it allows you to continue to be able to make no-knead sourdough breads that are just that…no knead.
How to Use the Stretch and Fold Method for the Best Results
Through experimentation, I found that the best method for using the stretch and fold method when making no-knead sourdough bread is to do five stretch and folds per stretch-and-fold set for a total of five sets. But you may be wondering, “what exactly is a set?”
These five stretch and folds are equal to what is known as one stretch-and-fold set. You will stretch your dough and fold it over itself a total of five times, rotating the bowl a one-quarter turn after each stretch and fold. (Remember that we reference the quarters of the bowl like a clock with the 12:00 mark at the top and the 6:00 mark at the bottom.)
- Start at the 12:00 mark and complete one stretch and fold.
- Rotate the bowl to the 3:00 mark (one clockwise quarter turn) and complete the second stretch and fold.
- Rotate the bowl to the 6:00 mark (one clockwise quarter turn) and complete the third stretch and fold.
- Rotate the bowl to the 9:00 mark (one clockwise quarter turn) and complete the fourth stretch and fold.
- Rotate the bowl back to the 12:00 mark (one clockwise quarter turn) and complete the fifth and final stretch and fold.
You have now completed one stretch-and-fold set.
Cover the bowl with a dish towel and let it rest for fifteen minutes. After fifteen minutes, remove the dish towel, wet your hands, and complete another stretch-and-fold set. After you complete the second stretch-and-fold set, recover the bowl and allow it to rest for fifteen minutes. You will do this three more times until you have completed five sets of stretch-and-fold, allowing the dough to rest for fifteen minutes between each set.
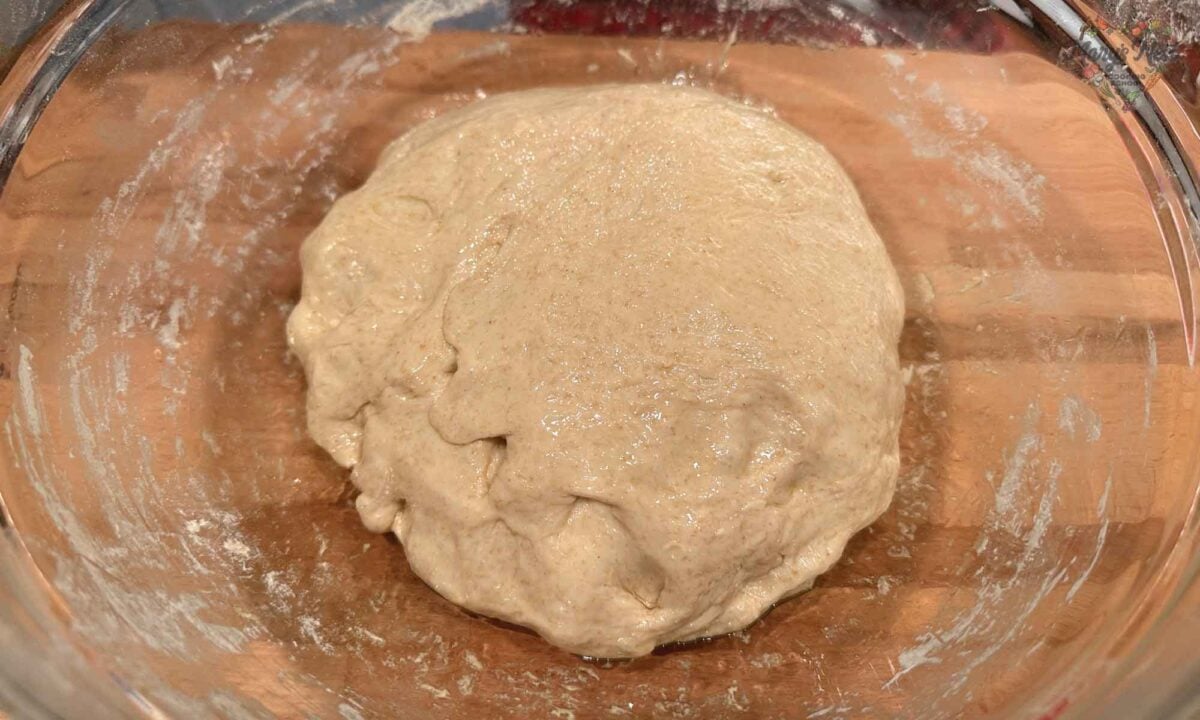
Once you have completed the five stretch-and-fold sets, you will coat the dough with olive oil, cover the bowl with a dish towel, and set it aside at room temperature to ferment for 12 hours. (If you would prefer to refrigerate your dough during the fermentation stage, be sure to read the recipe instructions below.)
How to Shape a No-Knead Sourdough Bread
After 12 hours, it’s time to remove the dough from the bowl and shape it into a ball. Be sure to watch the video where I show exactly how to do this. But here is a quick outline of the steps you’ll follow:
- Transfer the dough to a flat surface that has been lightly floured.
- Flatten the dough into a rectangle that is approximately 8 1/2″ x 11″.
- Fold the flattened dough into threes as you would a letter.
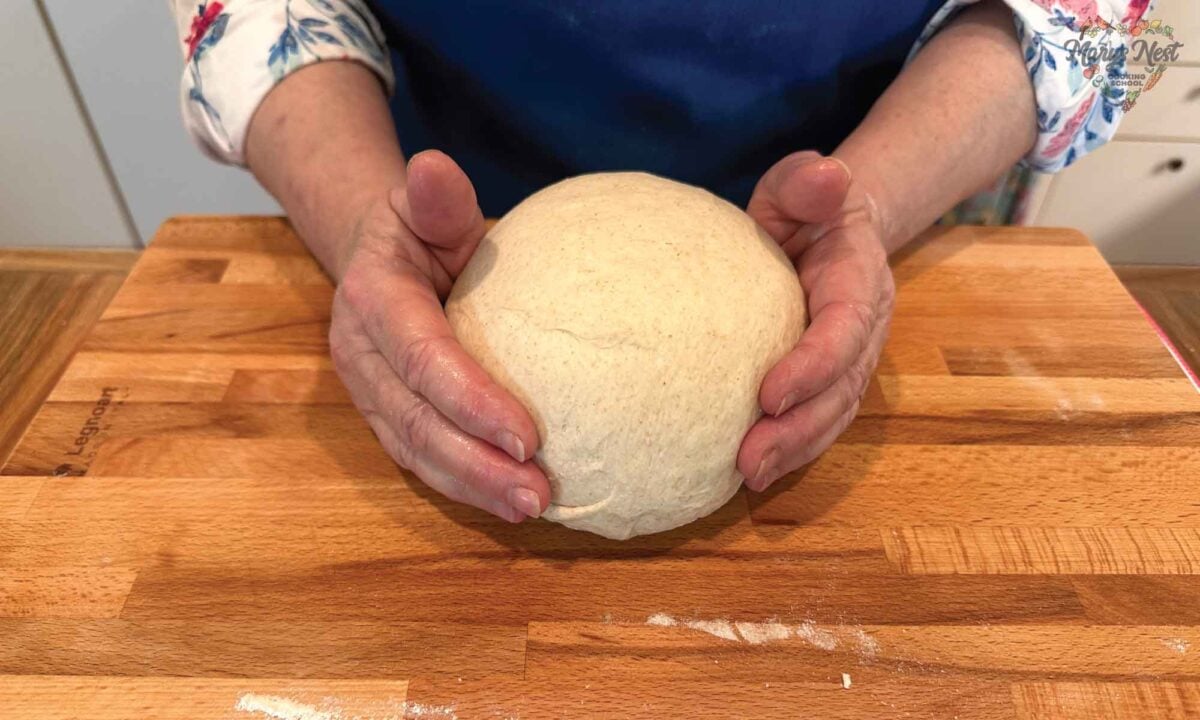
- Flip the dough over and use cupped hands to bring it together into a ball.
- Once the ball is formed and the dough has a smooth feel, you’ll transfer it to a piece of lightly-dusted parchment paper placed on a flat surface.
- Dust the top of the ball with flour and cover it with a dish towel.
- Allow the ball to rise and double in size.
How to Bake a No-Knead Sourdough Bread
While the ball is rising and doubling in size, place a lidded Dutch oven onto the middle rack of an oven. Preheat the oven to 500°F (260°C). (Make sure the knob on the Dutch oven is heat-safe up to 500°F [260°C].)
Once the ball has doubled in size, use potholders to remove the Dutch oven from the oven and place it on a heatproof surface. Next, using a potholder, carefully lift the lid of the Dutch oven (facing it away from you), and place the lid on a heatproof surface.
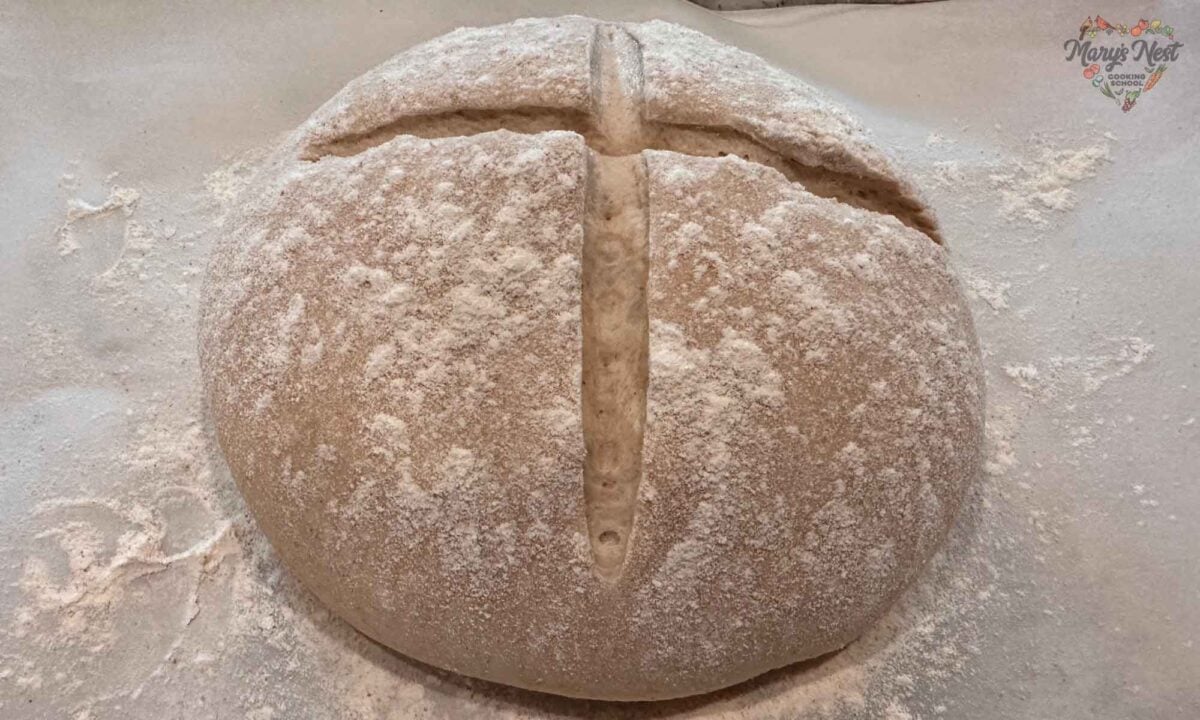
Score the top of the ball with a sharp knife (or bread lame), and then using the corners of the parchment paper, transfer the ball to the Dutch oven and replace the lid, making sure that all the parchment paper is tucked inside.
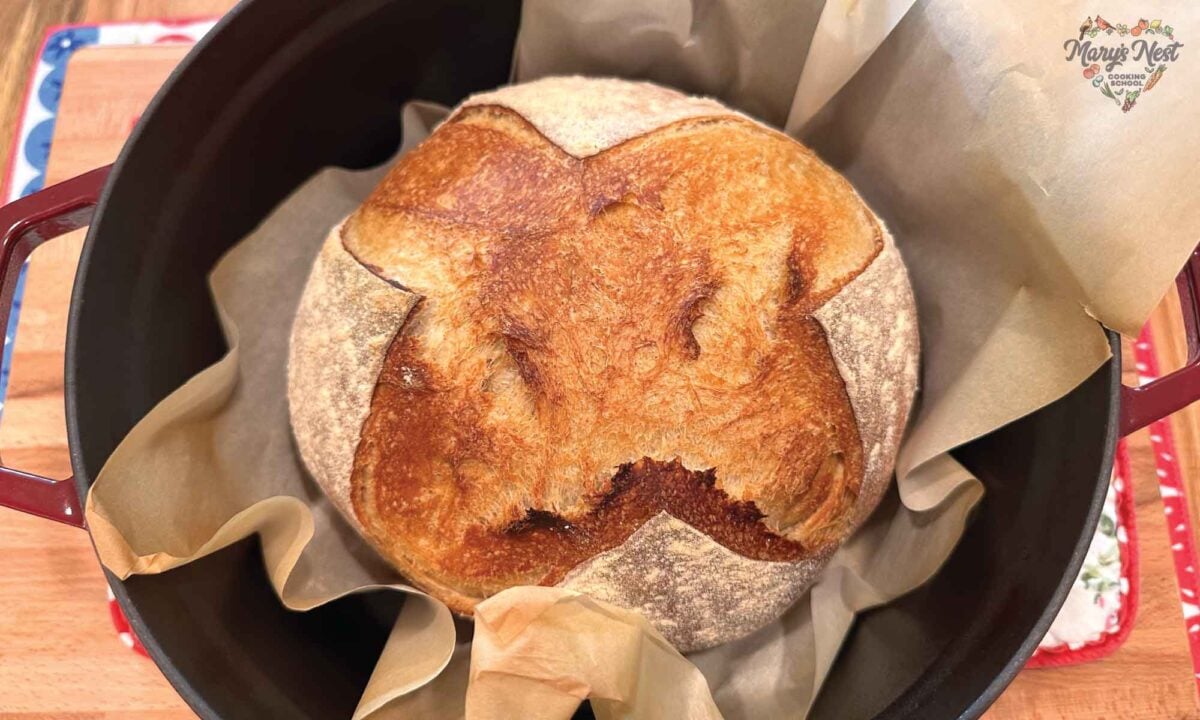
Now, pop the Dutch oven back into the oven, lower the oven temperature to 475°F (246°C), and bake the ball for 30 minutes. After 30 minutes, use potholders to remove the lid from the Dutch oven and you will be rewarded with a gorgeous golden sourdough boule (a round loaf).
Leave the boule in the oven to bake for a few more minutes, uncovered, until it turns a bit more golden brown. When the boule is finished baking, turn off the oven and transfer the Dutch oven to a heatproof surface. Then remove the boule from the Dutch oven, transfer it to a cooling rack, and slide out the parchment paper. Once cool, slice it with a serrated knife and enjoy!
Creating a Sourdough Starter
If you have struggled in the past creating a sourdough starter, my complete sourdough starter video will help you to have success. I cover all the steps involved in creating a starter. Plus, I share the most common problems encountered when making a starter and how to fix them.

Even though you can make a sourdough starter with any type of flour, if you can find rye flour, you are in luck. Making a sourdough starter using rye flour is basically foolproof!

How to Choose the Right Flour for Making Sourdough Bread
The beauty of sourdough bread is you can make it using pretty much any flour. One of my favorite flours to use when baking sourdough bread—or pretty much baking anything for that matter—is Spelt flour. Spelt is an ancient grain rich in vitamins and minerals.
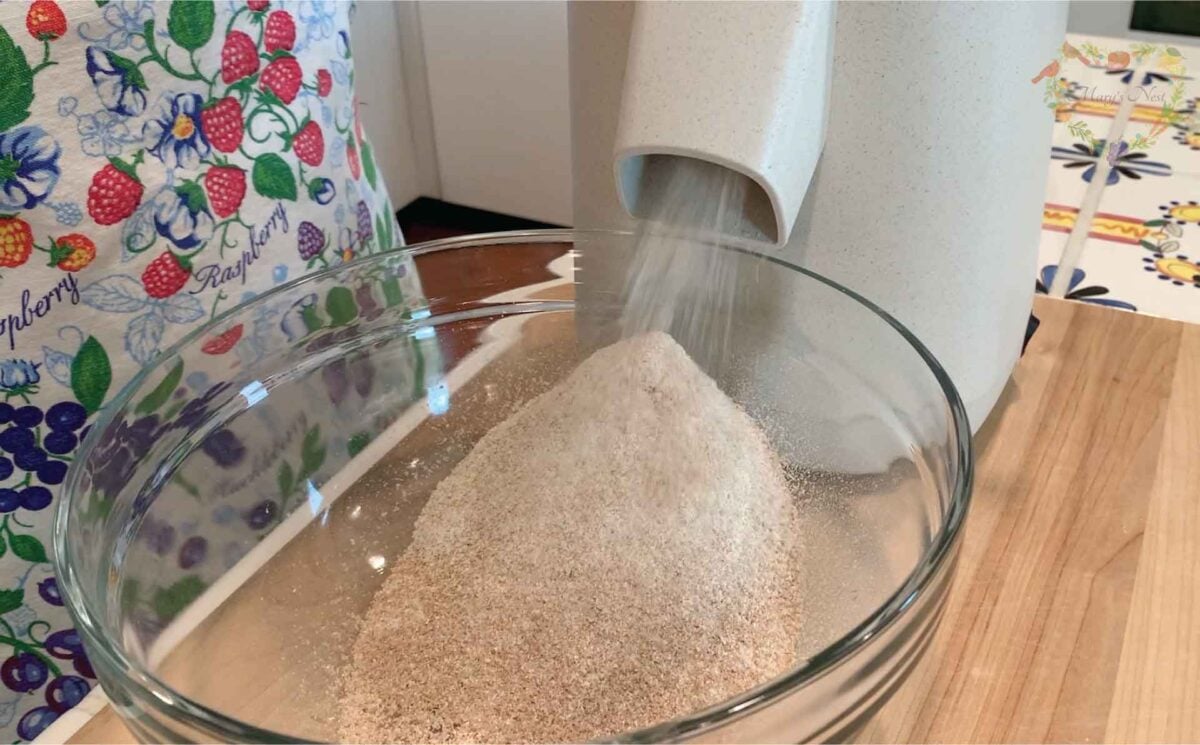
I usually keep the whole grain on hand and then use my Mockmill grain mill to grind my grain into fresh Spelt flour. It can’t be beat! Then, if I want to bake with the whole grain Spelt flour, I’m all set.
But if I want to bake with a homemade version of all-purpose Spelt flour, all I have to do is use a baker’s sifter to remove as much of the bran and germ from the whole-grain Spelt flour as possible. In the video below, I show you how I grind grain using my Mockmill grain mill and then create an all-purpose flour. (In the video, I’m grinding whole-grain Einkorn, but the technique applies to any whole grain, including Spelt.)
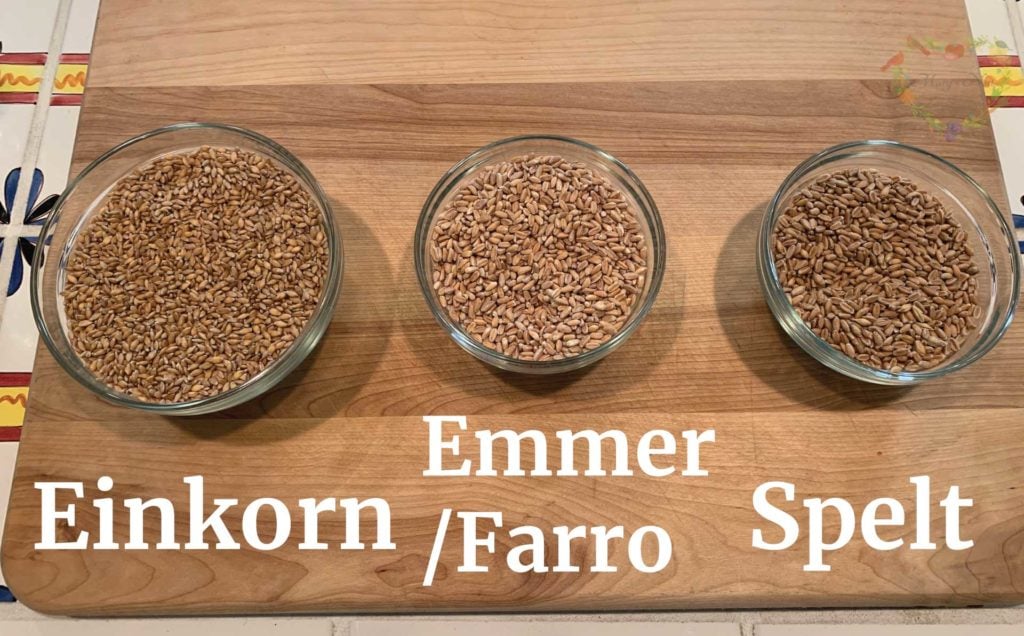
Learning More About Wheat Berries
To learn more about Spelt, Hard White Wheat, Emmer/Farro, Hard Red Wheat, Einkorn, and other wheat berries, watch my Wheat Berries FAQ video.

And if you’ve heard of Kamut, but weren’t sure what it was, I’ve got you covered with another video too.

Stocking Your Baking Pantry
If you are a new home baker or even an experienced baker, check out my video below, where I share all the ingredients I recommend stocking in your Baking Pantry. You can download and print out my accompanying How to Stock Your Baking Pantry checklist too.
If you need gluten-free alternatives, I’ll show you three ways to make gluten-free flour mixes, including all purpose, whole grain, and a cookie mix. And be sure to download my Gluten-Free Flour Mixes Pantry List too.
More Sourdough Recipes
The Ultimate Bread Baking Marathon!
Easy loves, sourdough tips, and warm kitchen joy for every home baker!

How to Make Sourdough Hot Cross Buns
Discover the perfect bread to serve with your Good Friday dinner.
How to Tackle Sourdough Starter Challenges – Art of Fermentation Approach
Learn how a successful ferment can be the secret to creating a sourdough starter.
Grind Your Own Flour with the Mockmill
When it comes to electric grain mills, after I did A LOT of research, I decided to buy a Mockmill. And am I so happy I did! The Mockmill is a very affordable but beautifully crafted German-made mill that stone grinds grain with settings ranging from 1 to 10—fine to coarse ground grain.
Learn more about Mockmill electric grain mills for making fresh flour and their Flake Lover’s Flaker that flakes whole grain in minutes. (This is not a sponsored post, I bought the Mockmill products that I show you, and I’m a happy user of their devices in my kitchen.)
- Mockmill 100 Grain Mill unboxing
- Get the Mockmill 100 Stone Grain Mill (Same product I show you my unboxing video.)
- Flake Lover’s Flaker from Mockmill in action
Redmond Real Salt
When it comes to using salt in my recipes, I always like to use a real salt that has not been processed and does not contain any extra added chemicals or anti-caking agents. Redmond real salt is perfect! And if you’d like to order Redmond Real Salt from their website, be sure to check out my Shopping Guide for a discount coupon code.
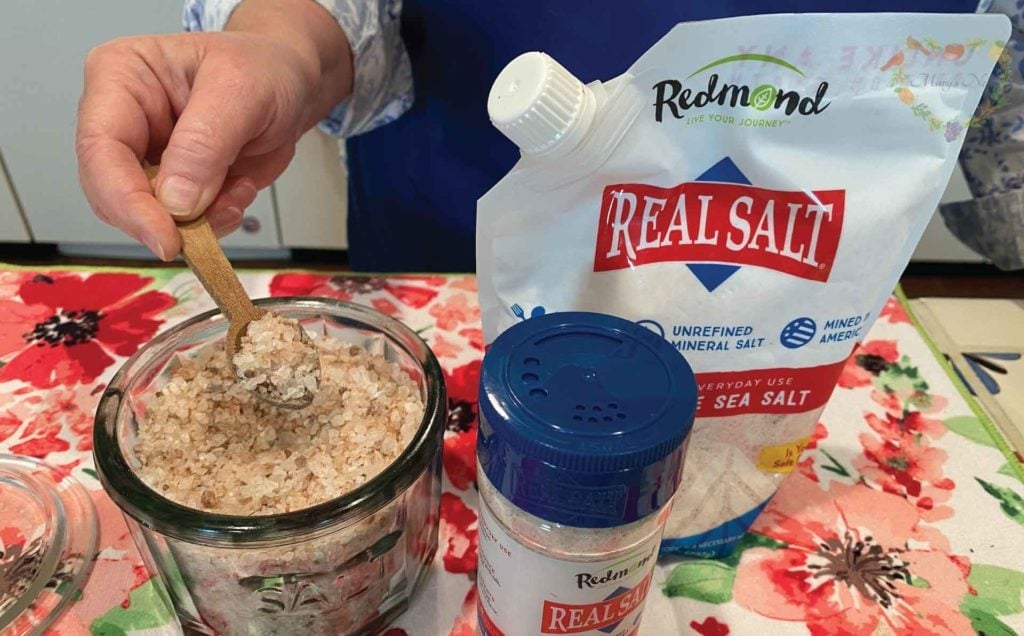
- Redmond Real Life – For Real Salt and other products, use this link and discount code MARYSNEST for 15% off your purchase. (Discount will show at checkout.)
Cultures for Health
If you’re looking for starter cultures from Milk Kefir to Cheese, see the products that Cultures for Health offers for making homemade cultured and fermented foods. And if you order from their website, be sure to use my MARYSNEST discount code for 15% off your purchase.

- Cultures for Health – Make Real Cultured Foods at Home and use discount code MARYSNEST for 15% off your purchase on the Cultures for Health website.
Download Your Free 36-Page Pantry List
For an extensive list of the traditional foods you can make and purchase to stock your pantry, be sure to download my free 36-page Traditional Foods Pantry List. This comprehensive eBook is full of links to recipe videos, helpful articles, and more!

And if you’re looking for a printed book full of my traditional foods recipes that shows you how to create a traditional foods kitchen, be sure to order your copy of my new bestselling book, The Modern Pioneer Cookbook.
Kitchen Academy Videos
Are you looking for more traditional foods videos? If so, I invite you to join the Traditional Foods Kitchen Academy. Members of this optional paid YouTube community get access to exclusive videos, live streams, and other members-only perks. Plus, your YouTube comments include a special members-only badge.
In the following members-only video, I talk about how to make any baking recipe a sourdough recipe.

More Kitchen Academy Videos
Baking with Whole Grains: The Maslin Method, Grain Mills, and America’s Bread Basket
Explore whole grain baking with The Maslin Method, fresh-milled flour, grain mills, heritage wheats, and more.

A Sweet Season of Celebration and New Beginnings with The Maslin Method Baking School Series
Celebrate the close of a heartfelt book tour and the exciting launch of The Maslin Method Baking School for traditional baking.

Why We Should Incorporate Mackerel Into Our Diet
Easy and nourishing ways to enjoy mackerel into your meals.
Stay in Touch with Mary’s Nest
- Subscribe to My YouTube Channel for Traditional Foods Videos (Free) - When you subscribe, be sure to click on the notification bell that will let you know each time I upload a new video.
- Subscribe to Mary’s Traditional Foods Newsletter (Free) - Get a free 36-page eBook for signing up: How to Stock Your Essential Traditional Foods Four-Corners Pantry.
- Join the Traditional Foods Kitchen Academy - For more detailed videos and exclusive members-only perks, join my YouTube membership community.
- Order The Modern Pioneer Cookbook - Get a hardcover book of Mary's nourishing recipes from a Traditional Foods Kitchen. This bestselling cookbook is published by Penguin Random House with their DK imprint.
- Order The Modern Pioneer Pantry - Get Mary's latest hardcover cookbook about preserving food and making delicious meals from your Four Corners Pantry. Mary's second cookbook is also published by Penguin Random House.
I look forward to having you join me in my Texas Hill Country Kitchen!
I’d like to receive more tips and recipes from Mary’s Nest.
How to Make No-Knead Sourdough Bread Using the Stretch and Fold Method

Equipment
- 1 5-6 quart Dutch oven with lid Knob must be able to withstand 500°F (260°C)
- 1 sharp knife or baker's lame
Ingredients
- 3 cups bread flour or all-purpose flour, any variety I used all-purpose Spelt flour.
- 1 1/2 tsp fine-ground sea salt
- 1 1/4 cups water, room temperature Preferably chlorine-free water.
- 1 cup fed sourdough starter Starter should be fed within 12 hours of being used to bake with.
- 1 tbsp olive oil
Instructions
- In a large bowl, whisk the flour and salt together. Set aside.
- In a large measuring cup, mix the water and sourdough starter together. Whisk well to incorporate.
- Make a well in the flour salt mixture and pour in the water sourdough starter mixture.
- Mix the dry ingredients with the wet ingredients until all the dry ingredients are completely saturated and the dough comes together to form a wet sticky dough. This is referred to as a "shaggy" dough.
- Cover the bowl of dough with a dish towel and set it aside at room temperature for 20 minutes.
- After 20 minutes, uncover the bowl and complete 5 sets of the stretch and fold method. (See the video to see how to do the stretch-and-fold method.)
- When all 5 sets of the stretch and fold method are complete, coat the dough in olive oil, cover with a dish towel, set it aside in a room temperature place (away from drafts), and allow the dough to ferment for 12 hours.
- BAKER'S NOTE: Alternatively, you can cover the bowl with plastic wrap and allow it to rest at room temperature for 1 hour, then transfer it to the refrigerator and allow it to ferment between 18 to 24 hours. Upon removing it from the refrigerator, allow the dough to return to room temperature and then proceed with the remaining steps.
- After 12 hours, place a piece of parchment paper on a baking sheet or other flat surface and lightly dust the parchment paper with flour. Set aside.
- Lightly dust a cutting board (or another flat surface) with flour. Uncover the dough, and using a plastic bench scrape or wet hands, remove the dough from the bowl and transfer it to the board.
- Flatten the dough into a rectangle approximately 8 1/2" x 11". Once flattened, fold the dough into threes as if you were folding a letter.
- Flip the dough over, and using cupped hands, begin to shape the dough into a ball. (See the recipe video for the technique.)
- Once the dough is formed into a smooth ball, use the plastic bench scrape to transfer it to the floured parchment paper. Dust the top of the ball lightly with flour and cover it with a dish towel.
- Allow the ball to rise and double in size. This will take approximately one to two hours.
- While the ball is rising, place a five to six-quart Dutch oven (with the lid on) onto the middle rack of the oven. Preheat the oven to 500°F (260°C) for at least 30 minutes prior to baking the bread. (Make sure that the knob of the Dutch oven can withstand 500°F [260°C].)
- Once the ball has doubled in size, use a sharp knife or a baker's lame to score the top of the bread.
- Using potholders, carefully remove the Dutch oven from the oven and set the Dutch oven on a heatproof surface. Carefully, remove the lid by opening it away from you to avoid exposure to the steam. Set the lid on a heatproof surface.
- Using the corners of the parchment paper, lift up the ball and transfer it, along with the parchment paper, down into the Dutch oven. (Be careful because the Dutch oven will be hot.) Using a potholder, replace the lid onto the Dutch oven and make sure that all the parchment paper is tucked into the Dutch oven.
- Using potholders, transfer the Dutch oven back onto the middle rack of the oven, close the oven door, and lower the oven heat to 475°F (246°C). Bake the bread, covered for approximately 30 minutes.
- After 30 minutes, open the oven door, and using a potholder, carefully remove the lid of the Dutch oven and place it on a heatproof surface. Close the oven door and allow the bread to continue to bake until it is a golden brown on top. This can take anywhere from five to fifteen minutes but watch it closely. You do not want it to burn.
- Once the bread is a golden brown on top, turn the oven off, and using potholders, remove the Dutch oven from the oven and place it on a heatproof surface.
- Once the parchment paper has cooled, use the ends of the paper to lift the bread out of the Dutch oven and transfer it (along with the parchment paper) to a cooling rack.
- Once the bread has cooled a bit and you are able to touch it, tap the bottom of the bread. It should sound hollow. This indicates that the bread has baked sufficiently.
- Remove the parchment paper and allow the bread to continue to cool on the cooling rack.
- Once the bread has cooled, use a serrated knife to slice it.
- Sourdough bread is best stored at room temperature in a bread bag or a bread box. It should stay fresh for approximately five days.
Video
Notes
Nutrition
Shop for items used in this blog post or video
Favorite Bread Making Supplies
- Baking Apron
- 10-Piece Glass Bowl Set
- Magic Whisk
- Large Measuring Cup
- Flour Sifter
- Danish Dough Whisk
- Plastic Bench Scrape
- Cast-Iron Dutch Oven
- Flour and Wheat Berries
Favorite Kitchen Supplies
- Spice Grinder
- Countertop Burner (On my kitchen island in many recipe videos.)
- Handheld Vacuum Sealing System
- Vacuum Lids
- Silica Gel Packets (Helps keep moisture from building up in your mix)
- 8-Quart Slow-Cooker
- Fat Separator (Clever kitchen device to help you decant bone broth)
- Flour Sack Towels
- pH Strips (Helps you check on the acidity of your vinegar)
Amazon Shop and Shopping Guide
- Visit Mary’s Nest Amazon Shop
- Visit my Shopping Guide page
Get up to 15% off for stocking your Traditional Foods Pantry and equipping your Modern Pioneer Kitchen, including discounts from US Wellness Meats, Farmhouse Teas, Backwoods Home, Masontops, Cultures for Health, Survival Garden Seeds, Redmond Real Salt, Mother Earth News, and More!
Recommended Reading
- The Modern Pioneer Cookbook
- Nourishing Traditions
- Thanksgiving 101
- Sourdough: Recipes for Rustic Fermented Breads, Sweets, Savories, and More
- New World Sourdough: Artisan Techniques for Creative Homemade Fermented Breads; With Recipes for Birote, Bagels, Pan de Coco, Beignets, and More
- Whole Grain Sourdough at Home: The Simple Way to Bake Artisan Bread with Whole Wheat, Einkorn, Spelt, Rye and Other Ancient Grains


Best recipe ever, for beginners or seasoned bread makers, this is the one I use all the time! Thanks Mary
Hi Patricia,
Thanks for your kind words. I’m glad the recipe is one of your favorites. I’m so glad we’re on this traditional foods journey together! 🙂
Love and God bless,
Mary
Hi, my dear. This is Gina Criscitiello.
I made your stretch and fold sourdough bread for my family.
It was fabulous! Thank you for being the one of greatest cooking teachers!
You explain everything so well, that you truly make everyone understand everything. I love you, Mary!
I feel like you’re a sweet friend, as you say to us. ❤️✝️❤️ God bless!
Hi Gina,
Thanks for your kind comment. I’m so glad it turned out wonderfully for you! 🙂
Lots of love to you and your family too!
Love and God bless,
Mary
Thank you so very much. Keep up the good work.