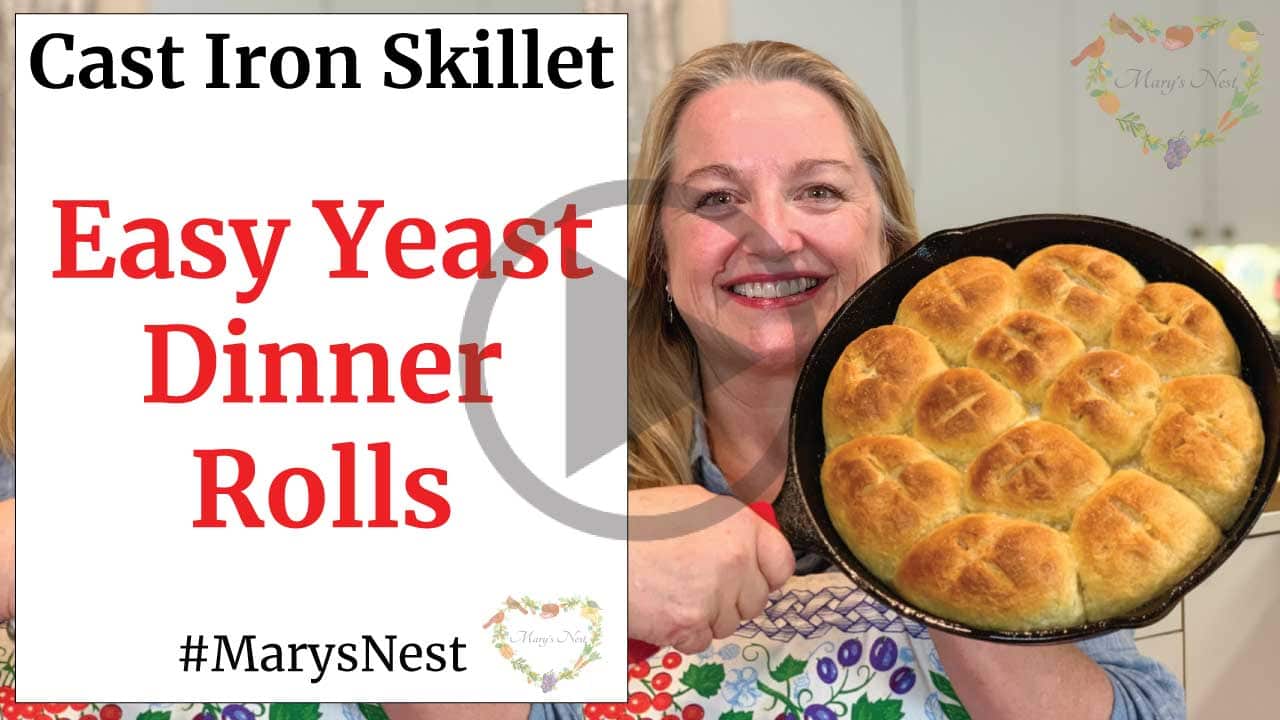
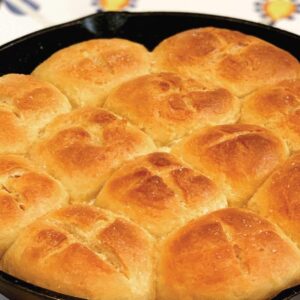
This easy yeast dinner rolls recipe makes perfectly soft, buttery rolls that are perfect for serving with all types of meals! All you need are simple ingredients. These rolls are easy to bake, making this the perfect recipe for beginner baker. You’ll get great results each and every time.
Affiliates note: As an Amazon Associate I earn from qualifying purchases. My content may contain affiliate links to products and services. If you click through and make a purchase, I’ll receive a small commission. It does not affect the price you pay.
Table of Contents
- Using a Cast Iron Skillet to Make Dinner Rolls
- Ingredients
- How to Bake Yeast Dinner Rolls
- What To Serve With Dinner Rolls
- How to Store
- Expert Tips
- FAQs
- More Baking Recipes
- Grind Your Own Flour with the Mockmill
- The Modern Pioneer Pantry
- Download Your Free 36-Page Pantry List
- Join the Traditional Foods Kitchen Academy
- More Kitchen Pioneer Videos
- Easy Yeast Dinner Rolls Recipe
- Shop for items used in this blog post or video
Using a Cast Iron Skillet to Make Dinner Rolls
These are the easiest yeast dinner rolls you’ll ever make, especially if you have a food processor. The dough literally comes together in one minute. And the rolls bake up into buttery, pillow-soft bites of deliciousness.
If you don’t have a food processor, you can also make these in an electric mixer with a dough hook or even by hand. Any way you make them, they are a delicious treat for your dinner table.
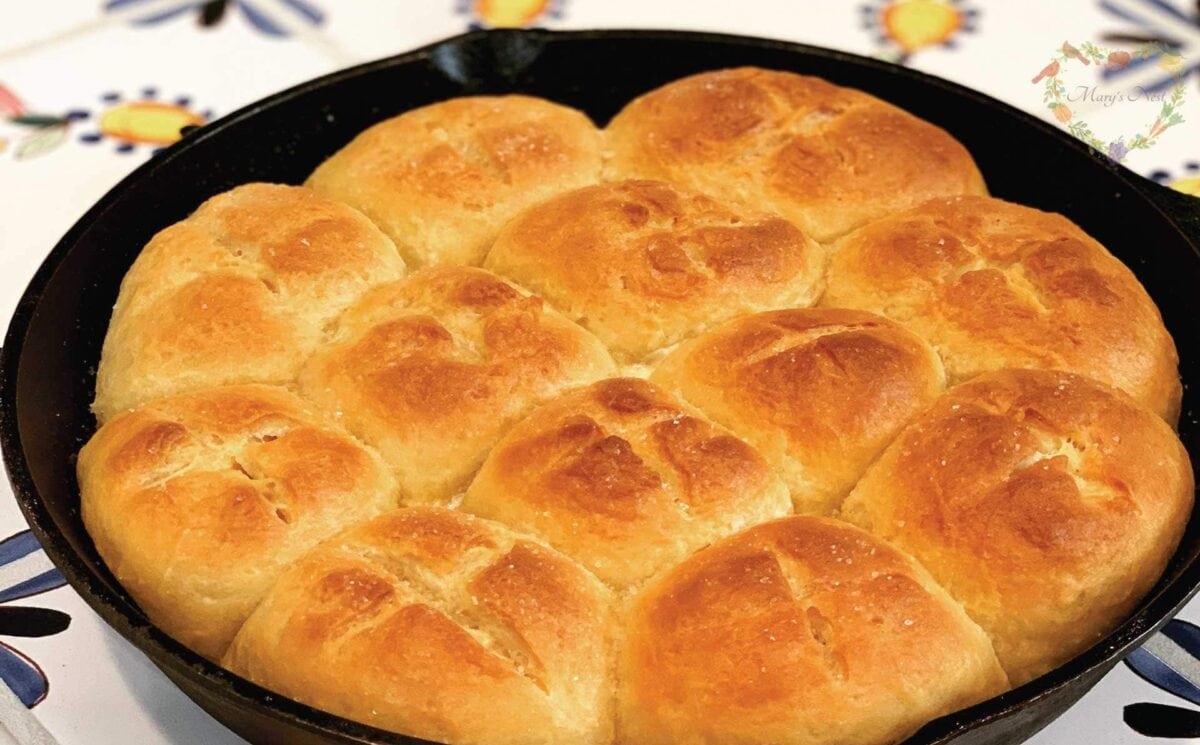
I love cooking them in a cast iron skillet because they bake up with a bit of extra crispiness on the edges.
Your cast iron skillet is an outstanding kitchen tool! So after you make yeast dinner rolls, don’t put your skillet away. You can also use it to make skillet cornbread or an apple pie skillet.
Ingredients
Find the full printable recipe with measurements below.
To make skillet dinner rolls with active dry yeast, you will need:
- Yeast: We will use active dry yeast to make these easy dinner rolls.
- Milk: Use whole milk for the best flavor, and make sure you warm it to 110°F (43°C).
- Sugar: Just a bit to feed the yeast and help it activate.
- Salt: Even simple dinner rolls need a touch of salt for flavor.
- Butter: Butter is baked into these rolls but also brushed over the top after baking.
- Flour: I prefer using bread flour that is higher in protein for making the best yeast dinner rolls, but you can also use all-purpose flour.
- Olive oil: Just a bit to coat the bowl used for the dough to rise in.
How to Bake Yeast Dinner Rolls
When it comes to making homemade yeast dinner rolls, you have lots of options. There are different ways to mix them up and also two methods for baking.
In my printable recipe, you will find how to mix these by hand and also how to bake them in a cast iron skillet or on a baking sheet.
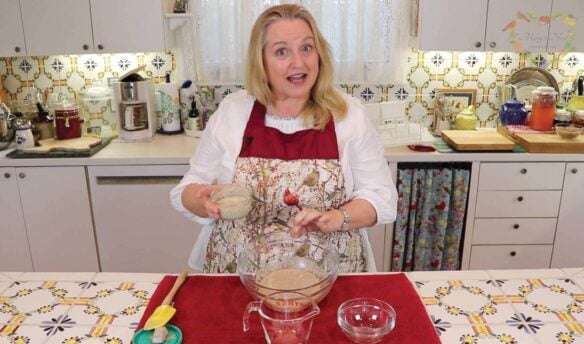
Step 1 – Place the warm milk, yeast, and sugar in a bowl, the bowl of your stand mixer, or food processor. Blend for a few seconds, and then allow the yeast a few moments to “bloom” and become frothy.
Step 2 – Add half a teaspoon of salt, half of the butter, and four cups of flour, starting with one-half cup of flour at a time. Mix the dough for approximately 10 seconds after each addition of flour.
PRO TIP: You are looking for the dough to come together into a smooth ball that’s no longer sticky. You may need an additional one half cup flour to get it to that consistency.
Step 3 – Add the olive oil to a large bowl. Add the dough to the bowl and turn it around until the dough is completely covered with the oil.
Step 4 – Cover the bowl with plastic wrap, place it in a warm area, and allow the dough to double in size. The dough will take about 1 1/2 hours to double.
Step 5 – After the dough is doubled, divide it into 12 even pieces and roll each piece into a ball, and place them into a greased cast-iron skillet or onto a greased baking sheet.
PRO TIP: Use a cast iron skillet if you prefer skillet dinner rolls with a bit of extra crispiness around the edges.
Step 6 – Brush the dough balls with water using a pastry brush. Make sure the dough balls are each well-saturated. Cover them again and allow them to rise in a warm area for 30 minutes or until doubled in size.
Step 7 – Use a sharp knife to make a cross incision on the top of each dough ball. Bake the rolls on the middle rack of the oven for 20 minutes.
Step 8 – Remove them from the oven when golden brown, top with melted butter, and sprinkle with the remaining salt.
What To Serve With Dinner Rolls
While these yeast rolls work great any time of year, they’re especially popular around the holidays. They go great with a Christmas glazed ham or a Thanksgiving roasted turkey made with small turkeys instead of a giant one! For the holidays, I love to start things off with a giant party platter and some baked brie. I always end our holiday dinner with a classic pumpkin pie or gingerbread cake.
For the rest of the year, they go great with a wide variety of comfort food favorites. Here are a few ideas for serving.
- Serve them with soups. Such as this simple hamburger soup or Italian minestra soup.
- They go great with casseroles. We love this old-fashioned hamburger casserole in our house.
- Add them to meals with pork chops or this delicious praised chicken.
You can also use these yeast bread rolls for other meals, including breakfast or lunch! They make a great breakfast sandwich or slider bun.
How to Store
Store leftover cast iron dinner rolls in an airtight container at room temperature for up to three days. If you prefer to reheat them before serving again, wrap them in foil and heat them in the oven until heated through.
The yeast rolls do firm up a bit after sitting, so they won’t be as soft as when freshly made. You can brush with more melted butter if desired once heated and just before serving.
Expert Tips
- New to baking? Get my printable baking ingredients checklist that you can take to the grocery store on your next shopping trip. You can also learn more about Essential Whole Grains and How to Store Whole Grain and Make Homemade Flour.
- Make sure to check your yeast expiration date.
- Proofing your dinner rolls. The dough will rise better in a warm place. If your kitchen is warm enough, that’s perfect, but I like to place them in the oven when it’s cold outside. Simply preheat the oven to 200°F (93°C) and then turn it off and place the dough inside.
- Make sure you allow enough time. The dough will need to sit for two hours, so make sure you start your rolls in advance so they’re ready in time for the meal.
- Serve immediately. These rolls are the best when they are hot, freshly brushed with warm, and still pillowy soft.
FAQs
Yes, you can! It works pretty much the same way but will likely reduce the time it takes for the dough to rise.
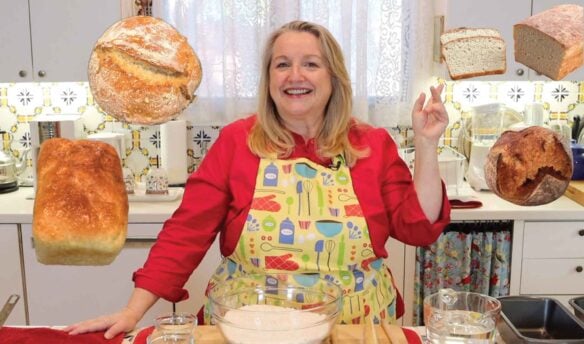
More Baking Recipes
If you’re looking for more easy baking recipes, watch the following recipe videos to make super soft homemade bread or crackers for entertaining. (The No Knead Sandwich Bread recipe video has over one million views on YouTube!)

No Knead Sandwich Bread – Super Soft!
This is the perfect bread to make to help you transition from a Processed Foods Kitchen to a Traditional Foods Kitchen.
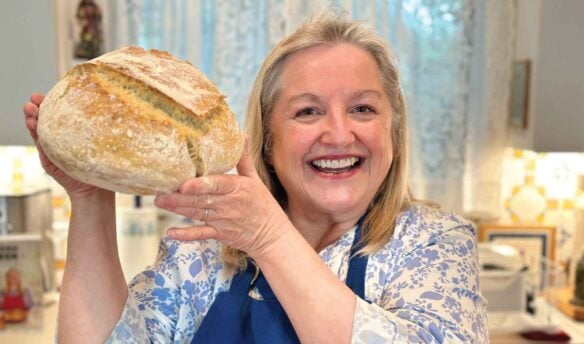
How to Make a Foolproof Sourdough Starter
Make a sourdough starter that will be successful every time.
Salt Rising Bread Recipe – Step by Step Tutorial
Enjoy this unique yet flavorful bread developed by the early pioneers of the Appalachian Mountains.
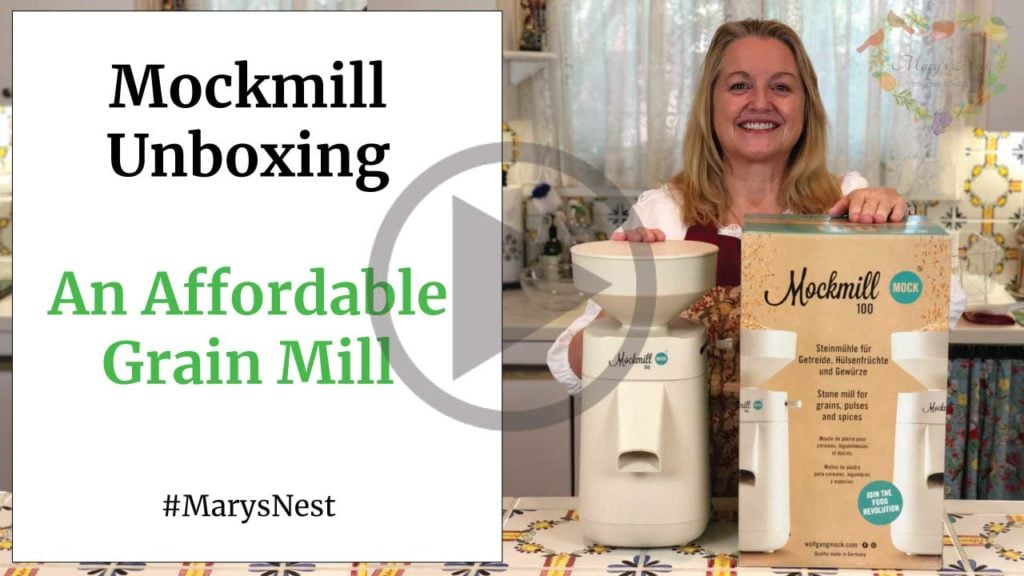
Grind Your Own Flour with the Mockmill
Are you ready to start using fresh flour for baking?
When it comes to electric grain mills, after I did A LOT of research, I decided to buy a Mockmill. And am I so happy I did! The Mockmill is a very affordable but beautifully crafted German-made mill that stone grinds grain with settings ranging from 1 to 10—fine to coarse ground grain.
You can see me unbox and try out the Mockmill 100 Grain mill in the following video.
Order YOUR COPY Now!
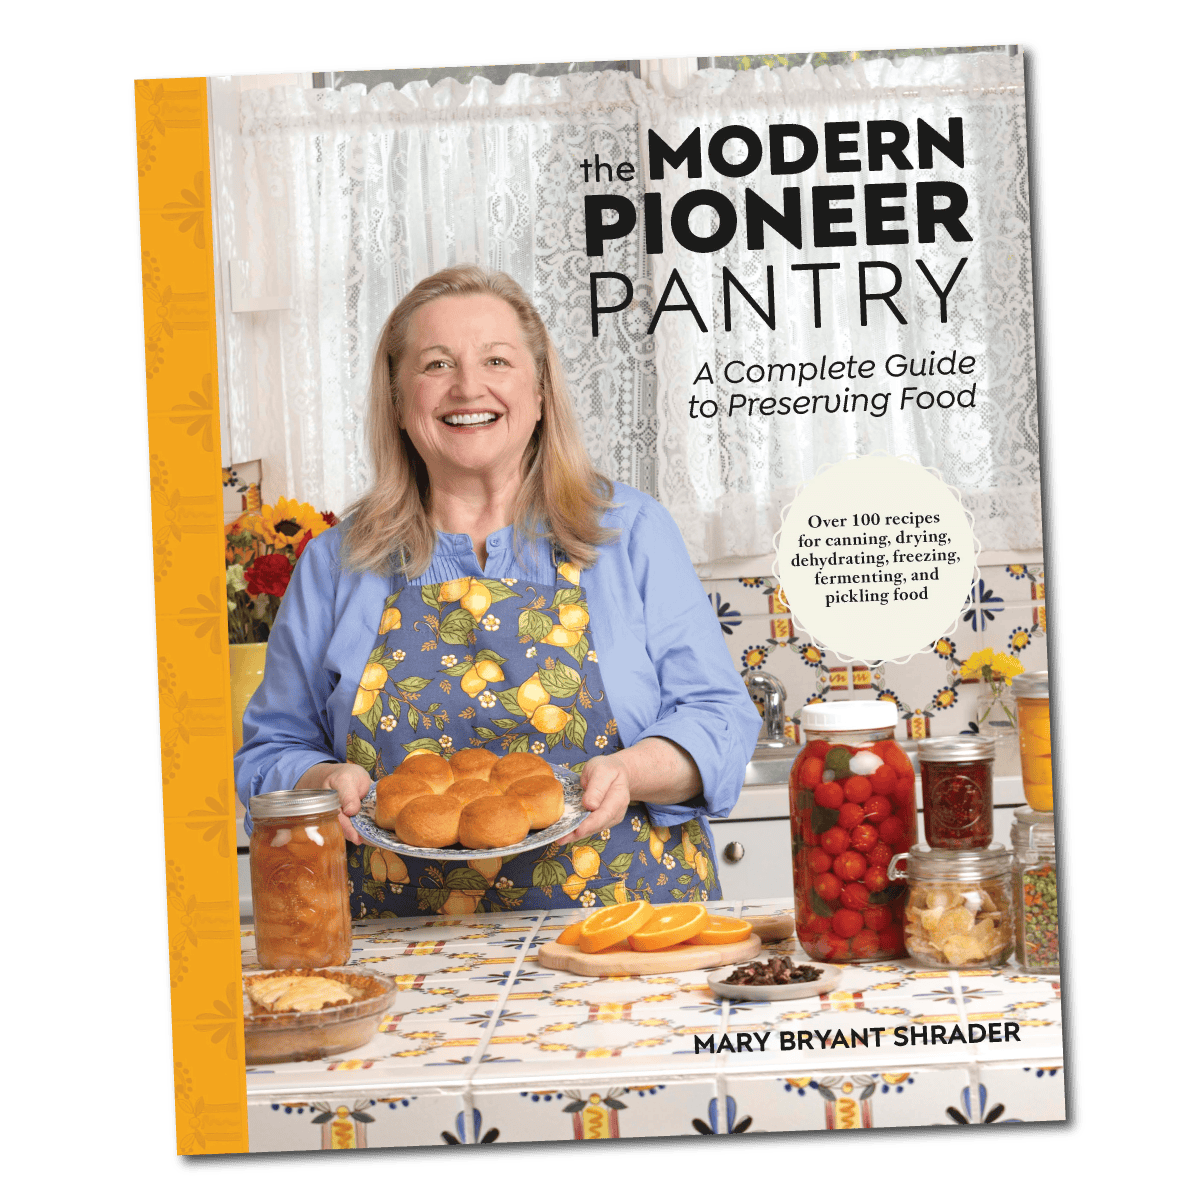
The Modern Pioneer Pantry
Simple ingredients, timeless techniques, and a well-stocked pantry. Discover over 100 nourishing recipes to preserve food and turn pantry staples into homemade meals. Build a wholesome, traditional pantry—just like a modern pioneer!
Download Your Free 36-Page Pantry List
For an extensive list of the traditional foods you can make and purchase to stock your pantry, be sure to download my free 36-page Traditional Foods Pantry List. This comprehensive eBook is full of links to recipe videos, helpful articles, and more!

And if you’re looking for a printed book full of my traditional foods recipes to show you how to create a traditional foods kitchen, be sure to order your copy of my bestselling book, The Modern Pioneer Cookbook.

Order YOUR COPY Now!
The Modern Pioneer Cookbook
Seasonal ingredients, traditional techniques, and nourishing recipes. Over 85 traditional, from-scratch recipes! Discover for yourself how you can use simple ingredients and traditional techniques to cook the modern pioneer way.
Join the Traditional Foods Kitchen Academy
Are you looking for more traditional foods videos? If so, I invite you to join the Traditional Foods Kitchen Academy. Members of this optional paid YouTube community get access to exclusive videos and other members-only perks. Plus, your YouTube comments include a special members-only badge.
More Kitchen Pioneer Videos
Baking with Whole Grains: The Maslin Method, Grain Mills, and America’s Bread Basket
Explore whole grain baking with The Maslin Method, fresh-milled flour, grain mills, heritage wheats, and more.
A Sweet Season of Celebration and New Beginnings with The Maslin Method Baking School Series
Celebrate the close of a heartfelt book tour and the exciting launch of The Maslin Method Baking School for traditional baking.
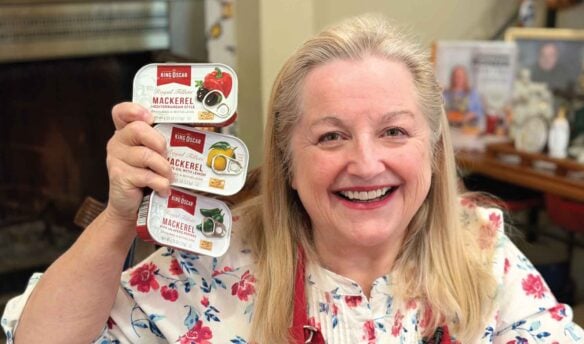
Why We Should Incorporate Mackerel Into Our Diet
Easy and nourishing ways to enjoy mackerel into your meals.
Stay in Touch with Mary’s Nest
- Subscribe to My YouTube Channel for Traditional Foods Videos (Free) - When you subscribe, be sure to click on the notification bell that will let you know each time I upload a new video.
- Subscribe to Mary’s Traditional Foods Newsletter (Free) - Get a free 36-page eBook for signing up: How to Stock Your Essential Traditional Foods Four-Corners Pantry.
- Join the Traditional Foods Kitchen Academy - For more detailed videos and exclusive members-only perks, join my YouTube membership community.
- Order The Modern Pioneer Cookbook - Get a hardcover book of Mary's nourishing recipes from a Traditional Foods Kitchen. This bestselling cookbook is published by Penguin Random House with their DK imprint.
- Order The Modern Pioneer Pantry - Get Mary's latest hardcover cookbook about preserving food and making delicious meals from your Four Corners Pantry. Mary's second cookbook is also published by Penguin Random House.
I look forward to having you join me in my Texas Hill Country Kitchen!
I’d like to receive more tips and recipes from Mary’s Nest.
Easy Yeast Dinner Rolls
Equipment
- Food processor, stand mixer with dough hook, or electric hand mixer with dough hook. (These are all optional since you can also knead this dough by hand.)
- Cast iron skillet or baking sheet
- Pastry brush
Ingredients
- 1 pkg Active dry yeast You can also use instant yeast, which will slightly decrease the rise time.
- 1 cup Whole milk Warm the milk to 110°F (43°C)
- 1 tbsp Sugar
- 1 tsp Salt, divided
- 8 tbsp Butter, divided
- 4 1/2 cups Bread flour You can also use all-purpose flour.
- 1 tsp Olive oil
- 1/4 cup water
Instructions
If using a food processor, stand mixer, or hand mixer
- Preheat oven to 425°F (218°C).
- If using a food processor, stand mixer, or hand mixer, place warm milk, yeast, and sugar in the bowl attachment and blend for a few seconds. Allow the yeast a few moments to "bloom" and become frothy.
- To the bowl attachment, add 1/2 tsp. of salt, 4 tbsp. butter, and 4 cups of flour, starting with one half cup flour at a time. Mix for approximately 10 seconds after each addition of flour.
- The dough should come together in a smooth ball and no longer be sticky. You may need an additional one half cup flour for a total of 4 1/2 cups flour.
- Take a clean, large bowl and pour in the olive oil. Drop the dough into the bowl and turn it around until the dough is completely greased.
- Cover the bowl with plastic wrap, place it in a warm area, and allow the dough to double in bulk. This will take about 1 1/2 hours.
- After the dough has doubled in bulk, divide the dough into 12 even pieces and roll into 12 balls. (See video.)
- Place each ball into a greased cast-iron skillet or onto a greased baking sheet.
- Brush the dough balls with a 1/4 cup of water using a pastry brush. Make sure the dough balls are each well saturated.
- Cover dough balls with plastic wrap and allow them to rise in a warm area for 30 minutes until doubled in size.
- After 30 minutes, uncover the dough balls. Using a sharp knife, make a cross incision on the top of each dough ball.
- Place the cast-iron skillet or baking sheet onto the middle rack of the oven and bake for 20 minutes.
- After 20 minutes or once the rolls are golden brown, remove the skillet or baking sheet from the oven and place it on a heatproof surface.
- Melt the remaining 4 tablespoons of butter, brush the butter on top of the rolls, and sprinkle the rolls with the remaining 1/2 teaspoon of salt. Serve immediately.
If mixing by hand
- Preheat oven to 425°F (218°C).
- If mixing this by hand, simply place the warm milk, yeast, and sugar in a bowl and stir. Allow the yeast a few moments to "bloom" and become frothy.
- To the bowl, add 1/2 tsp. of salt, 4 tbsp. butter, and 4 cups of flour, starting with one half cup flour at a time. Mix well in between each addition of flour.
- Mix with a wooden spoon, a Danish dough whisk, or clean hands until the dough comes together in a smooth ball and is no longer sticky. This may take 10 minutes of kneading. You may need an additional one half cup flour for a total of 4 1/2 cups flour.
- Take a clean, large bowl and pour in the olive oil. Drop the dough into the bowl and turn it around until the dough is completely greased.
- Cover the bowl with plastic wrap, place it in a warm area, and allow the dough to double in bulk. This will take about 1 1/2 hours.
- After the dough has doubled in bulk, divide the dough into 12 even pieces and roll into 12 balls. (See video.)
- Place each ball into a greased cast-iron skillet or onto a greased baking sheet.
- Brush the dough balls with a 1/4 cup of water using a pastry brush. Make sure the dough balls are each well saturated.
- Cover dough balls with plastic wrap and allow them to rise in a warm area for 30 minutes until doubled in size.
- After 30 minutes, uncover the dough balls. Using a sharp knife, make a cross incision on the top of each dough ball.
- Place the cast iron skillet onto the middle rack of the oven and bake for 20 minutes.
- After 20 minutes or once the rolls are golden brown, remove the skillet or baking sheet from the oven and place it on a heatproof surface.
- Melt the remaining 4 tablespoons of butter, brush the butter on top of the rolls, and sprinkle the rolls with the remaining 1/2 teaspoon of salt. Serve immediately.
Video
Notes
-
- New to baking? Get my printable baking ingredients checklist at https://marysnest.com/how-to-stock-your-baking-pantry-with-the-best-ingredients/ that you can take to the grocery store on your next shopping trip.
-
- Make sure to check your yeast expiration date!
-
- Proofing your dinner rolls. The dough will rise better in a warm place. If your kitchen is warm enough, that’s perfect, but I like to place them in the oven when it’s cold outside. Simply preheat the oven to 200°F (93°C) and then turn it off and place the dough inside.
-
- Make sure you allow enough time. The dough will need to sit for two hours, so make sure you start your rolls in advance so they’re ready in time for the meal.
-
- Serve immediately. These rolls are the best when they are hot, freshly brushed with warm, and still pillowy soft.
Shop for items used in this blog post or video
Favorite Kitchen Supplies
- Favorite Aprons
- Lodge Cast Iron Skillet
- KitchenAid Food Processor
- KitchenAid Commercial Countertop Mixer
- Cuisinart Hand Held Mixer
- Le Creuset Silicone Spatula Spoon
- Duralex Stackable 10-Piece Bowl Set
Amazon Shop and Shopping Guide
- Visit Mary’s Nest Amazon Shop
- Get a 30-day Audible trial with a free audiobook
- Visit my Shopping Guide page
Get up to 15% off for stocking your Traditional Foods Pantry and equipping your Modern Pioneer Kitchen, including discounts from US Wellness Meats, Farmhouse Teas, Backwoods Home, Masontops, Cultures for Health, Survival Garden Seeds, Redmond Real Salt, and More!

Where can I locate the printable recipe for Easy Yeast Dinner Rolls – Cast Iron Skillet?
Hi Michele,
Thanks for your comment. I didn’t have the recipe as part of my original blog post, but I’ve added it now. I hope that helps you make some wonderful and delicious dinner rolls to enjoy! 🙂
Love and God bless,
Mary