If rising prices for chickens are making it difficult for you to create chicken bone broth, this recipe uses inexpensive chicken parts to make some of the most collagen-rich bone broth you have ever had for under $2.00!

Affiliates note: As an Amazon Associate I earn from qualifying purchases. My content may contain affiliate links to products and services. If you click through and make a purchase, I’ll receive a small commission. It does not affect the price you pay.
Table of Contents
- Collagen Rich Bone Broth
- What is the Difference Between Collagen and Gelatin?
- What Do I Gain When Making Bone Broth in the Instant Pot?
- Making a Vegetable Scrap Bag
- Recipes with Kitchen Scraps
- Should I Use a Fat Separator?
- Do You Want to Keep the Fat in Your Bone Broth?
- Should I Buy Bone Broth?
- Why I Love Having a Spider Strainer
- How to Make Cheap Beef Bone Broth
- How to Make Different Types of Bone Broth
- How to Make Keto Bone Broth
- How to Dehydrate Bone Broth
- More Bone Broth Videos
- Recipes Using Bone Broth
- More Instant Pot Recipes
- Looking for Bones for Beef Bone Broth?
- Download Your Free 36-Page Pantry List
- Join the Traditional Foods Kitchen Academy
- Collagen Rich Bone Broth Recipe
- Shop for items used in this blog post or video
Collagen Rich Bone Broth
Bone broth is the backbone of a traditional foods kitchen because of its nutritiousness and versatility. And making bone broth is affordable and easy, especially chicken bone broth. Since it is rich in protein, you can use bone broth in place of water in most recipes.
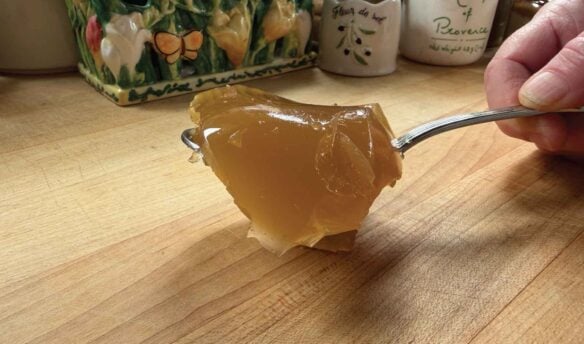
The secret to nutritious bone broth is to make it as gelatinous as possible. Once refrigerated, your bone broth should look like gelatin. The gelatin occurs because bones, especially cartilage, are rich in collagen. And once you cook bones and cartilage, the collagen seeps out to make your bone broth gelatinous.
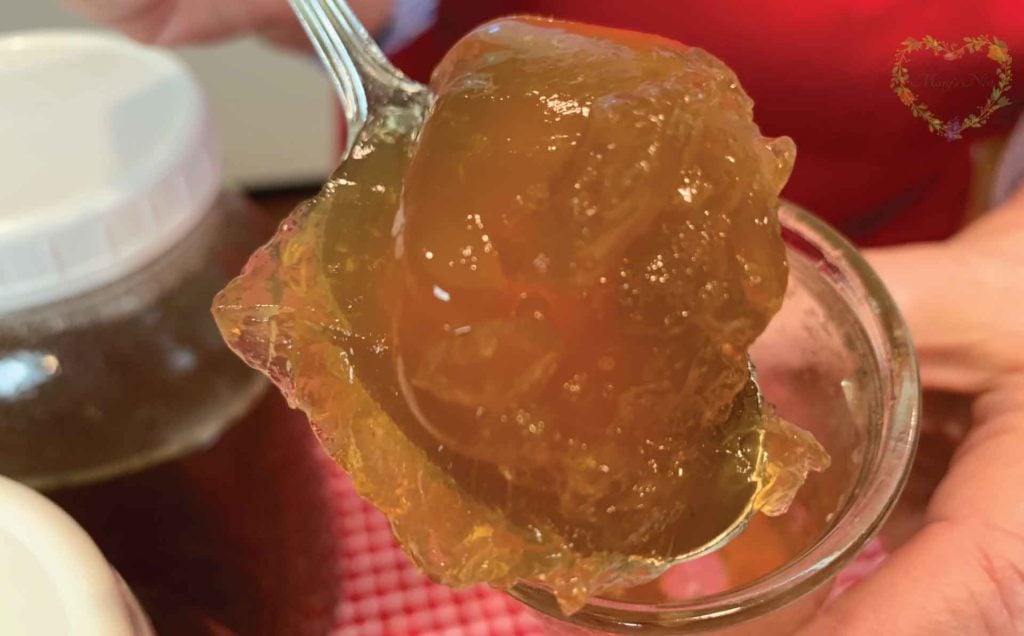
It’s this gelatin that we are after. It’s the reward of a well-made bone broth. But why all the emphasis on this gelatin? Read on.
What is the Difference Between Collagen and Gelatin?
Animal bones and especially the cartilage attached to animal bones are rich in collagen. As a protein, collagen benefits the human body since it helps to protect many of our internal organs and joints.
Once you cook collagen, it becomes gelatin. However, you don’t have to cook collagen to benefit from it. You can eat a piece of chicken cartilage off of a chicken bone to get collagen, but it’s much more soothing to your body and digestive system when you consume gelatin, the cooked form of collagen.
When you simmer that chicken cartilage in water at a low but warm temperature, the cartilage releases collagen into the water, and it becomes gelatin. Our human digestive system can easily absorb collagen when we drink it in this liquid form. This liquid gelatin is what we call bone broth.
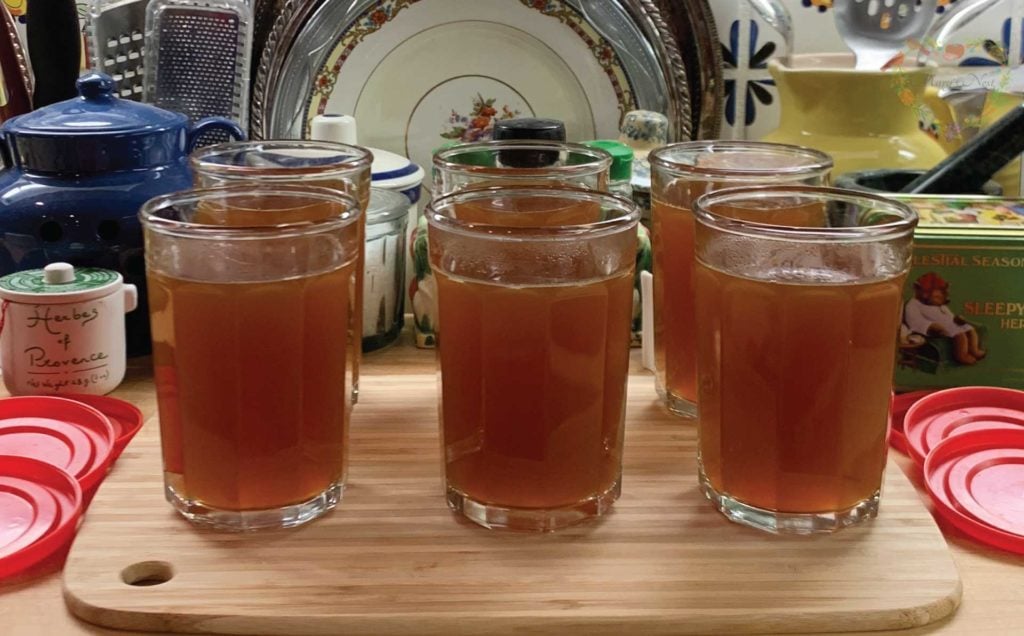
What Do I Gain When Making Bone Broth in the Instant Pot?
In today’s video, I show you how to make collagen-rich bone broth in the Instant Pot. However, you can certainly use any brand of pressure cooker to follow this recipe.
Although you can make bone broth on the stovetop or in the slow cooker, making it in the Instant Pot is the ideal choice when you are short on time. In the Instant Pot, you can make bone broth in two hours as compared to six hours on the stovetop or in the slow cooker.
However, keep in mind that for what you gain in time saved, you lose in the creation of some of the gelatin. This is because even when set to cook at low, the Instant Pot still runs higher than the temperature at which collagen likes to be simmered to create a rich and gelatinous gelatin.
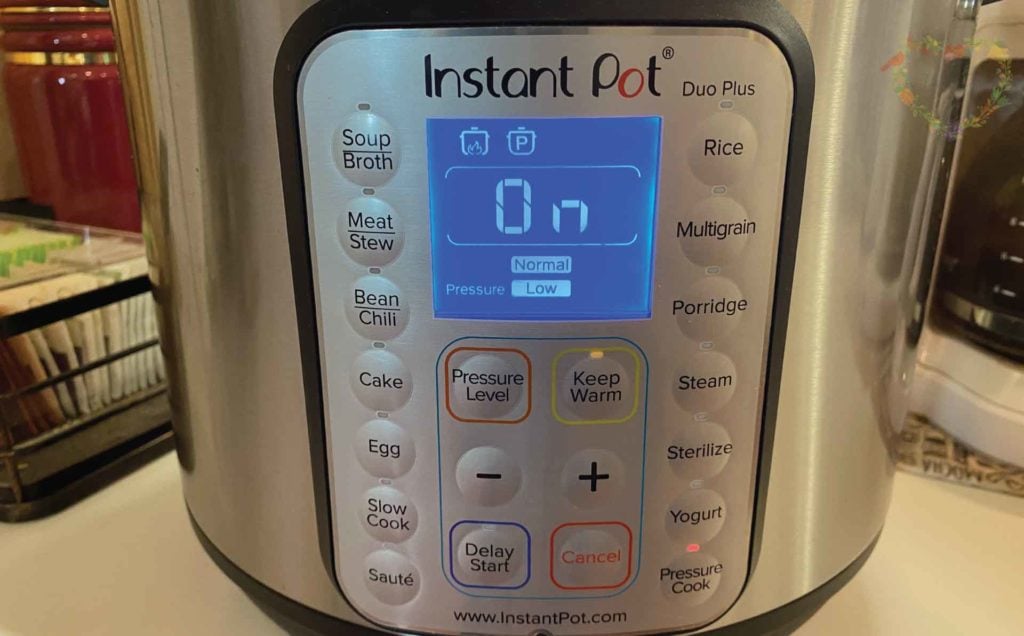
Nevertheless, if you are tight on time, making bone broth is always better than not making bone broth. And although your Instant Pot bone broth may not be as gelatinous as bone broth made in more traditional ways, it will still gel when cooled and be very nutritious.
You will typically find the gel will be slightly looser than the gel of bone broth that has simmered on the stovetop or in the slow cooker.
Making a Vegetable Scrap Bag
Whenever you are peeling onions, scraping carrots, or getting down to the root of the celery stalk, don’t throw your vegetable scraps out! Instead, put them into a freezer-proof bag or container and save those scraps in your freezer.
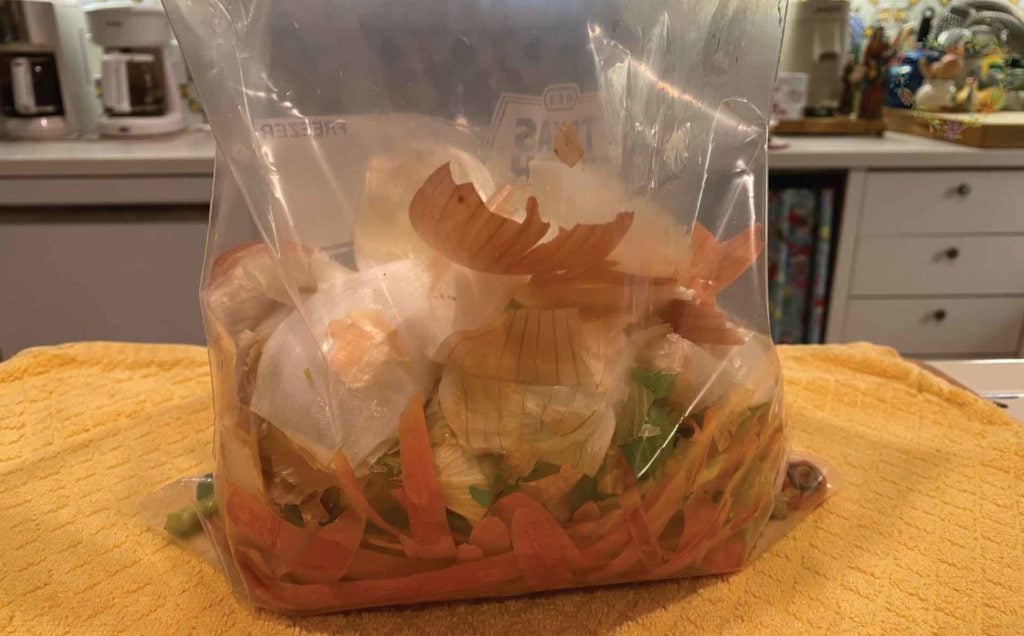
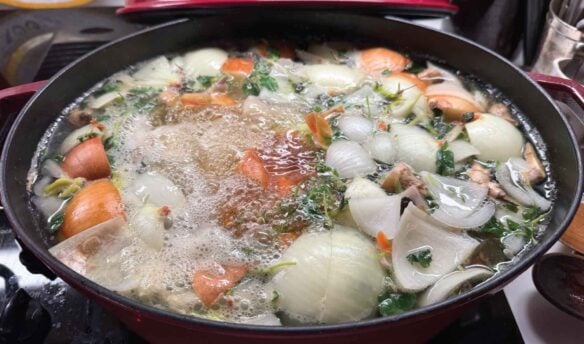
When ready to make bone broth, pull out your scrap bag and add those bits and bobs right in with your bones. Those scraps will provide your broth with flavor and nutrition, especially minerals.
If you don’t have a vegetable scrap bag handy, you can still make bone broth. At a minimum, you just need to add one of each of the following cut-up vegetables:
- Carrot
- Celery
- Onion
Recipes with Kitchen Scraps
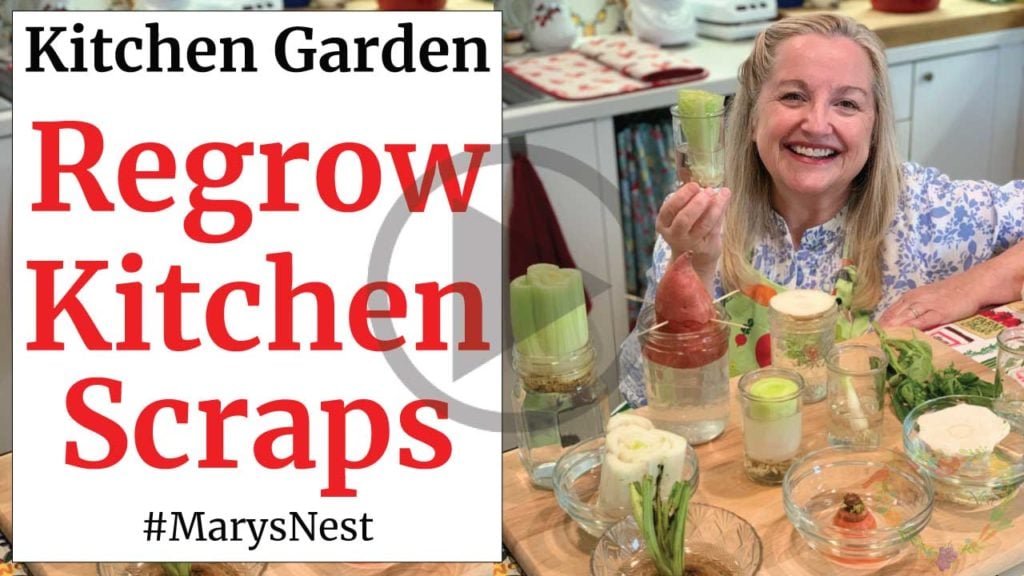
As I mention in my video, if you save the bottom of your celery stalk, you can regrow it. In the following video, I show you 10 vegetables you can regrow from kitchen scraps, including celery!
Also important to keep in mind is that onion skins and garlic skins are rich in nutrients, just like the vegetables under those skins! In the video below, watch how I make a simple yet effective cold remedy using onion skins.
Should I Use a Fat Separator?
Do you want to strain the fat out or keep it in your bone broth? I like to completely de-fat my bone broth before storing it. Then, with my de-fatted and stored bone broth handy, I can use it in place of water when making soups, stews, or cooking up grains.
The process of removing the fat is easy. You have two options.
First, you can let bone broth chill with the fat still mixed in it. The fat will rise to the top and harden, and then you can simply lift the fat cap up and remove it. But don’t throw away the fat! It is very nutritious. Save this fat in your fridge or freezer to use for cooking.
Alternatively, if you want to make the job of removing the fat from your bone broth fast and easy, be sure to try out one of my favorite kitchen tools, the fat separator.
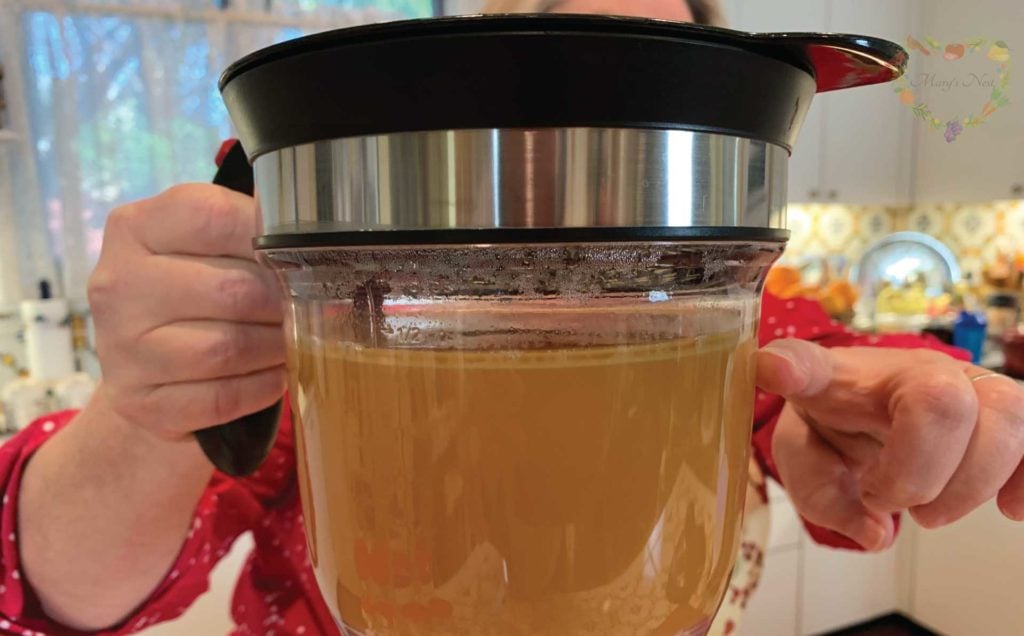
To use the fat separator:
- Pour your bone broth into the fat separator.
- Position your device over the container where you want to store your de-fatted bone broth.
- Press the side lever on your fat separator, and all your fat-free bone broth will strain out of the bottom of the fat separator and into your container.
- As you get closer to the fat line, release the lever to stop the flow and then decant the fat into a separate receptacle.
Do You Want to Keep the Fat in Your Bone Broth?
Keeping the fat in your bone broth is a good option if you plan to refrigerate your bone broth, instead of freezing it, but don’t want to use it right away. Allowing the fat to form on top of the bone broth will keep your bone broth fresh in the refrigerator for about two weeks.
The fat cap is the fat that forms at the top of refrigerated bone broth, and this cap creates something akin to an airtight seal. The seal helps keep air from degrading your bone broth. However, once your break the fat cap, your bone broth will only stay fresh for about another week in the refrigerator.
Should I Buy Bone Broth?
Should you buy bone broth? Absolutely not! I would rather see you use water in your recipes than use store-bought bone broth with all the extra ingredients that manufacturers typically include in their broth. (I guess you could say that I am a bit passionate about this subject 😉)
Watch my homemade versus store-bought bone broth video to learn why you should avoid store-bought bone broth with all its added ingredients. (Spoiler alert: Homemade bone broth gives you the collagen and nutrition you want and need at a more affordable price.)
- Homemade Bone Broth vs Store Bought – Which is Better and More Affordable?
Why I Love Having a Spider Strainer
Also known as a Spider Skimmer, a Spider Strainer is a handy kitchen tool for removing all the bones and cooked vegetables from your stockpot, slow cooker, or Instant Pot after making bone broth.
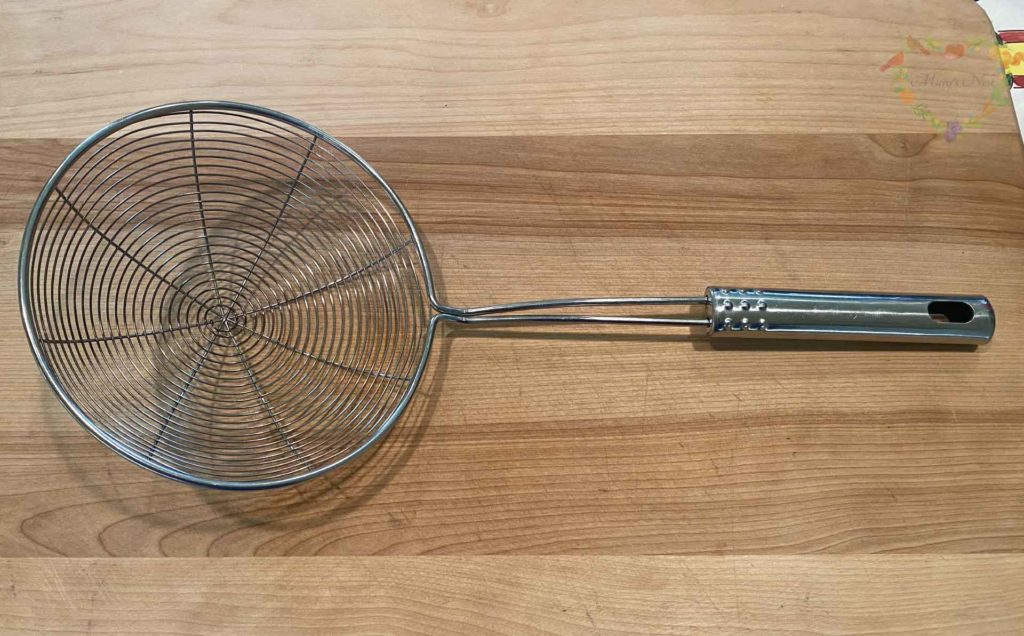
This tool gets the job done quickly and efficiently to make sure that you get the bulk of debris out of your bone broth before pouring it into a jar to store.
How to Make Cheap Beef Bone Broth
With the rising price of beef bones due to the popularity of bone broth, be sure to try your hand at making beef bone broth using beef feet. Feet are very affordable and make a fabulously gelatinous bone broth.
How to Make Different Types of Bone Broth
You can make bone broth from almost any type of animal bones, and I share some of the many bone broth variations you can make in the following videos.
Chicken Bone Broth
My favorite way to make chicken bone broth is by using the carcass of three roast chickens. This technique creates a bone broth with a rich brown color and an exceptional flavor! And you can make chicken bone broth in many ways, including in the slow cooker, on the stovetop, and in the Instant Pot.
Beef Bone Broth
Like chicken bone broth, you can also make beef bone broth in a wide variety of ways, including in the slow cooker, on the stovetop, and in the Instant Pot.
I also have a handy video to help you select the best bones for making beef bone broth.
And did you know that you can reuse your bones to make beef bone broth and chicken bone broth? Most bones can easily create a second batch of bone broth and sometimes even a third batch too!
Turkey Bone Broth
When you’re making a big turkey dinner for the holidays, be sure to save your turkey carcass to make a delicious and nutrient-rich bone broth. In the videos below, I show you how easy it is to make turkey bone broth in the slow cooker and the Instant Pot.
Other Types of Bone Broth
Never overlook a fish carcass! The carcass of a fish and the head and the tail will make an outstanding thyroid-loving fish bone broth that only needs to simmer for 45 minutes.
And if you are looking for the fountain of youth to help you create smooth and wrinkle-free skin, look no further than pork bone broth. Not only is it rich in collagen, which our skin needs, but it also tastes like liquid bacon!
How to Make Keto Bone Broth
If you’re following the Keto diet and need to limit your carbohydrate intake, protein-rich bone broth makes an ideal low-carb drink to enjoy.
However, even though bone broth is high in protein, you have to watch out for the types of vegetables you’ll want to add to your bone broth. Generally, the veggies used to make bone broth may be high in natural sugars, like sweet onions and carrots.
But not to worry! In the video below, I share some of the best mineral-rich yet low sugar vegetables to add when making bone broth for a Keto or low-carb diet.
How to Dehydrate Bone Broth
Dehydrating bone broth is a fairly simple process and can be done in a dehydrator or an oven. Once dried, you have an easy-to-use and portable way to take your bone broth with you when you are on the go! Just add hot water to rehydrate, and you have a delightful sipping broth.
More Bone Broth Videos
Ever wonder what the difference is between broth, stock, and bone broth? In the video below, I walk you through the differences and similarities between each, as well as how to best use them in your traditional foods kitchen.
Plus, if you still have questions after watching all these videos about bone broth, watch my Bone Broth FAQs video, where I answer all your questions.
If you have ever wondered why I always stress the importance of trying to make your bone broth as gelatinous as possible, you’ll find out in the following video.
Bone broth is rich in certain types of proteins that soothe our digestive tract and nourish our hair, skin, and nails. You can also increase the nutrition of your bone broth by adding various herbs and spices. I’ll show you some of the best combinations to add to your bone broth in the following video.
Recipes Using Bone Broth
Bone broth is incredibly versatile, and you can use it in many ways, even in smoothies! Learn five ways to use bone broth in the following video.
Because of all of its benefits, I encourage you to consistently use bone broth as your base for soups and stews instead of water. You can also use bone broth in place of water when cooking grains. Try making this chicken bone broth soup, and you will never want to add plain water to your chicken soup again.
As mentioned earlier, you can use bone broth as the liquid base for making smoothies. When you use bone broth instead of water, you will no longer need to buy those expensive collagen powders to add to your smoothies. Learn how to make some of my favorite superfood smoothies below, and be sure to download the free printable checklist.
More Instant Pot Recipes
In my recipe video, I use an Instant Pot to make collagen-rich bone broth. Here are some additional recipes to enjoy if you have an Instant Pot too.
Deep Cleaning Your Instant Pot
After you’ve made collagen-rich chicken bone broth or other meal in your Instant Pot, learn how to clean your device the right way. I called up the manufacturer and share their tips with you.
Looking for Bones for Beef Bone Broth?
If you can’t find high-quality bones from grass-fed cows in your neighborhood supermarket or farmer’s market, check out US Wellness Meats for beef bones for your beef bone broth.
- Use discount code MARYNEST and my link to save 15% off regular-priced items on your US Wellness Meats order. You can shop for a variety of products, including:
This post is not sponsored. I’m a long-time customer of US Wellness Meats because I have always been impressed by the quality of their products. Check out my US Wellness Meats unboxing video to see the types of products you can get, including bones for beef bone broth!
Download Your Free 36-Page Pantry List
For an extensive list of the traditional foods you can make and purchase to stock your pantry, be sure to download my free 36-page Traditional Foods Pantry List. This comprehensive eBook is full of links to recipe videos, helpful articles, and more!
And if you’re looking for a printed book full of my traditional foods recipes to show you how to create a traditional foods kitchen, be sure to order your copy of my bestselling book, The Modern Pioneer Cookbook.
Join the Traditional Foods Kitchen Academy
Are you looking for more traditional foods videos? If so, I invite you to join the Traditional Foods Kitchen Academy. Members of this optional paid YouTube community get access to exclusive videos, live streams, and other members-only perks. Plus, your YouTube comments include a special members-only badge.
In the following members-only video series, I talk about the importance of cooking with traditional fats, including butter, ghee, animal fats, and cooking oils.
Stay in Touch with Mary’s Nest
- Subscribe to My YouTube Channel for Traditional Foods Videos (Free) - When you subscribe, be sure to click on the notification bell that will let you know each time I upload a new video.
- Subscribe to Mary’s Traditional Foods Newsletter (Free) - Get a free 36-page eBook for signing up: How to Stock Your Essential Traditional Foods Four-Corners Pantry.
- Join the Traditional Foods Kitchen Academy - For more detailed videos and exclusive members-only perks, join my YouTube membership community.
- Order The Modern Pioneer Cookbook - Get a hardcover book of Mary's nourishing recipes from a Traditional Foods Kitchen. This bestselling cookbook is published by Penguin Random House with their DK imprint.
- Order The Modern Pioneer Pantry - Get Mary's latest hardcover cookbook about preserving food and making delicious meals from your Four Corners Pantry. Mary's second cookbook is also published by Penguin Random House.
I look forward to having you join me in my Texas Hill Country Kitchen!
I’d like to receive more tips and recipes from Mary’s Nest.
Collagen Rich Bone Broth

Equipment
- 1 8-quart Instant Pot You can also use a 6-Quart Instant Pot or other brands and sizes of pressure cookers.
- 1 Baking sheet or roasting pan
- 1 "Spider" Skimmer or Strainer
Ingredients
- 6-8 Chicken feet
- 6-8 Chicken necks Optionally, you could use 4-6 chicken backs in place of the necks or use a combination of necks and backs.
- 1 tbsp Apple cider vinegar Optionally, you could use lemon juice.
- 6 cups Vegetable scraps, including onion skins, carrot shavings, and the root of a celery stalk. If you do not have vegetable scraps, you can add one onion, a carrot, and a stalk of celery. You can add more vegetables if you want. Be sure to leave the skins on and rough chop your vegetables.
- 1-2 Bay leaves, optional
- 10 Whole black peppercorns
- Water
Instructions
- Place the chicken feet and necks on a baking sheet or in a roasting pan. Place the sheet or pan on the middle rack of a 425°F preheated oven.
- Roast feet and necks until they turn a golden brown. This can take approximately 30 minutes. If you want to accelerate this process, you can put the feet and necks under the oven broiler, but be sure to watch them closely.
- Once the feet and necks have browned nicely, remove them from the oven and transfer them into the liner of the Instant Pot.
- Deglaze the baking sheet or roasting pan with water and scrape up all the fond. (The "fond" are those browned bits that form on the baking sheet or roasting pan as the feet and necks browned.)
- Add the water from the deglazing to the Instant Pot liner.
- Add the vinegar and additional water to the Instant Pot liner to make sure that the feet and necks are covered with water. Don't worry if the feet float to the top of the water.
- Allow the feet and necks to soak for one hour. Make sure that the Instant Pot is NOT on.
- After one hour, add the vegetable scraps or vegetables to the Instant Pot liner. Add additional water to make sure that the vegetables are covered in water, but DO NOT use more water than you need. Use just enough water to cover the contents but no more. And never fill the Instant Pot liner beyond the pressure line. (See video.)
- Place the lid on the Instant Pot and lock it into place.
- Set the pressure knob on the lid of the Instant Pot to Sealing.
- On the control panel of the Instant Pot, choose the Pressure Cook setting.
- While still working with the control panel, set the temperature to low and the time to two hours. (See Video.)
- The Instant Pot will click on automatically and begin building up pressure.
- When the Instant Pot finishes simmering the bone broth, it will beep and switch over to a keep warm setting. At this point, you can manually release the pressure by moving the pressure knob from Sealing to Venting. BE CAREFUL. The pressure knob will release a forceful burst of steam. (Optionally, you can allow the Instant Pot to come down from pressure naturally.)
- Once the pressure has been released, unlock the lid. Again, be careful as additional steam may also rush forth from the Instant Pot.
- Remove the feet, necks, and vegetables from the Instant Pot.
- Carefully pour the broth into a tempered half-gallon or quart-sized jar.
- Fill additional tempered jars until all the broth has been removed from the Instant Pot liner.
- Any debris you were not able to remove from the broth will sink to the bottom of the jar, and the fat will rise to the top and congeal once refrigerated. This fat will create a "fat cap" in your container that will keep your bone broth fresh in the refrigerator for 2 weeks.
- If you remove the fat from your bone broth before refrigerating it, or if you break the fat cap, your bone broth will stay fresh in the refrigerator for one week.
- Using an appropriate freezer-proof container, you can freeze your bone broth for up to one year.
Video
Notes
Shop for items used in this blog post or video
Favorite Bone Broth Making Supplies
- 8-Quart Instant Pot
- Spider Strainer
- Flour Sack Towels
- Fat Separator (Clever kitchen device to help you decant bone broth)
Favorite Kitchen Supplies
- Favorite Aprons
- Whisk
- Silica Gel Packets (Helps keep moisture from building up in your mix)
- Cast Iron Dutch Oven
- 8-Quart Slow-Cooker
- pH Strips (Helps you check on the acidity of your vinegar)
Amazon Shop and Shopping Guide
- Visit Mary’s Nest Amazon Shop
- Visit my Shopping Guide page
Get up to 15% off for stocking your Traditional Foods Pantry and equipping your Modern Pioneer Kitchen, including discounts from US Wellness Meats, Farmhouse Teas, Backwoods Home, Masontops, Cultures for Health, Survival Garden Seeds, Redmond Real Salt, Mother Earth News, and More!
